Travel Trailer Collision Repair 2026: Navigating the Inland Empire Insurance and Restoration Process
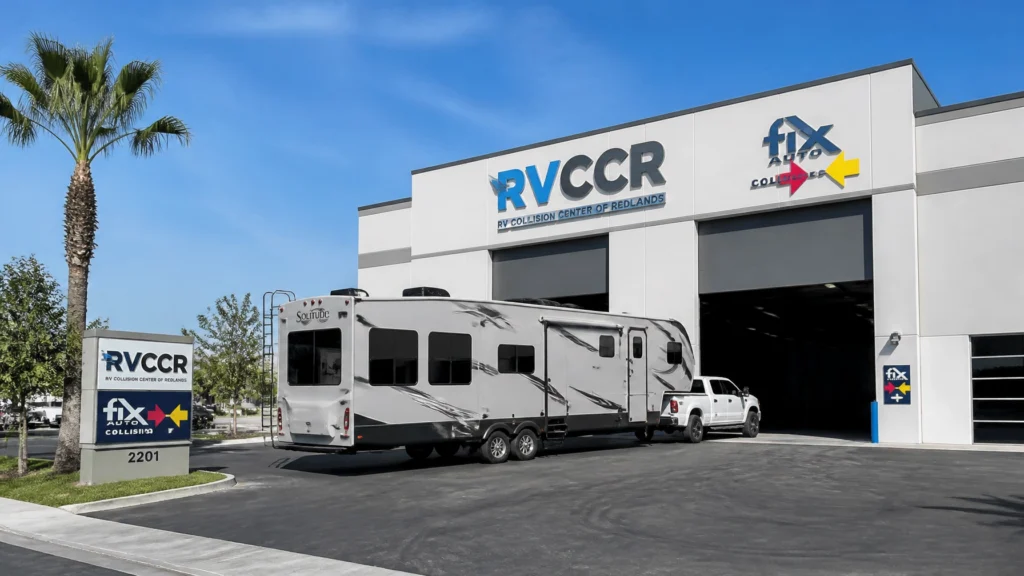
When you’re hauling your home-away-from-home through the Cajon Pass or winding toward Big Bear, the last thing on your mind is a structural failure or a side-swipe. But for travel trailer owners in the Inland Empire, the reality of the road sometimes includes high winds, tight parking spots, and the unpredictable traffic of the I-10 and I-215. As an RVDA-certified facility with over 21 years of experience in Redlands, RVCCR has seen how a single moment of distraction or a heavy gust of wind can turn a weekend getaway into a complex insurance and repair puzzle.
Travel trailer collision repair is fundamentally different from standard automotive bodywork. While a car is a unibody or chassis-based machine designed for passenger safety, a travel trailer is a delicate balance of a heavy-duty steel frame supporting a lightweight "living box." When these two distinct systems are compromised in an accident, the repair process requires a level of specialization that standard auto shops simply cannot provide. Dealing with the aftermath of an RV accident involves navigating separate insurance policies, understanding the limits of frame straightening, and ensuring that your trailer’s structural integrity is restored to factory specifications before you ever hitch up again…
The Structural Divide: Why Travel Trailers Aren't Just "Motorhomes Without Engines"
Many owners assume that motorhome collision repair and travel trailer repair are essentially the same service. In reality, the engineering couldn't be more different. A motorhome is built on an automotive chassis, think of it as a heavy-duty truck or bus frame that carries the engine, transmission, and steering. If a motorhome is involved in a front-end collision, the repairs involve mechanical components, cooling systems, and chassis rail alignment.
A travel trailer, however, relies on a dedicated steel trailer frame, typically a ladder or tube frame design. This frame is the backbone of the entire unit. It doesn't just hold the weight; it manages the physics of towing. When a travel trailer is hit, the force travels through the "house" (the walls and roof) and often ends up twisting or buckling the frame or the A-frame tongue.
The Vulnerability of the A-Frame and Tongue
The most critical part of your travel trailer is the A-frame tongue. This is where the trailer connects to your tow vehicle. In a "jack-knife" incident, where the trailer swings too far and strikes the tow vehicle, the tongue often bears the brunt of the impact. At RVCCR, we utilize precision measuring tools to check for even the slightest twist in the A-frame. A tongue that is out of alignment by even half an inch can cause dangerous towing instability, irregular tire wear, and increased stress on your hitch assembly.
Frame Rails and Crossmembers
Unlike the heavy-duty rails of a Class A diesel pusher, travel trailer frames are often optimized for weight. This makes them susceptible to "sagging" or "buckling" if the impact occurs near the axles or at the rear. Because these frames are usually painted or powder-coated steel, an accident can also crack welds that aren't immediately visible to the naked eye. Our certified technicians perform a "frame-out" inspection on every major collision job to ensure the foundation of your RV is sound.

The "Living Box": Laminated Walls vs. Hung-Wall Construction
When you're searching for rv paint and body shop services in the Inland Empire, you need to know exactly how your trailer was built. There are two primary types of sidewall construction in the travel trailer world, and each requires a completely different approach to collision repair.
1. Laminated Fiberglass Sidewalls
Most modern mid-to-high-end travel trailers use laminated construction. This is a "sandwich" of fiberglass skin, a thin layer of luan (wood), block foam insulation, and an internal aluminum or wood frame, all bonded together with high-pressure adhesives.
- The Repair Challenge: Laminated walls are incredibly strong but difficult to "patch." If a collision causes a large crack or a puncture, the structural integrity of the entire panel may be compromised. In many cases, the only way to perform a factory-quality restoration is to replace the entire sidewall panel.
- The Danger of Delamination: If a repair isn't sealed perfectly, water can seep between the layers. Over time, the adhesive fails, and the fiberglass "bubbles" or pulls away from the frame, a death sentence for an RV's resale value.
2. Hung-Wall Aluminum Construction
Older trailers or "stick-and-tin" models use a wood frame with aluminum "cladding" or siding hung on the outside.
- The Repair Challenge: While these are often easier to repair (you can replace individual "slats" of aluminum), the wood framing underneath is highly susceptible to splintering during a crash. A technician must strip back the metal to inspect every stud and joint to ensure the "box" won't collapse or shift during your next trip.
Regardless of the construction type, using oem parts for motorhome collision repair and travel trailer restoration is the only way to guarantee the unit meets original safety standards. Aftermarket panels or generic sealants often fail to provide the same UV protection or structural bond as factory-certified materials.
How Hitch Loads, Ball Mount Geometry, and Collision Forces Actually Travel Through a Trailer
A travel trailer crash rarely affects just the visible dented panel. The load path starts at the coupler, moves through the ball mount and hitch receiver, and then transfers into the trailer tongue, A-frame rails, crossmembers, suspension hangers, and wall structure. That matters because some of the most expensive damage is not where the scrape or impact first appears. It shows up where the force finally stops.
In a rear-end event involving the tow vehicle, the hitch receiver can shove the trailer coupler backward or downward with enough force to deform the ball coupler latch, stretch mounting holes, or tweak the tongue jack bracket. In a jackknife event, side-loading becomes the bigger issue. The coupler is designed primarily for fore-aft towing loads and vertical tongue weight, not a sharp lateral shock. Once that sideways load enters the A-frame, it can rack one frame rail more than the other. That is how a trailer can end up looking cosmetically repairable while still towing poorly afterward.
Ball mount drop or rise also affects how those loads transfer. If the trailer was being towed nose-high or nose-low before the collision, impact forces do not move through the frame evenly. A misleveled setup can increase stress on one axle, one spring pack, or one side of the tongue structure. Weight-distribution hardware adds another variable. Spring bars and brackets can mask or spread damage, so they also need inspection for deformation, loosened fasteners, or elongated attachment points after a crash.
This is one reason a qualified travel trailer repair near me search should lead you to a shop that understands more than fiberglass and paint. RVCCR inspects the coupler, safety-chain attachment points, breakaway switch mount, tongue jack area, propane tray mounts, and front frame geometry as part of the larger collision picture. If the trailer no longer tracks correctly behind the tow vehicle, the root cause is often in this hitch-force transfer path, not just in the visible body damage.
Insurance Nuances: The Separate Policy Headache for Towables
One of the biggest shocks for Inland Empire RV owners after an accident is how insurance claims are handled for travel trailers versus motorhomes. If you're driving a motorhome, you generally have one policy that covers the entire vehicle. If you're towing a travel trailer, you are likely dealing with two distinct insurance entities.
Liability vs. Physical Damage
In many cases, the liability portion of your tow vehicle’s insurance (the truck or SUV) extends to the trailer. This means if your trailer swings out and hits another car, your truck's insurance pays for their damage. However, your truck's insurance almost never covers the damage to your trailer.
For that, you need a separate RV or trailer policy. When you file a claim at a certified collision repair facility like RVCCR, we often have to coordinate with two different adjusters, one for the tow vehicle's rear-end damage and one for the trailer's front-end damage.
The Total Loss Threshold
Travel trailers have a much lower "Total Loss" threshold than motorhomes or cars. Because a travel trailer doesn't have an expensive engine or drivetrain, its value is tied entirely to the "house" and the frame. If a collision requires a full sidewall replacement or a frame swap, the cost of labor and specialized materials can quickly exceed 70% of the trailer’s actual cash value.
At RVCCR, we work closely with major insurance carriers to provide detailed, transparent estimates that account for every clip, seal, and structural member. We speak the language of adjusters, ensuring that "hidden" damage, like a twisted axle or a compromised roof seal, is documented early in the process.

The Critical Importance of Axle and Suspension Alignment
If you've hit a curb, a deep Inland Empire pothole, or been involved in a side-impact collision, your trailer's axles are likely out of alignment. Most travel trailers use "leaf spring" or "torsion" axles. Unlike your truck, these don't have sophisticated alignment adjustment points. If an axle is bent or a spring hanger is moved, it must be replaced or the frame must be corrected.
Signs of post-collision alignment issues include:
- The trailer "dog-tracking" (the trailer looks like it’s driving sideways behind you).
- Rapid or uneven tire wear on one side.
- Increased "sway" or instability at highway speeds.
- A persistent "pull" felt through the tow vehicle’s steering wheel.
Ignoring these symptoms doesn't just lead to a flat tire; it puts immense stress on the trailer frame and the tow vehicle's transmission. Our team includes certified mechanical techs who specialize in RV running gear, ensuring that your trailer tracks straight and true before it leaves our Redlands shop.
Repaired Axle or Replaced Axle? How the Decision Really Gets Made
Axle decisions after a collision are rarely based on one simple visual check. The shop has to determine whether the impact damaged only bolt-on components, moved the spring hangers, bent the axle tube, altered spindle geometry, or transferred force into the frame itself. On leaf-spring travel trailers, a curb strike or side impact may twist an axle enough to create tire wear without producing dramatic visible damage. On torsion-axle trailers, internal rubber suspension components can also be compromised even when the outer housing looks acceptable.
In practical terms, replacement is often the cleaner and more defensible path when the axle tube or spindle has been deformed. A repaired axle may appear less expensive at first, but if the trailer continues to dog-track, overheat tires, or wear suspension parts unevenly, the owner ends up paying in downtime and repeat work. Replacement also simplifies the documentation insurers want to see. If measurements show the running gear is out of specification, it is easier to justify a new axle assembly than to argue for a partial repair with uncertain long-term results.
That said, not every post-collision running-gear issue means full replacement. Sometimes the actual problem is a bent hanger, damaged equalizer, shifted U-bolts, cracked weld at a mounting point, or wheel damage that created false symptoms. Good diagnosis matters because replacing the wrong part does not solve the towability issue.
Here is a practical comparison owners can use during the estimate review:
| Decision factor | Repair existing components | Replace axle assembly |
|---|---|---|
| Typical best use case | Minor hanger/bracket correction, isolated hardware damage | Bent axle tube, spindle damage, severe misalignment, questionable structural integrity |
| Parts cost | Usually lower | Usually higher |
| Labor complexity | Can vary if measuring, disassembly, and re-welding are needed | Often more straightforward once damage is confirmed |
| Insurance documentation | May require more explanation and reinspection | Usually easier to support with measurements and photos |
| Long-term confidence | Depends heavily on exact damage and repair quality | Generally higher when major axle damage is present |
| Downtime risk | Higher if hidden issues remain | Lower if the correct assembly is installed and aligned |
A fair cost comparison for a travel trailer owner is this: a minor running-gear repair may stay in the lower four figures, while full axle replacement with related hardware, brake components, and labor can move substantially higher. But the right comparison is not just today's invoice. It is the total cost of safe towing, tire life, braking consistency, and not having to revisit the same problem two trips later.
Why a Dedicated RV Paint and Body Shop is Non-Negotiable
You might find a local auto body shop that claims they can "fix anything," but travel trailers present logistical challenges that a standard shop isn't equipped to handle.
The Paint Booth Problem
A standard automotive paint booth is roughly 20 to 24 feet long. A typical travel trailer or fifth wheel can range from 25 to 42 feet. Most auto shops are forced to paint RVs in an open-shop environment or in sections, leading to "overspray," dust contamination, and mismatched paint lines.
At RVCCR, we maintain oversized, specialized booths designed specifically for large-scale vehicles. This allows us to apply a factory-grade finish in a controlled environment. Whether your trailer has a simple white gelcoat or a complex full-body paint scheme with multiple clear coats, our painters have the equipment to match the original luster perfectly.
The Sealant and Roof Factor
Every time a travel trailer is involved in a collision, the "torque" or twisting of the body can break the delicate seals along the roofline and corners. If these aren't inspected and resealed using RV-specific Dicor or specialized membranes, your "repaired" trailer will start leaking within months. This is why we often recommend a comprehensive RV roof replacement or a high-level reseal as part of any major collision restoration.

A Real-World Insurance Supplement Example: How a $3,500 Estimate Becomes a $9,200 Repair
One of the biggest frustrations for trailer owners is seeing an insurance estimate that looks manageable at first, only to watch the approved repair total climb after teardown. That is not automatically a sign that anyone is padding the bill. It is often a sign that the initial field estimate captured only what was visible from the outside.
A typical example starts with an adjuster writing for obvious cosmetic damage: replace a fender skirt, repair lower metal skin, repaint one section, inspect the entry door, and check one wheel area. On paper, that could land around $3,500. The trailer comes into the shop, trim is removed, underbelly material is dropped, and interior access panels come out. That is when the hidden damage starts to appear.
Suppose teardown reveals a buckled wheel well structure, a shifted spring hanger, damaged brake wiring, torn underbelly barrier material, cracked sealant at the roof-to-sidewall transition, and insulation that got wet after the impact opened a seam. At that point, the repair is no longer a simple body-and-paint job. It now includes structural labor, suspension correction, resealing, diagnostic checks on the 7-way connection and brake circuit, and replacement of materials the first estimate never accounted for.
A worked example might look like this:
| Line item | Initial visible estimate | Supplement after teardown |
|---|---|---|
| Exterior panel and paint work | $2,100 | $2,100 |
| Fender skirt / trim / moldings | $450 | $700 |
| Wheel and tire inspection items | $250 | $450 |
| Hidden structural repair at wheel well | $0 | $1,650 |
| Spring hanger / running gear correction | $0 | $1,200 |
| Brake wiring and connector repair | $0 | $450 |
| Underbelly material and insulation replacement | $0 | $900 |
| Roofline and corner reseal work | $0 | $850 |
| Additional labor, calibration, and final testing | $700 | $900 |
| Total | $3,500 | $9,200 |
This is why good documentation matters. Photos, measurements, teardown notes, and clear insurer communication protect the owner and speed approval. At RVCCR, we build supplements around what the trailer actually needs once opened up, not what looked convenient from the parking-lot inspection.
Navigating the 2026 Repair Standards
As we move through 2026, RV manufacturing has become more high-tech. Modern trailers are incorporating more "smart" systems, solar arrays, and lightweight composite materials than ever before. This evolution means that the "old way" of patching a hole with some Bondo and a prayer is long gone.
Today’s repair standards involve:
- Computerized Color Matching: Ensuring that the "Aura White" or "Platinum Grey" on your 2024 trailer matches exactly, despite two years of California sun exposure.
- Ultrasonic Frame Testing: Using technology to find micro-fractures in aluminum frames that a visual inspection would miss.
- Integrated System Checks: Verifying that your slide-out motors, leveling jacks, and solar controllers weren't shorted out or jarred loose during the impact.
At RVCCR, our technicians stay current with RVDA (Recreational Vehicle Dealers Association) training and OEM certifications from major manufacturers like Ford (for tow vehicle integration) and various RV brands. We aren't just fixing a dent; we are restoring a complex piece of engineering.
California Brake and Safety-Chain Requirements After a Collision
After a trailer crash, cosmetic restoration is only part of the return-to-road question. Owners also need to think about legal compliance. In California, trailer brake and safety-chain systems are not optional details to gloss over because the paint looks finished. If impact damage affected the coupler, tongue, axle area, wiring, breakaway components, or chain attachment points, those items need to be inspected as safety systems, not accessories.
For many travel trailers, service brakes are required based on trailer weight, and a breakaway system is a major part of that conversation. If the trailer separates from the tow vehicle, the breakaway device is intended to activate the trailer brakes. After a collision, shops should inspect the breakaway switch, battery condition where applicable, cable routing, mounting integrity, and brake response. A breakaway cable that is kinked, frayed, poorly routed, or mounted to damaged tongue hardware is not something to ignore because the trailer still “pulls fine” around town.
Safety chains deserve the same level of attention. The chains themselves, the hooks, and especially the attachment points on the tongue can all be compromised in a jackknife or front-corner impact. If a chain tab is bent, rewelded poorly, or attached to deformed tongue material, it may not perform as intended in a second emergency. The crossed-chain setup and usable chain length also matter because they help control the tongue if the coupler disconnects.
Just as important, electrical testing should confirm that the trailer brake signal, running lights, turn signals, and emergency functions all work correctly through the 7-way connector after repairs. In short, a post-collision travel trailer should not leave the shop based only on how straight it looks. It should leave based on whether it tows, brakes, connects, and protects the driver the way it is supposed to.
Choosing a Repair Partner in the Inland Empire
Living in Redlands, San Bernardino, or Riverside means you have choices for repair work. However, the Inland Empire's unique climate, extreme heat, high winds, and mountain grades, demands a repair that can stand up to the elements. A "cheap" repair might look good in the driveway, but it won't hold up when you're climbing the Grapevine in 100-degree weather.
When choosing a shop for your travel trailer repair near me, ask three questions:
- Do you have an oversized paint booth? (If the answer is no, your paint quality will suffer.)
- Are you RVDA certified? (This ensures they understand the specific plumbing, electrical, and structural codes of an RV.)
- Do you offer a written lifetime warranty? (At RVCCR, we stand by our work for as long as you own the vehicle.)
Post-Repair Storage in Inland Empire Heat: What Owners Should Think About Before the Next Trip
A completed collision repair does not end the care cycle for a travel trailer, especially in Redlands and the wider Inland Empire. Summer heat, direct UV exposure, hot pavement, and long periods of storage can all affect how well recent repairs hold up. That does not mean a properly repaired trailer is fragile. It means the owner should be smart about the first few months after restoration.
Start with sealants and exterior surfaces. Roof edges, corner moldings, marker lights, and any newly repaired wall transitions should be kept clean and visually checked during the first storage cycle. Inland Empire heat can be brutal on neglected caulk lines and roof accessories, particularly if the trailer is stored outside without shade. A weekly glance is usually enough to catch a lifting edge, debris buildup, or an opening around a penetration before it turns into a water intrusion issue.
Tire and suspension loading also matter after a running-gear repair. If the trailer will sit for extended periods, maintaining proper tire pressure and parking on a stable, level surface helps protect tires, spring components, and alignment-related repairs. Owners should also be cautious about storing a nose-high or nose-low trailer for long stretches, because uneven load distribution can make diagnosis harder if a towability complaint shows up later.
Inside the unit, heat can stress adhesives, trim pieces, and laminated materials if ventilation is poor. That makes it worthwhile to manage interior temperature where possible and to inspect cabinets, wall joints, and repaired areas before and after storage. If the trailer was repaired after sidewall damage or resealed along the roofline, a simple owner check after the first hot month is a smart habit.
The bottom line is simple: post-repair storage is part of protecting the investment. A quality collision restoration gets your trailer back to the road. Smart storage helps keep it there, so when your next desert weekend, lake trip, or mountain run finally arrives, you can hitch up with confidence instead of starting another repair claim.
We understand that an accident is more than just a logistical headache; it’s a disruption to your lifestyle. You bought your travel trailer for the freedom of the open road, the weekend camping trips at Joshua Tree, and the family memories made at the beach. Our goal is to handle the stress of the insurance claim and the complexity of the repair so you can get back to what matters most.
From minor fiberglass scrapes and awning replacements to major frame realignments and full sidewall restorations, RVCCR is the Inland Empire's trusted authority for travel trailer collision repair. We combine the personal touch of a family-owned business with the technical prowess of a factory-certified center.
Stop by our facility in Redlands for a free estimate, or give us a call to discuss your insurance claim. Let’s get your home-away-from-home back in "adventure-ready" condition.
Drive safe, tow steady, and we’ll see you at the trailhead.
Need a repair estimate?
Skip the wait — send us a few photos and our team will get back to you fast.
Start a Photo Estimate →