Hail Damage on RV Roofs: Repair vs. Replacement Options for Inland Empire Owners
Title: Hail Damage on RV Roofs: Repair vs. Replacement Options for Inland Empire Owners
When a freak hail storm rolls through the Inland Empire: sweeping from the San Bernardino mountains down through Redlands and Yucaipa: it leaves more than just dented cars in its wake. For motorhome and travel trailer owners, a significant hail event represents a complex structural challenge that goes far beyond cosmetic aesthetics. At RVCCR, as a family-owned facility with 21 years of experience and RVDA-certified technicians, we have seen how a single 15-minute weather event can compromise the integrity of an RV’s most critical component: the roof.
The difficulty for owners in the Redlands area is that RV roofs are not monolithic. Depending on whether your unit is equipped with a Thermoplastic Polyolefin (TPO) membrane, a rigid fiberglass shell, or traditional aluminum panels, the physics of a hail impact: and the subsequent repair requirements: vary dramatically. What looks like a minor "scuff" from the ground can actually be a full-thickness puncture or a "bruised" substrate that will lead to catastrophic wood rot during the next winter rains.
Understanding the specific threshold between a simple patch and a full roof replacement requires a technical deep dive into material science, insurance claim logistics, and professional sealing standards. Because the safety and longevity of your "home on wheels" depend on an airtight envelope, the nuances of post-hail restoration are rarely as straightforward as they appear…
The Material Physics of Hail Impact: TPO vs. Fiberglass vs. Aluminum
Every roof material responds differently to the kinetic energy of falling ice. In the Inland Empire, where temperatures can swing from 40°F during a storm to 100°F the following afternoon, thermal expansion adds another layer of stress to hail-damaged surfaces.
TPO (Thermoplastic Polyolefin) Membranes
TPO is the most common roofing material on modern RVs due to its UV resistance and flexibility. However, it is a membrane, not a shell. When hail strikes a TPO roof, the impact is absorbed not just by the membrane, but by the luan (wood) substrate directly beneath it.
On a TPO roof, hail damage often manifests as a "star-burst" bruise. Even if the membrane doesn't visibly tear, the impact can compress the underlying wood or cause the adhesive bond between the TPO and the substrate to fail. Once that bond is broken, air pockets form. During high-speed travel on the I-10, these air pockets can expand, eventually leading to a "ballooning" effect that can rip the roof off entirely.
Fiberglass Roofs
Fiberglass is significantly more resilient to minor hail, but it is prone to "spider-cracking" in the gelcoat. These hairline fractures might seem cosmetic, but they are entry points for moisture. Over time, water seeps into these cracks and undergoes freeze-thaw cycles, or simply reacts with the fiberglass matting underneath, leading to delamination. A delaminated fiberglass roof loses its structural rigidity, making it dangerous to walk on and nearly impossible to seal effectively around vents and AC units.
Aluminum Panels
Aluminum was the gold standard for decades and is still found on many travel trailers and high-end motorhomes. Aluminum doesn't "bruise": it deforms. Hail creates thousands of tiny indentations known as "oil-canning." While these dents are often cosmetic, they create "low spots" where water can pool. Furthermore, the impact can stress the mechanical fasteners (screws and rivets) and the putty tape at the seams. If an aluminum panel is creased or punctured, it generally cannot be "filled" like an automotive body panel; it must be replaced to maintain its structural properties.

How to Spot Hidden Membrane Damage from the Ground
One of the most dangerous mistakes an RV owner can make after a hail storm is assuming the roof is "fine" because they don't see massive holes from the ground. At our rv paint and body shop, we perform multi-point inspections that reveal damage invisible to the naked eye at a distance.
The "Sponge" Test
During a professional inspection, a technician will walk the roof (if safe) to check for soft spots. Hail impacts can crush the internal structure of the roof's core: usually EPS foam or luan. If the roof feels "spongy" underfoot in specific spots where hail hit, the structural integrity of the substrate is gone. No amount of sealant can fix a crushed core.
Sealant "Lifting"
Hail doesn't just hit the flat surfaces; it hammers the components. AC shrouds, plumbing vents, and skylights are often made of thin plastics that shatter upon impact. More importantly, the vibration and shock of the storm can cause the lap sealant (the "caulk") at the front and rear caps to pull away from the roof material. Once that seal is broken, water will travel along the roofline and enter the front or rear walls of the RV, often showing up as dampness in the bedroom or cab area days or weeks later.
Identifying the "Ghost" Puncture
On TPO and EPDM roofs, a hailstone can create a microscopic puncture that "self-heals" or closes back up. To the eye, it looks like a small grey mark. However, under pressure: such as a heavy downpour or when the roof flexes during transit: that puncture opens up. We use high-intensity lighting and moisture meters to detect these "ghost" punctures before they cause mold growth inside your ceiling.
Professional Seal Restoration vs. Temporary Patches
When damage is localized, a repair may be possible. However, there is a massive difference between a DIY "peel-and-stick" patch and a professional seal restoration. In our experience with rv collision repair, we frequently see DIY repairs fail because the underlying chemistry of the roof was ignored.
TPO roofs require specific cleaners and primers to ensure that new sealant or patches bond at a molecular level. Using a standard silicone caulk from a local hardware store is a recipe for disaster; silicone does not adhere to TPO and will peel off within months. At RVCCR, we use manufacturer-approved solvents to strip away oxidized layers before applying commercial-grade lap sealants that are designed to withstand the 100-degree heat of the Inland Empire.
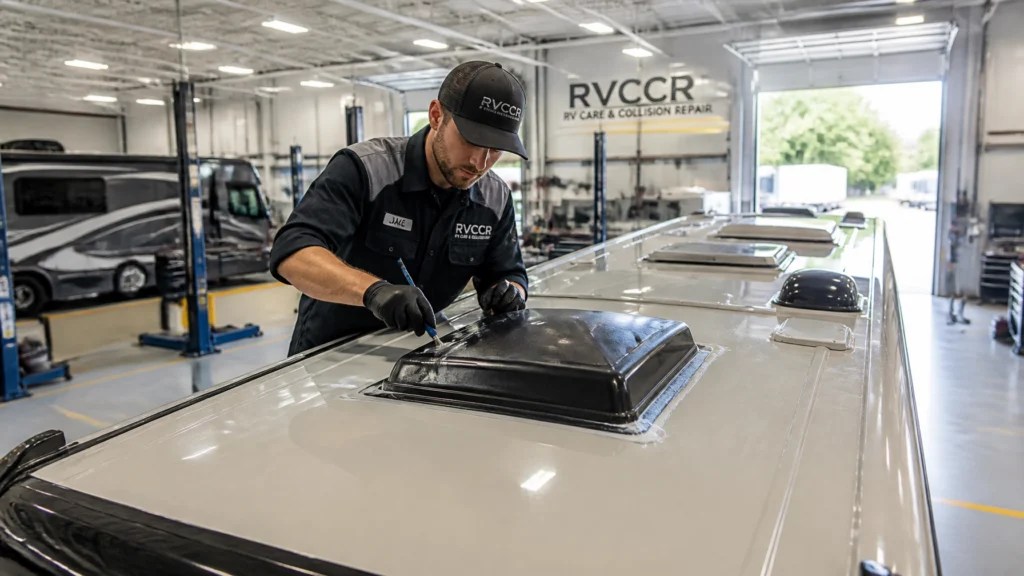
If the hail damage has affected the perimeter seals, we don't just "top off" the old sealant. We remove the failing material, inspect the transition joints for corrosion, and apply a fresh, contoured seal. This process is critical because hail punctures are often accompanied by "seal shock": where the physical impact of the storm has jarred the existing sealant loose from the metal or plastic moldings. For more on why the technical details of sealing matter, see our detailed breakdown on why rv roof replacement is often more reliable than patchwork for aging or heavily damaged units.

Navigating the Insurance Claim Process for Weather Events
Unlike a typical rv collision repair involving a moving vehicle, hail damage is typically covered under the "Comprehensive" portion of your insurance policy. This is an important distinction for Inland Empire residents.
Comprehensive vs. Collision
Comprehensive claims usually do not carry the same "at-fault" weight that collision claims do, meaning your premiums are less likely to skyrocket after a weather-related claim. However, insurance adjusters are trained to minimize the payout. They may look at a hail-damaged roof and suggest "spot repairs" when a full replacement is technically required for safety.
The Role of Documentation
When you bring your RV to RVCCR, we act as your advocate. We provide insurance carriers like State Farm, GEICO, Progressive, and USAA with high-definition photographic evidence and technical justifications for the necessary repairs. We document:
- Density of Impact: If there are more than 10-15 impacts per square foot, the structural integrity of the membrane is compromised beyond the point of reliable patching.
- Collateral Damage: We inspect the AC fins, solar panels, and awnings. Often, an adjuster will miss the fact that hail has flattened the cooling fins on your AC unit, which will lead to overheating and premature failure in the Redlands summer heat.
- OEM Standards: We insist on using OEM parts vs aftermarket materials. This is especially true for roof components and specialized sealants that must meet the manufacturer’s original specifications to maintain your warranty.
The "Hidden" Claim: Diminished Value
A hail-damaged RV that has been "patched" rather than restored to factory specs has a significantly lower resale value. We help ensure that the repair performed is of such quality that it is backed by our written lifetime warranty, protecting your investment and your future resale potential.
The Replacement Threshold: When is the Damage "Too Much"?
Determining whether to repair or replace an RV roof after hail is a matter of technical thresholds. At RVCCR, we follow a strict protocol to help owners make this decision.
The 3-Foot Rule
If hail damage is concentrated in a single area: for example, a branch fell during the storm or a specific section of the roof took the brunt of the impact: and the damaged area is less than 3 feet in any direction, a professional patch may be sufficient. However, if punctures or bruises are distributed across the entire length of the roof, the "patch" becomes a sieve. Every patch is a potential future failure point. When you have dozens of patches, the statistical likelihood of a leak increases exponentially.
The 30% Surface Area Rule
If more than 30% of the roof surface shows evidence of "bruising," delamination, or gelcoat cracking, the roof is functionally compromised. At this stage, the labor cost to individually prep and patch 50+ impact sites often exceeds the cost of a full roof replacement.
Material Age and "Service Life"
A TPO roof typically has a service life of 15-20 years. If your RV is 12 years old and suffers significant hail damage, patching it is a temporary fix for a material that is already nearing its end-of-life. In these cases, we almost always recommend a full replacement. This gives you a brand-new, factory-standard roof with a fresh 15-20 year lifespan, often covered largely by your insurance settlement.
Repair vs. Replace Decision Math: Material Costs and Labor Hours
Owners often hear that replacement is "more expensive," but the real decision is not patch versus replace in theory. It is patch count, labor stacking, material compatibility, and the remaining service life of the roof. Once multiple hail strikes are spread across a large surface, the math changes quickly.
TPO Patch Costs by the Spot
For a single 1-square-foot TPO patch, the material package is not just one piece of tape. A proper repair typically includes cleaner, primer, sealant, and in some cases EternaBond tape or another compatible patching product. Material cost for one properly repaired spot generally runs $200-$400. Labor usually falls in the 2-4 hour range because the technician has to clean the roof, prep the surface, inspect the substrate, complete the patch, seal transitions, and verify bond quality. That puts the realistic total at $400-$700 per spot.
This is where owners can underestimate the total. Five isolated patches at $400-$700 each can place the roof in a $2,000-$3,500 repair range before accounting for additional seal work, vent damage, or substrate replacement. If those five hits are spread across the full length of the roof, the leak risk also becomes distributed across the full structure.
Full TPO Roof Replacement on a 35-Foot Fifth Wheel
Replacing the entire TPO roof on a 35-foot fifth wheel usually involves $1,500-$3,000 in materials. That figure typically includes the membrane, adhesive, trim components, and sealants. Labor is the major factor. A correct replacement generally takes 40-60 hours because the process includes stripping the old roof, substrate preparation, installation of the new membrane, rolling, sealing, reinstalling accessories, and finishing details. In total, owners are usually looking at $4,000-$8,000.
That spread matters because there are meaningful differences between a roof that only needs membrane replacement and one that also has damaged decking, compromised vent flanges, or collateral hail damage to rooftop accessories. Still, the key point is straightforward: when a TPO roof has many impact points, full replacement can become economically rational faster than most owners expect.
Fiberglass Gelcoat Repair by Square Foot
Fiberglass roofs introduce a different cost profile. Gelcoat repair is labor intensive, especially when hail damage has created spider cracking, fractured surface layers, or localized delamination. Material cost per square foot commonly runs $100-$150 for resin, gelcoat, hardener, and sandpaper. Labor is often 3-5 hours per layer, depending on crack depth, cure time, sanding requirements, and whether the damage extends into deeper structure. The total typically comes out to $400-$800 per square foot depending on depth.
A few isolated cracks may still make sense to repair. But once multiple sections require layered structural correction and finish matching, the square-foot cost starts stacking quickly.
Full Fiberglass Roof Replacement
A full fiberglass roof replacement generally runs $2,000-$5,000 in materials and 60-80 hours in labor. That puts the usual total in the $8,000-$14,000 range. The reason labor is so high is that fiberglass replacement is not just a surface swap. The shop may need to remove rooftop accessories, address hidden water intrusion, rebuild affected substrate areas, fit replacement sections, complete finishing work, and restore sealing around every penetration.
This is why a fiberglass roof with widespread spider cracking can become a replacement candidate even when no single crack looks catastrophic from the ground. The labor required to restore many separate damaged zones often approaches full replacement labor without delivering the same long-term confidence.
Aluminum Panel Replacement by Panel
On aluminum roofs, hail damage is more about deformation and puncture than membrane separation. Replacing one aluminum roof panel usually costs $300-$800 in materials, including the panel itself, fasteners, and putty tape. Labor generally runs 4-8 hours per panel because adjoining trim, seams, and seal points often have to be disassembled and restored carefully. Total cost typically lands in the $700-$1,600 per panel range.
This means the decision can flip quickly on older travel trailers. Replacing two or three panels may still be reasonable. Replacing a large number of adjacent panels can approach the cost and complexity of rebuilding most of the roof assembly anyway.
Full Aluminum Roof Replacement
A full aluminum roof replacement generally requires $3,000-$6,000 in materials and 50-70 hours in labor, for a total of about $8,000-$13,000. The exact total depends on roof length, seam count, component removal, and whether hidden wood damage is uncovered during disassembly.
Why the Math Matters
For Inland Empire owners, the practical question is not whether one patch costs less than one replacement. Of course it does. The correct question is whether the total count of damaged areas, the age of the roof, and the labor needed to create many reliable repairs make replacement the better long-term decision. If a roof needs six to ten separate repairs, has bruised substrate, and is already well into its service life, replacement may protect the RV better and provide a clearer insurance claim path than repeated spot repairs.

Insurance Treatment of Hail Damage Roof Claims
For most RV owners, hail damage falls under comprehensive coverage rather than collision coverage. That distinction matters because the claim is typically handled as a weather event, and the deductible structure is usually different from what owners expect after a driving-related loss.
Comprehensive Coverage and Deductibles
Comprehensive coverage typically covers hail damage subject to a deductible. In many policies, that deductible is commonly $100-$1,000, although the exact amount depends on the policy the owner selected. Before authorizing major work, owners should confirm the deductible amount in writing and ask how it applies to roof-only losses.
Why the Initial Estimate is Only the Starting Point
The insurance adjuster usually writes an initial estimate based on visible damage. That first estimate is rarely the entire story on an RV roof claim. Hidden substrate crushing, moisture intrusion, lifted sealant, damaged vent flanges, and accessory damage are often not fully visible until the shop begins controlled teardown and closer inspection.
That is why the shop's teardown and documentation are critical to getting supplements approved for hidden damage. Without teardown photos, measurements, and itemized operations, the carrier may only pay for surface-level patching even when the roof structure says otherwise.
Why Carriers May Prefer Patching
Insurance companies may prefer patching over replacement because patching is cheaper on a per-claim basis. From the carrier's perspective, a handful of visible strikes can look like isolated repairs. From the shop's perspective, those same strikes may represent distributed damage across a membrane, crushed substrate under impact points, or a roof that is too old to support durable localized repair.
To support replacement, the shop must provide technical justification. That usually includes:
- impact density across the roof
- evidence of substrate damage
- evidence of puncture, bruising, or cracking
- material age and remaining service life
- documentation showing why many patches create long-term reliability concerns
Betterment Clauses and Roof Age
Many policies include a betterment clause. In practical terms, that means the insurer may reduce what it pays when the damaged component was already far through its expected service life. For example, if a roof is 12 years old and its expected life is 15 years, the insurance carrier may treat most of the roof as already depreciated and deduct a percentage from the replacement value. In the scenario you asked us to explain, the carrier may deduct 80% of the replacement cost, leaving the owner responsible for the remaining 20%.
That is a major reason to read the policy language early in the claim process. Owners are often surprised to learn that comprehensive coverage may still leave a meaningful out-of-pocket amount when the damaged roof is older.
Two Questions Every Owner Should Ask
Before moving forward with a major hail roof claim, the owner should ask the carrier:
- Is there a betterment clause in my policy?
- How does my deductible apply to a comprehensive roof claim?
Those two questions help frame the real financial picture before repair versus replacement decisions are finalized.
The Insurance Supplement Documentation Process
Supplements are where many RV roof claims are won or lost. The initial estimate handles obvious damage. The supplement process is how the shop shows the carrier what the storm actually did once hidden areas are exposed.
Step 1: Document All Visible Damage
The process starts with documenting all visible damage using photos and measurements. The shop records impact locations, punctures, cracks, lifted sealant, damaged accessories, and any signs of pooling or deformation. Wide shots establish the full roof condition. Close-up shots capture individual strikes and component damage.
Step 2: Perform a Controlled Teardown
Next comes a controlled teardown to expose hidden damage. This is not random disassembly. The goal is to remove only what is necessary to inspect substrate condition, membrane adhesion, seam integrity, and damage around penetrations such as vents, skylights, and air-conditioning units.
Step 3: Photograph Hidden Damage with Scale Reference
Once hidden damage is exposed, each affected area is photographed with a scale reference. That may be a ruler, tape measure, or another clear size indicator. This matters because the carrier needs evidence not only that damage exists, but also how extensive it is. A close-up of soft decking means much more when the size of the damaged zone is documented.
Step 4: Write the Supplement
After inspection, the shop writes a supplement listing each additional operation, each required part, and each added labor hour. The supplement should clearly separate original estimate items from newly discovered conditions. Examples may include substrate replacement, additional sealant operations, removal and reinstall of rooftop components, or membrane replacement that became necessary after teardown.
Step 5: Submit the Supplement to the Carrier
The shop then submits the supplement to the insurance carrier with the supporting photo evidence. Clear documentation reduces back-and-forth and gives the adjuster a technical basis to revise the original estimate.
Step 6: Carrier Review
The carrier reviews the supplement and generally does one of three things: approves, questions, or denies each line item. Approval may be immediate on some items and delayed on others. Questioned items usually trigger requests for additional photos, clarification, or explanation of why repair is not sufficient.
Step 7: Respond to Denials with Technical Justification
If a line item is denied, the shop provides technical justification. That may include OEM specifications, material science information, installation requirements, or safety-related reasoning. For example, a shop may show that a damaged substrate cannot support a durable patch, or that a replacement membrane requires complete removal of specific rooftop accessories to maintain seal integrity.
Step 8: Approval, Parts Ordering, and Scheduling
If the supplement is approved, the shop orders parts and schedules the repair. If specialized roof materials or brand-specific components are involved, this step can affect overall cycle time.
Expect More Than One Cycle
This process can take 1-3 weeks per supplement cycle. On a large RV roof claim, there can be more than one cycle if additional hidden damage is discovered after deeper disassembly. That timeline is one reason owners should not assume that a slow-moving claim means nothing is happening. In many cases, the delay comes from inspection, documentation, carrier review, and approval steps that are necessary to secure the correct repair scope.
Technical Specifications for a Proper Roof Replacement
If your RV meets the replacement threshold, the process must be handled with precision. This is not a simple "overlay." A proper replacement at our Redlands facility involves:
- Total Stripping: We remove all accessories (AC, vents, ladders, solar) and strip the old membrane or metal panels down to the wood or aluminum rafters.
- Substrate Inspection: We replace any water-damaged or crushed luan. This is the only way to ensure the new roof has a flat, solid foundation.
- Adhesive Engineering: We use high-temperature contact adhesives specifically formulated for the Inland Empire's climate. Generic adhesives can "outgas" in the heat, creating bubbles under your new roof.
- Vacuum Sealing and Rolling: The new membrane is applied and rolled with heavy weighted rollers to eliminate air pockets and ensure a 100% bond.
- Component Upgrades: While the roof is off, it is the ideal time to replace aged plumbing vents or upgrade to higher-quality skylights that are more impact-resistant for the next storm.
Why RVDA Certification Matters for Your Hail Claim
RVDA (Recreational Vehicle Dealers Association) certification is the gold standard in our industry. It means our technicians have undergone rigorous training specifically on the systems and structures of motorhomes and trailers. Unlike a standard auto body shop that might "dabble" in RV repair, our team understands the unique cabinetry, electrical routing, and weight distribution of your unit.
When we handle a hail claim, our RVDA-certified staff ensures that the repair doesn't just look good: it functions correctly. For instance, we know how to properly torque the mounting bolts on your AC unit after a roof replacement to ensure the gasket compresses correctly without crushing the new roof material. These are the small details that prevent major leaks 5,000 miles down the road.
Moving Forward After the Storm
Dealing with hail damage is undeniably stressful. Your RV represents both a significant financial investment and a gateway to your next adventure, whether that’s a weekend at Big Bear or a cross-country trek. Seeing that investment pockmarked by ice can be disheartening.
However, a hail storm is also an opportunity to reset the "clock" on your RV’s lifespan. By choosing a certified, family-owned shop that prioritizes OEM standards and structural integrity, you ensure that your restoration is permanent. Our team at RVCCR is here to handle the logistics, from the initial free estimate to the final insurance walkthrough.
Drive into our Redlands facility or contact us today to schedule your professional roof inspection. We will provide a transparent, technical assessment of your unit’s condition and a clear path toward getting you back on the road. Let us handle the complexity of the repair so you can focus on the freedom of your next destination.
Experience the difference of a certified, lifetime-warrantied restoration. We restore your peace of mind by restoring your RV to factory specifications, ensuring that the only thing you have to worry about is where the map takes you next.
Need a repair estimate?
Skip the wait — send us a few photos and our team will get back to you fast.
Start a Photo Estimate →