ADAS Recalibration After an EV Collision: Why Your Tesla, Rivian, or EV Needs More Than Just Body Work
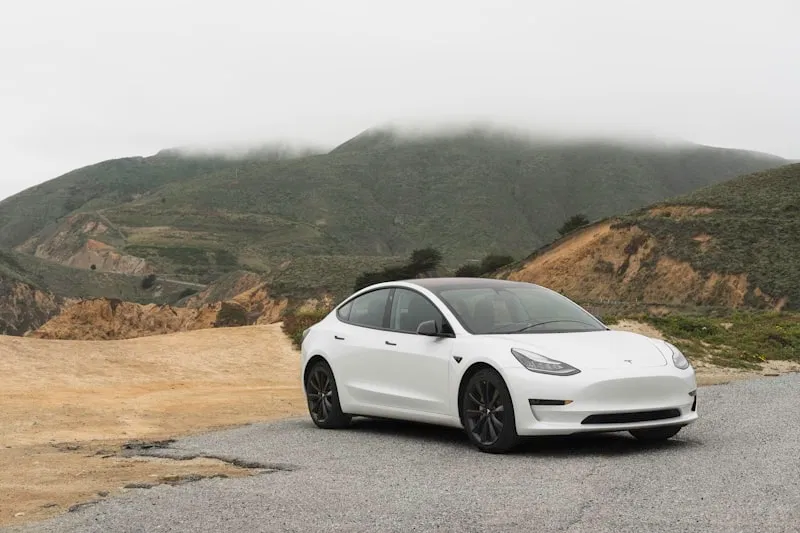
Advanced Driver Assistance Systems (ADAS) have transformed from luxury add-ons to the foundational safety architecture of modern electric vehicles. At RVCCR, our status as a Tesla-certified collision center and a Rivian-certified repair facility means we operate at the intersection of structural restoration and high-frequency digital calibration. When a Tesla Model 3 or a Rivian R1S is involved in even a minor collision in the Inland Empire, the repair process is no longer defined solely by metal, paint, and plastic. Instead, it is a complex recovery of the vehicle’s "nervous system": the array of cameras, radar units, and ultrasonic sensors that govern Autopilot, Full Self-Driving (FSD), and Driver+ features.
The complexity of these repairs is often underestimated by owners and traditional repair shops alike. A vehicle may emerge from a paint booth looking pristine, yet remain functionally compromised if its sensors are misaligned by even a fraction of a degree. In the world of high-precision EVs, a one-millimeter shift in a camera’s focal point can translate to a thirty-foot error in object detection at highway speeds. This reality dictates a rigid, multi-stage recalibration protocol that must be followed to restore a vehicle to its original factory safety specifications…
The Invisible Architecture of EV Safety
To understand why recalibration is non-negotiable, one must first understand the hardware. Modern EVs utilize a suite of sensors that work in concert to create a 360-degree digital map of the vehicle's surroundings.
- Cameras (Optical Sensors): These are the primary "eyes" for Tesla and Rivian. They detect lane lines, read speed limit signs, and identify traffic lights. In a Tesla, the front-facing "Triple Cam" unit behind the rearview mirror is critical for emergency braking and adaptive cruise control.
- Radar (Radio Detection and Ranging): While Tesla has transitioned toward a "Vision Only" approach for many newer models, many EVs still rely on front-mounted radar to detect the distance and velocity of vehicles ahead, especially in low-visibility conditions like heavy rain or fog.
- Ultrasonic Sensors: These are short-range sensors typically located in the front and rear bumpers. They are the primary tools for park assist and detecting obstacles in the vehicle's immediate blind spots.
- LiDAR (Light Detection and Ranging): While not present on Teslas, some high-end EV competitors utilize LiDAR to create high-resolution 3D maps of the environment using laser pulses.
When a collision occurs, the force of the impact: or even the process of removing a bumper cover to inspect for damage: can disturb these components. This is why searching for an ev repair shop near me that understands the electronic nuances of these vehicles is just as important as finding one that can match a paint code.
The Diagnostic Mandate: Pre-Repair vs. Post-Repair Scans
At RVCCR, the recalibration process begins long before the first wrench touches a bolt. Every certified auto collision repair must start with a Pre-Repair Diagnostic Scan.
The Pre-Repair Scan
This is a digital health check of the vehicle’s entire electronic ecosystem. We connect the vehicle to the manufacturer’s proprietary diagnostic software: such as Tesla Toolbox or Rivian’s service portal: to identify "latent" damage. Modern EVs are designed to "self-diagnose," but many fault codes related to ADAS sensors do not trigger a dashboard warning light immediately. A pre-scan allows us to identify sensors that were shaken loose or electrically compromised by the impact, ensuring they are included in the initial insurance estimate.
The Post-Repair Scan
After the structural and cosmetic work is complete, a Post-Repair Diagnostic Scan is performed. This scan confirms that all replaced components are communicating correctly with the vehicle's Central Computing Unit (CCU). More importantly, it clears any "soft" codes triggered during the repair process (such as when a camera is disconnected for a windshield replacement) and prepares the vehicle for the final, most critical step: Recalibration.

Static vs. Dynamic Calibration: The Technical Divide
Depending on the manufacturer and the specific sensors affected, recalibration typically falls into two categories: Static and Dynamic. A certified auto collision repair often requires both to ensure redundant safety systems are fully operational.
Static Calibration: The Controlled Environment
Static calibration takes place inside the repair facility. It requires a highly controlled environment: a perfectly level floor, specific lighting conditions, and the absence of reflective surfaces that could confuse the sensors.
Technicians use Calibration Targets: large boards with specific geometric patterns: that are placed at exact distances and angles from the vehicle. The vehicle’s onboard computer "looks" at these targets through its cameras or radar and adjusts its internal software to account for any physical misalignment.
For Rivian owners, static calibration is often required after a windshield replacement or any front-end structural work. The process ensures that the Driver+ system knows exactly where the vehicle’s centerline is relative to the horizon.
Dynamic Calibration: The Real-World Test
Dynamic calibration involves driving the vehicle on the road under specific conditions. For Tesla vehicles, camera calibration is primarily dynamic. After a repair, the technician (or the owner) must drive the car on well-marked roads at speeds typically above 40 mph.
During this drive, the Tesla's computer identifies lane markings, stationary objects, and other vehicles to "self-calibrate." It is a learning process where the car's software calculates the pitch, yaw, and roll of each camera lens. However, if the physical mounting bracket is bent: even by a fraction of a millimeter: the software may eventually "time out" or fail to calibrate, indicating that the oem parts vs aftermarket or the structural repair itself was not executed to factory standards.
Why "No Error Codes" Is Not Sufficient
A common misconception among vehicle owners: and some uncertified shops: is that if the dashboard is clear of warning lights, the car is "safe." In the context of ADAS, this is a dangerous assumption.
ADAS sensors are programmed with "tolerance windows." If a radar sensor is misaligned by 2 degrees, it may not trigger a system failure light. However, that 2-degree error means the radar is now looking into the adjacent lane rather than the lane directly ahead. On the freeway, your Tesla might "see" a truck in the right lane and interpret it as an obstacle in your path, leading to a "phantom braking" event. Conversely, it might fail to see a vehicle stopped directly in front of you until it is too late for the automatic emergency braking to intervene.
True safety requires verification through documentation. At RVCCR, we provide our customers with calibration printouts and scan reports that prove the sensors are not just "on," but are accurate to within the manufacturer’s specified tolerances.

Tesla-Specific Recalibration Requirements
As a Tesla-certified collision center, we follow the Tesla Service Manual to the letter. Tesla’s "Vision" system relies heavily on the 8 cameras surrounding the vehicle.
- Windshield Replacement: Any time a Tesla windshield is replaced, the front-facing camera housing is disturbed. This requires a "Clear Camera Calibration" command via Service Mode, followed by a dynamic drive cycle.
- Radar Alignment: For older Teslas equipped with radar, if the front bumper or structural rail was impacted, the radar unit must be checked for physical "plumb" and "level" before the software calibration is initiated.
- The "Thrust Angle" Connection: ADAS calibration is only as good as the vehicle’s wheel alignment. If the rear wheels are not tracking perfectly behind the front wheels (the "thrust angle"), the car is essentially "crabbing" down the road. Cameras will struggle to calibrate because the car’s physical direction of travel doesn't match where the steering wheel is pointing. We perform a four-wheel alignment as a prerequisite to every ADAS calibration.
Rivian-Specific Recalibration: Driver+ and Beyond
Rivian’s ADAS suite, known as Driver+, utilizes a combination of 11 cameras, 5 radars, and 12 ultrasonic sensors. Because Rivian vehicles are designed for both highway and off-road use, their sensors are subject to rigorous environmental stresses.
- Rivian Gen 2 Self-Calibration: Newer Rivian models feature advanced self-calibration algorithms that run continuously. However, Rivian’s official position statements clarify that service-based calibration using OEM tools is still required after any collision repair or suspension modification.
- Surround View Camera Alignment: When a side mirror or a bumper is replaced on an R1T or R1S, the "Bird’s Eye View" camera system must be stitched back together. This is a static calibration process using floor-mounted mats with specific markers, allowing the computer to merge the images from four different cameras into one seamless overhead view.
Sensor-by-Sensor Recalibration: What Each System Needs
Once the damaged panels are removed and the obvious structural work is mapped out, the next question is not simply whether the vehicle has ADAS. The real question is which sensor was affected, how it was affected, and what the OEM requires before the vehicle can be considered restored. Different sensors do different jobs, and they do not share one universal reset procedure. That is why certified EV repair involves a sensor-by-sensor plan rather than a generic "scan and clear" approach…
Forward-Facing Camera: Tesla Triple Cam Behind the Windshield
On many Tesla models, the forward-facing camera assembly mounted behind the windshield is the main visual input for lane keeping, adaptive cruise behavior, traffic control recognition, and forward object tracking. Because that camera package looks through the glass and references the vehicle’s centerline, even small changes matter. A windshield replacement, roof rail impact, mirror strike, front suspension disturbance, or body structure movement can all change the camera’s effective angle.
For the standard post-repair procedure, the vehicle typically requires a dynamic calibration drive on well-marked roads at 40+ mph for roughly 10 to 15 minutes. During that drive, the system identifies lane lines, road edges, and surrounding traffic and uses those references to learn the camera’s actual orientation. This is why the road matters. Faded striping, low speeds, stop-and-go congestion, or poor weather can delay or interrupt the process.
If the camera bracket itself has been replaced, the procedure becomes more demanding. In that situation, a static calibration using target boards is required first so the camera starts from a known physical reference before the dynamic learning drive begins. If a shop skips that first step after bracket replacement, the system may complete a drive cycle without actually matching the true geometry of the vehicle.
Forward Radar: Bosch or Continental Units on Rivian and Older Teslas
Some EV platforms, including certain older Teslas and Rivian configurations, use a forward radar unit to measure distance and relative speed ahead. Radar calibration is less forgiving than many owners realize because radio waves can be distorted by poor mounting angle, ride height changes, reflective clutter, or improper target placement.
The usual repair requirement is a static calibration with a corner reflector positioned at the exact distance and exact height specified by the OEM procedure. The vehicle must sit on a level surface, and the ride height must be within specification before the calibration starts. If suspension damage remains, if tire pressures are wrong, or if the alignment is incomplete, the radar reference will be off before the first command is entered.
The environment also matters. There should be no metal objects within the radar’s field of view that could reflect the signal and corrupt the setup. Toolboxes, lifts, body panels, and nearby vehicles can all interfere if the bay is not staged correctly. This is one reason radar calibration belongs in a controlled space and not in a rushed corner of a general mechanical shop.
Side Repeater Cameras: Fender- or Mirror-Mounted Units
Side repeater cameras on EVs help support lane-change visualization, blind-area awareness, and surround-view processing. These cameras are commonly mounted in fenders or mirrors, which also happen to be common impact and replacement areas in side-swipe collisions, parking lot incidents, and mirror strikes.
After any replacement, these cameras generally require dynamic calibration. The vehicle learns the camera’s actual position relative to the vehicle centerline during normal driving. In practical terms, that means the software compares what the camera sees against the motion of the car over time and confirms whether the image geometry makes sense relative to steering, wheel speed, and yaw data.
This is important because a side repeater camera can appear physically straight to the eye while still being rotated enough to distort blind-area interpretation or stitched surround-view images. If a mirror housing is replaced with a damaged mounting base, or if a fender attachment point is slightly shifted, the camera may still power up without a visible fault while producing unreliable positioning data.
Ultrasonic Sensors: Bumper-Mounted Proximity Sensors
Ultrasonic sensors in the front and rear bumpers handle close-range detection for parking assistance and obstacle alerts. Unlike camera and radar systems, they generally do not require a software calibration routine after service. What they do require is a functional test.
Each sensor must detect objects at the correct distance and respond consistently across the bumper array. If one sensor is recessed too far, tilted in the bracket, painted incorrectly, or physically cracked at the face, its sound-wave return pattern can be compromised. In that case, software will not fix the problem. The failed component or bracket has to be replaced.
This distinction matters in estimating and quality control. A shop should not bill ultrasonic "calibration" the same way it bills a camera or radar calibration if the OEM procedure only calls for inspection and function verification. At the same time, a quick dashboard check is not enough. Each sensor still has to be tested to confirm it detects objects at the correct range after bumper repair or replacement.
LiDAR: Specialized Static Calibration on Equipped Non-Tesla EVs
LiDAR is not part of Tesla’s current production sensor strategy, but some non-Tesla EV platforms use it to build a precise 3D model of the vehicle’s surroundings. Because LiDAR maps space using laser pulses, its mounting accuracy is critical. Minor deviations can shift the system’s interpretation of lane edges, object positions, and free space.
If a non-Tesla EV is equipped with LiDAR and the relevant body area or mounting structure is disturbed, the system generally requires a precise static calibration using a 3D target array. This is a much more specialized process than a camera drive cycle. It often requires dedicated OEM instructions, model-specific target geometry, and a controlled bay setup that many general body shops do not maintain.
In practice, this procedure is frequently performed by the OEM’s mobile service team or a specialized EV shop with the approved hardware and software. That does not make the step optional. It simply means the repair plan must account for who is authorized and equipped to complete it.
The Equipment Required for Proper ADAS Calibration
ADAS calibration is often described as software work, but the reality is more physical than many people expect. The software matters, but it only works when the vehicle, the floor, the targets, the tools, and the environment all match the procedure. If one variable is wrong, the calibration can fail outright or, worse, appear to complete while embedding bad reference data into the system.
A Level Floor
A proper calibration starts with the surface under the vehicle. The calibration area must be within 1 degree of level in all directions, and that is verified with a digital inclinometer rather than guesswork. If the floor pitches too far forward, backward, or side to side, the target relationship changes and the sensor learns from a false reference.
This is one of the biggest differences between a certified calibration environment and a typical open service bay. The floor is not just a convenience. It is part of the measuring system. When a camera is interpreting the horizon or a radar is checking its horizontal aim, the slope of the floor directly affects the result.
Calibration Targets
Most static procedures require large target boards with specific geometric patterns. These are not generic posters. They are manufacturer-specific visual references designed so the camera or radar can identify exact dimensions and alignment markers.
Depending on the manufacturer, these targets often cost $1,000 to $5,000 each. Tesla uses target patterns that differ from Honda or Subaru targets, and those differ again from other OEM systems. That means a shop cannot reliably substitute one target kit for another and still claim an OEM-correct process. Using the wrong target can lead to an invalid calibration even if the setup looks professional from a distance.
Target Placement Tools
The targets are only useful if they are placed exactly where the OEM procedure requires. That is why technicians use laser levels, measuring tapes, and mounting stands to set the target at the correct distance, height, and centerline position relative to the vehicle.
A difference of a few millimeters can matter. Placement usually begins with confirming the vehicle’s thrust line and center point, then measuring outward and forward according to the service information. Laser tools help verify that the board is square to the vehicle. Adjustable stands help set the proper height. Measuring tapes confirm the final placement. This is detail work, not rough carpentry.
OEM Diagnostic Software
Once the physical setup is correct, the technician still needs the right software to command the calibration, read system status, and save the result. For Tesla, that means access to Tesla Toolbox, which typically requires a subscription that can range from about $2,000 to $5,000 per year depending on access level and use case. Rivian uses its own service portal and OEM procedures, and other EV manufacturers require their own authorized software ecosystems.
This is another area where "we can scan it" is not the same as "we can calibrate it correctly." Generic scan access may read fault codes, but many calibration procedures require OEM-level workflow prompts, live measurements, and completion records that only the manufacturer’s platform provides.
A Pre- and Post-Repair Scan Tool
In addition to OEM software, the shop needs a scan tool capable of pre- and post-repair diagnostics. The pre-repair scan identifies collision-related faults, communication issues, and sensor status before disassembly. The post-repair scan confirms that the modules are online, fault memory is reviewed, and the vehicle is ready for calibration or final delivery.
This documentation matters for both quality control and insurance support. Without recorded scans before and after the repair, it becomes harder to prove when a fault occurred, whether it was addressed, and whether the repaired vehicle was electronically verified before release.
A Suitable Dynamic Calibration Route
For systems that learn through driving, the equipment list extends beyond the building. The shop needs a verified road route that is clear, well-marked, and safe for the procedure. Dynamic calibration is not simply "drive it around for a while." The route has to support the OEM conditions, including visible lane markings, legal operating speeds, and traffic conditions that allow the system to gather clean reference data.
That requirement can affect scheduling. A rainy afternoon, heavy Inland Empire traffic, active construction zones, or poorly marked roads can all delay a valid calibration drive. A certified shop plans for that reality instead of pretending every vehicle can be recalibrated instantly after paint.
Why Post-Collision Recalibration Is Not Optional
There is still a misconception in the market that ADAS calibration is an upsell or an advanced extra reserved for luxury vehicles. That view is out of step with both OEM repair requirements and modern collision liability. When sensor mounting points, alignment geometry, or ride height are affected, recalibration is part of restoring the vehicle. It is not an elective add-on.
OEM Position Statements Make It Clear
Tesla and Rivian position statements expressly require calibration after repairs that affect sensor mounting locations, wheel alignment, or ride height. That language matters because those are common collision variables. A bumper reinforcement replacement, a windshield replacement, a front rail repair, a suspension hit, or an alignment correction can all change the relationship between the sensor and the road.
In other words, the vehicle does not need a dramatic major-loss collision to trigger calibration requirements. The threshold is whether the impact or the repair changed the reference point the sensor depends on.
California Repair Expectations and I-CAR Standards
In California, collision repairs are expected to restore the vehicle to its pre-accident condition, and accepted I-CAR repair standards reinforce that ADAS functionality has to be considered as part of a complete repair process. For a modern EV, "pre-accident condition" does not stop at paint match and panel gap. It includes the safety technology the owner relied on before the loss.
That principle is straightforward. If automatic emergency braking, lane-keeping support, blind-spot visualization, or parking detection functioned before the accident, those features must be properly restored after the repair.
Skipping Calibration Shifts Liability to the Shop
A shop that knowingly skips a required calibration is not saving the customer money in any meaningful long-term sense. It is accepting liability for the future performance of a system it chose not to verify. If the vehicle later fails to brake, tracks the wrong lane, or generates unsafe ADAS behavior tied to repair-related misalignment, the decision to release it without calibration becomes a central issue.
That is why reputable shops document calibrations instead of treating them as optional line items. Documentation shows the vehicle was returned with the required electronic validation, not just cosmetic completion.
Owner Declination Does Not Erase the Risk
If an owner declines a required calibration and is later involved in an accident where ADAS could have reduced or mitigated the damage, the legal exposure can widen. Depending on the facts, the owner and the shop may share liability if the shop delivered the vehicle without completing an OEM-required step or without clearly documenting the consequences of refusal.
This is another reason certified facilities spend time explaining the issue instead of reducing it to a single fee on the estimate. Owners deserve to understand that calibration is tied to safety performance, not convenience.
Insurance Carriers Increasingly Want Proof
Insurance companies are also changing their expectations. Carriers are increasingly asking for documentation of ADAS calibration in the claim file, especially on late-model vehicles with known camera, radar, and driver-assist systems. The reason is simple: the industry recognizes that scanning and calibration are now standard components of many collision repairs.
That does not mean every estimate is approved without questions. It does mean that a documented OEM-required calibration is easier to defend than a repair file that says nothing about the vehicle’s safety systems after impact.
The Cost of Skipping ADAS Calibration
The expense of a proper calibration can look frustrating when a collision already involves towing, deductible costs, rental delays, and parts lead times. But the cost of skipping the process is usually far higher, and not only in the obvious safety sense. The financial consequences can follow the owner long after the vehicle leaves the body shop.
Misaligned Autopilot Can Create a Second Collision
If a Tesla’s Autopilot-related visual system is misaligned, one possible outcome is phantom braking, where the car reacts to a perceived hazard that is not actually in its path. A sudden braking event at highway speed can trigger a rear-end collision from the vehicle behind.
That second loss creates a difficult insurance question. If the first repair was incomplete or improper, the owner may face disputes over whether the follow-up crash involved an improperly repaired vehicle. Coverage decisions depend on policy terms and claim facts, but the financial risk is real enough that no owner should dismiss calibration as a minor technicality.
Trade-In Value Can Drop
If the owner later trades in the vehicle, a dealer inspection or scan may reveal that ADAS systems were not properly calibrated after the last repair event. In practical terms, that can reduce confidence in the vehicle history and drive down the offer.
A realistic consequence is a $1,000 to $3,000 reduction in trade-in value, particularly if the scan history, repair documentation, or system status raises questions that the next buyer or dealer will have to solve. Even when the vehicle looks clean cosmetically, unresolved ADAS concerns make it more expensive to recondition and harder to resell.
Warranty Work Can Be Affected
A Tesla service center can refuse warranty work on a vehicle that shows evidence of non-certified repairs or missing calibration documentation tied to prior collision work. That does not mean every warranty concern will be denied automatically, but it does mean prior repair quality can become relevant.
From the owner’s perspective, this is another hidden cost. Saving a few hundred dollars by skipping a required calibration can create bigger service complications later if the manufacturer sees incomplete repair history or unresolved safety-system questions.
The Math Usually Favors Doing It Right
For many repairs, the cost of calibration falls in the range of about $300 to $800, depending on the vehicle, the number of systems involved, whether static and dynamic procedures are both required, and whether sublet OEM support is needed. That number is not trivial, but it is still far lower than the cost of a single ADAS-related collision, diminished value dispute, or repeat repair visit.
In other words, calibration is not where a modern EV owner saves money. It is where the owner protects the value, safety, and insurability of the vehicle after the first accident.
How to Read Your Repair Estimate: Red Flags to Watch For
When you receive an estimate for EV collision repair, you should look for specific line items related to ADAS. If these are missing, the shop may be cutting corners on your safety.
- Pre-Repair Diagnostic Scan: (Labor or sublet charge).
- Post-Repair Diagnostic Scan: (Essential for verifying the electronic "handshake" of all modules).
- ADAS Recalibration (Static and/or Dynamic): This should be listed as a specific labor operation, often with an associated fee for the use of the OEM software (Tesla Toolbox or Rivian Service).
- Four-Wheel Alignment: As discussed, this is the physical foundation of electronic calibration.
- OEM Parts Only: Aftermarket bumper covers or windshields often lack the clarity or the precise mounting tabs required for ADAS sensors to function correctly. A tesla certified collision center will always prioritize OEM components.

The Documentation Owners Should Demand
Insurance companies often push for the fastest and cheapest repair possible. However, the owner is the final authority on the safety of their vehicle. When you pick up your EV from RVCCR, or any reputable shop, you should demand a Calibration Completion Report. This document should include:
- The date and time the calibration was performed.
- The software version used during the procedure.
- A "Pass" confirmation for every sensor system (Forward Collision Warning, Lane Departure Warning, Blind Spot Monitoring, etc.).
- Proof of the dynamic drive cycle results, including the distance driven to achieve successful calibration.
Navigating the Insurance Claim Process for ADAS
Insurance adjusters may sometimes question the necessity of a $500 calibration fee for a "minor" bumper scratch. At RVCCR, we handle the heavy lifting of insurance coordination. We provide the carrier with the manufacturer’s position statements: official documents from Tesla or Rivian that mandate calibration for specific repair types.
By grounding our estimates in manufacturer requirements, we ensure that your insurance claim covers the full cost of restoration, including the essential electronic verification that keeps your family safe on the road.
Precision Restored, Adventure Resumed
The transition to electric vehicles has changed the landscape of collision repair forever. We are no longer just fixing cars; we are recalibrating the sophisticated computers that guide your daily commute and your weekend adventures. Whether you are navigating the traffic of the Inland Empire or heading out for a long-distance road trip using Autopilot, your peace of mind depends on the invisible work performed in the service bay.
At RVCCR, we combine 21 years of family-owned experience with the cutting-edge certifications required by the next generation of automotive technology. We understand that your Tesla or Rivian is more than a mode of transport: it is a feat of engineering that deserves to be restored with absolute precision.
When the structural work is done and the paint has dried, our commitment to your safety continues through the final pixel of calibration. We invite you to experience the difference that certified expertise makes. Let us handle the complexities of your insurance claim and the intricacies of your vehicle’s ADAS, so you can focus on the road ahead.
Drive with confidence. Explore with safety. Restore with RVCCR.
Need a repair estimate?
Skip the wait — send us a few photos and our team will get back to you fast.
Start a Photo Estimate →