EV Battery Enclosure Integrity After a Collision: What a Certified Inspection Checks Under Your EV
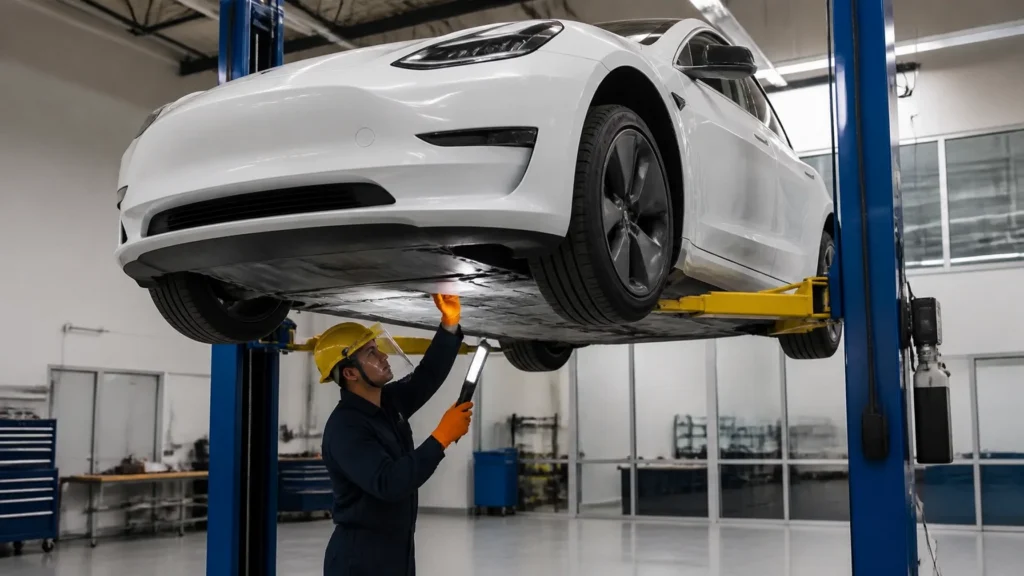
Updated August 31, 2026 | Tesla, Rivian, and Ford EV collision repair | Redlands and the Inland Empire
RVCCR is a Tesla Approved Body Shop, Rivian 3P Certified collision facility, and Ford Collision Career Network shop serving Redlands and the Inland Empire. Our certified collision, paint, and mechanical repair team evaluates electric vehicles according to manufacturer repair information, high-voltage safety procedures, and documented inspection requirements.
An EV battery enclosure can look acceptable from the outside while impact forces have affected its seals, mounting points, coolant connections, high-voltage isolation, or internal structure. That is why a post-collision battery inspection is not the same as checking for a dented underbody panel. The question is not simply whether the vehicle can be driven into the shop. The question is whether the battery assembly and its surrounding systems remain safe and repairable…
Why the battery enclosure is safety-critical
The high-voltage battery enclosure is the protective structure surrounding the vehicle’s traction battery components. Depending on the vehicle, the assembly may include battery modules, busbars, contactors, monitoring components, cooling passages, service disconnects, high-voltage connectors, seals, and structural attachment points.
The enclosure is positioned low in the vehicle, where it helps support the vehicle’s underbody architecture but may also be exposed to:
- Road debris and curb strikes
- Bottoming out
- Underbody impacts
- Side impacts near the rocker panels
- Front or rear structural deformation
- Wheel and suspension impacts
- Flooding or water exposure
- Improper lifting or towing
- Heat exposure during refinishing or welding
A collision does not have to produce a dramatic puncture to justify a detailed inspection. A dent, crease, distorted flange, damaged seal, shifted mounting point, or coolant leak can change the repair decision. In some cases, a protective shield absorbs the visible damage. In others, the shield transfers force to the battery enclosure below it.
The enclosure serves several functions at once. It helps protect high-voltage components from intrusion, supports environmental sealing, provides attachment points to the vehicle, and helps keep cooling and electrical systems in their intended positions. If those functions are compromised, a cosmetic repair to the outer panel may not address the actual safety concern.
Tesla’s published battery inspection procedures for affected vehicle platforms use model-specific inspection criteria for underside damage. Rivian’s RCI-30-23-002-1, High Voltage (HV) Battery Damage Inspection Guidelines, dated March 8, 2023, directs inspection of the enclosure for deformation, cracks, dents, tears, damaged connectors, damaged seals, moisture, corrosion, coolant leaks, and evidence of an electrical arc event. Ford’s On Target collision repair information similarly emphasizes that a damaged EV battery or battery case must be evaluated to determine whether the damage is cosmetic or requires repair or replacement.
These documents do not create one universal inspection for every EV. They reinforce an important principle: the vehicle’s make, model, year, battery configuration, damage location, and applicable OEM procedure control the decision.
What happens before anyone inspects the enclosure
High-voltage collision inspection begins with safety, not disassembly.
Under OSHA 29 CFR 1910.333, live parts to which an employee may be exposed generally must be deenergized before work begins unless a recognized exception applies. Deenergized equipment must be disconnected from energy sources, stored electrical energy must be addressed, and a qualified person must verify the deenergized condition with appropriate test equipment.
For an EV, turning the vehicle off is not enough by itself. A normal power-down command, key removal, touchscreen shutdown, or interlock may not be used as the sole means of deenergizing electrical equipment. The exact procedure must come from the vehicle manufacturer.
A qualified repair team may need to:
- Identify the exact vehicle and battery configuration.
- Review the current OEM emergency response and service procedures.
- Establish a controlled work area.
- Wear the required high-voltage personal protective equipment.
- Disable the high-voltage system using the manufacturer’s procedure.
- Address low-voltage and auxiliary power sources.
- Allow the manufacturer-specified discharge period where applicable.
- Verify the condition with approved test equipment.
- Document the vehicle’s high-voltage status before further work.
The owner should not attempt to remove a service disconnect, open the battery enclosure, test orange high-voltage cables, or probe battery terminals at home. A collision-damaged EV may contain stored energy even when the instrument panel is dark. Rivian’s inspection guideline specifically warns that a damaged HV battery and related components may present a significant electrocution risk until properly disabled.
The first physical inspection: underbody, shields, and impact path
Once the vehicle is positioned safely according to the applicable procedure, the technician examines the complete impact path rather than looking only at the largest visible dent.
The inspection may include:
- Underbody shields and skid plates
- Battery enclosure surfaces
- Perimeter flanges and seams
- Rocker-side areas adjacent to the battery
- Front and rear battery edges
- Suspension and subframe areas
- High-voltage cables and connectors
- Coolant lines and fittings
- Mounting brackets and fasteners
- Floor structure above the enclosure
- Signs of fluid, moisture, corrosion, or heat
- Evidence of contact with road debris or lifting equipment
Tesla’s published underside-damage tech notes use defined inspection zones on certain models and direct technicians to remove or inspect protective panels as necessary. A zone-based approach matters because damage in one area may have different repairability criteria from damage in another. A shallow mark on an approved replaceable shield is not evaluated the same way as deformation near a sealed battery edge, a mounting point, a connector, or a restricted enclosure zone.
Photographs should be taken before and during disassembly. The record should show the original condition of the shield, the enclosure, the impact location, fluid evidence, damaged hardware, and any areas that require closer evaluation.

Battery enclosure damage: cosmetic versus structural compromise
The word “dent” does not describe enough information to make a safe repair decision.
A cosmetic condition may be limited to a removable shield or surface area that does not affect the enclosure’s sealing, structure, mounting, cooling, high-voltage components, or manufacturer-defined restricted zones. Even then, the applicable OEM procedure must determine whether the part can be repaired, replaced, or left in service.
A potentially structural or safety-related condition may include:
- A crack, tear, puncture, or rupture
- A sharp or deep deformation
- A distorted enclosure flange
- A compromised seal
- A shifted or damaged mounting point
- A dent near a battery module, connector, or busbar area
- Evidence that the enclosure contacted internal components
- Coolant leakage
- Moisture accumulation inside or around the enclosure
- Corrosion associated with water or coolant entry
- Arc marks, welding marks, or electrical spatter
- Heat discoloration
- Damage extending beyond an OEM-approved repair area
A surface can appear smooth after refinishing and still fail an enclosure integrity test. Conversely, a visible mark may be limited to a replaceable protective component. The correct conclusion depends on the manufacturer’s damage criteria and the results of the required tests.
Ford’s On Target guidance describes underbody HV battery inspection job aids intended to help repairers distinguish cosmetic damage from conditions that require further action. Ford also states that the job aids do not replace the detailed procedures in the Ford Workshop Manual. That distinction is important. A general photograph or industry rule cannot substitute for the current repair information for a specific Mustang Mach-E, F-150 Lightning, or other Ford EV.
Checking the enclosure, seals, and mounting points
The enclosure is not evaluated only as a flat metal or composite surface. Its perimeter, attachment system, and interfaces with other vehicle structures are equally important.
Perimeter seals and enclosure seams
A collision can distort a flange or compress a seal unevenly. A seal may look installed but fail to maintain the intended barrier against moisture and contamination. Technicians examine the perimeter for separation, tearing, pinching, deformation, missing fasteners, and impact-related gaps.
Where the manufacturer specifies an enclosure leak or air-leak test, the test must be performed according to that procedure. Tesla service information includes an HV battery air-leak test for applicable battery assemblies. The test uses controlled pressure and monitors pressure loss. The pressure and pass/fail criteria are procedure-specific; they are not safe values to improvise.
Tesla’s collision-related tech notes identify enclosure leak-test failure due to impact as a condition that can require HV battery replacement on applicable vehicle platforms. The decision is not based on a technician’s visual impression alone. The manufacturer’s procedure and the documented test result control.
Mounting points and fasteners
The battery assembly is attached to the vehicle through engineered mounting locations. A collision can bend a mounting surface, stretch or damage fasteners, distort a threaded hole, or shift the body structure around the pack.
The inspection should document:
- Mounting-point deformation
- Cracked or torn attachment areas
- Damaged fasteners
- Missing or displaced hardware
- Evidence of contact between the pack and body structure
- Correct seating of the enclosure
- Structural measurements required by the OEM
- Any required one-time-use replacement hardware
A battery may pass a visual enclosure inspection but still require additional structural evaluation if the vehicle floor, rocker, subframe, or mounting structure has shifted. The enclosure and the body cannot always be evaluated separately.
Connectors and high-voltage cables
High-voltage connectors are designed to remain protected and properly seated. Impact can damage a connector housing, seal, terminal, cable shield, or retaining feature. A cable can also be pinched or pulled without an obvious break in its outer covering.
Technicians should look for:
- Crushed or cut cable insulation
- Damaged connector housings
- Deformed terminals
- Broken locks or retainers
- Seal displacement
- Evidence of arcing
- Abrasion against the enclosure or body
- Cable routing that no longer matches the manufacturer’s requirements
No one should handle these components until the vehicle has been made safe under the correct OEM procedure.
Coolant system inspection and pressure testing
Many EV battery assemblies use liquid thermal management. The exact architecture differs by manufacturer and model, but a collision inspection may include coolant lines, fittings, manifolds, valves, pumps, reservoirs, and battery-side connections.
A technician may check for:
- Wetness or dried coolant residue
- Cracked fittings
- Kinked or crushed lines
- Damaged quick-connects
- Low coolant level
- Leaks near the battery enclosure
- Damaged thermal-management components
- Air in the system after repair
- The need for a manufacturer-specified pressure, vacuum, or refill procedure
Coolant loss is not a cosmetic issue. It may affect thermal management, and fluid entering an electrical area can affect insulation resistance. However, the testing process must be selected carefully. An EV cooling circuit, battery enclosure, and high-voltage electrical system are not interchangeable systems.
Our article on EV battery coolant system inspection and dielectric testing explains why coolant concerns and high-voltage isolation concerns may need to be evaluated together after a crash.
A shop should not promise that a simple coolant refill resolves a battery-related warning. If the enclosure, cooling circuit, or high-voltage components may have been affected, the repair plan should identify the required inspection and verification steps.
High-voltage isolation and dielectric testing
High-voltage isolation testing evaluates whether the high-voltage system remains adequately separated from the vehicle chassis and other unintended conductive paths. It is commonly discussed as insulation-resistance or dielectric testing.
The exact test method, test points, test voltage, equipment, and acceptance criteria depend on the manufacturer and vehicle. A generic resistance check with a standard multimeter is not automatically equivalent to an OEM-approved isolation test.
Depending on the procedure, a qualified technician may need to:
- Follow the manufacturer’s high-voltage disablement process.
- Confirm the required safety state.
- Inspect the battery and related components for impact, moisture, and leakage.
- Use an approved insulation or isolation tester.
- Test the specified circuits or components.
- Record the measured values.
- Investigate any low-isolation condition.
- Repeat testing after the required repair or replacement.
- Confirm that the vehicle meets the manufacturer’s final criteria before release.
Tesla service information includes isolation and insulation test procedures and collision-related guidance connecting impact-related low isolation with battery replacement decisions for applicable packs. Rivian’s RCI-30-23-002-1 directs repairers to use the Rivian diagnostic system and contact the regional Rivian Collision/Service Team when enclosure damage, leaks, corrosion, connector damage, seal damage, or other listed conditions are found.
The important point for owners is simple: a scan warning, a visible dent, or a passed visual inspection does not replace the test that the OEM requires. If a dielectric or isolation test is indicated, ask whether it was completed, what procedure was used, and whether the result was documented.

What Tesla, Rivian, and Ford require from the repair process
Each manufacturer publishes its own repair information. The procedures change as battery designs, software, enclosure materials, and vehicle platforms change.
Tesla
Tesla’s published tech notes for applicable Model 3, Model Y, Model S, and Model X battery configurations describe inspections for underside damage. Depending on the model and battery type, the process may involve skid-plate inspection or removal, zone-based enclosure assessment, leak testing, isolation testing, and a replacement decision when impact-related enclosure leakage or low isolation is found.
Tesla repair information should be matched to the exact model, year, battery configuration, and damage condition. A procedure for one battery pack should not be assumed to apply to another Tesla.
For Tesla owners looking for a Tesla certified collision center, the useful question is not only whether the shop works on Teslas. Ask whether the shop can access the appropriate Tesla repair information, follow high-voltage procedures, document testing, and coordinate additional service-center involvement when the manufacturer requires it.
Rivian
Rivian’s RCI-30-23-002-1 applies to Rivian vehicles from model year 2022 and later in the United States. The document states that RiDE is required for the procedure and that some routines may be restricted to a Rivian service center.
The guideline identifies battery-enclosure inspection findings including sparks, smoke, flames, electrical odors, fumes, gurgling or bubbling noises, external battery-cooling-fluid leaks, moisture, corrosion, deformation, cracks, dents, tears, damaged high-voltage connectors, damaged enclosure seals, and arc-event evidence.
Rivian directs emergency action when dangerous signs such as sparks, smoke, or flames are present. For other listed damage conditions, the guideline directs the repairer to contact the regional Rivian Collision/Service Team for assistance or repair direction.
That is why a Rivian inspection should not be reduced to replacing a skid plate or straightening an underbody panel. Rivian’s official collision repair information and service guidance must be considered together with the actual battery condition.
Ford
Ford’s On Target publications explain that Ford and Lincoln BEVs with underbody HV battery packs must be inspected after collision or transport damage to determine whether the damage is cosmetic or requires repair.
Ford’s guidance also emphasizes the use of Ford OEM procedures, proper tools, equipment, training, and the Ford Workshop Manual. For repairs that require HV battery removal, Ford identifies specific training and equipment requirements and directs facilities without the required capability to work with an appropriate Ford or Lincoln EV-certified resource.
Ford’s Mach-E inspection content uses vehicle-specific damage areas and repairability guidance. The same principle applies to Ford EVs such as the Mustang Mach-E and F-150 Lightning: the applicable Workshop Manual and current Ford repair information control the repair.
RVCCR’s Ford and Lincoln certification information explains the equipment and training framework behind our work on Ford vehicles and EVs.
What happens if the enclosure is compromised?
The outcome depends on the condition identified and the manufacturer’s repair decision.
Possible outcomes include:
- Replacing a damaged underbody shield
- Replacing damaged mounting hardware
- Repairing surrounding body structure
- Replacing a coolant line or fitting
- Performing additional leak testing
- Performing isolation or insulation testing
- Sending the vehicle to a manufacturer service center for a restricted routine
- Replacing the battery enclosure or complete battery assembly
- Placing the vehicle out of service until a safety decision is made
A compromised battery should not be returned to normal driving simply because the car starts, moves, charges, or displays no warning. Those observations do not independently establish enclosure integrity.
If a battery has smoke, flames, unusual odors, gurgling, active leakage, or evidence of thermal or electrical damage, the vehicle requires immediate attention and should be handled according to emergency and manufacturer procedures. Do not park a suspected damaged EV inside a garage or near combustible materials while waiting for an inspection.
For less obvious damage, the vehicle should still be evaluated before disassembly continues. The correct decision may require additional diagnostic information, a physical inspection, leak testing, isolation testing, or manufacturer review.
What owners should request in writing
A professional repair file should explain what was inspected and why. Ask for documentation that identifies:
- Vehicle identification number
- Make, model, year, and battery configuration
- Date of inspection
- Damage photographs
- Underbody and enclosure findings
- Skid-plate or shield condition
- Mounting-point findings
- Coolant-system observations
- High-voltage disablement status
- Diagnostic scan results
- Isolation or dielectric test results, when required
- Enclosure leak-test results, when required
- Manufacturer procedure or technical guidance used
- Parts replaced
- Any restricted work referred to another facility
- Final post-repair scan
- Final warning-status verification
- Required calibration or programming
- Final quality-control signoff
The repair record should distinguish between a visual finding and a test result. “No visible damage” is not the same as “passed the required enclosure leak test.” “No warning on the dashboard” is not the same as “passed the required high-voltage isolation verification.”
Owners should also ask whether the battery was removed, whether the vehicle entered a paint booth, whether welding occurred near the battery, and what temperature or bake-time limits applied. Ford’s On Target information warns that excessive paint-booth heat can damage EV batteries and identifies conditions under which the battery must be removed before refinishing. Battery removal and welding decisions must follow the applicable OEM procedure.
Why the pre-repair diagnostic scan matters
Battery-enclosure inspection should be connected to the vehicle’s electronic record. A scan performed before body work begins can document high-voltage, battery-management, restraint, communication, and sensor-related alerts present when the vehicle arrived.
Our article on the pre-repair diagnostic scan for Tesla and EV collision repair explains why the initial scan should be completed before disassembly whenever the vehicle’s condition allows it.
A pre-repair scan does not replace a physical battery inspection. It helps the technician identify systems that require further evaluation and creates a dated baseline. The post-repair scan then helps confirm the vehicle’s condition after the required repairs, programming, calibration, and reassembly.
The strongest repair documentation connects:
- The original impact photographs
- The pre-repair scan
- The teardown findings
- The battery enclosure inspection
- The manufacturer’s repair criteria
- The test results
- The parts and procedures used
- The post-repair verification
That sequence gives the owner, repair facility, and insurer a clearer record of the repair decision.

Questions to ask an EV repair shop near you
If you are searching for an EV repair shop near me, ask these questions before authorizing work:
- Do you inspect the battery enclosure after an underbody, side, front, rear, or wheel-impact collision?
- Will the inspection follow the OEM procedure for my exact vehicle?
- Do you document the enclosure, seals, connectors, coolant lines, and mounting points?
- Will you perform the manufacturer-required leak test?
- Will you perform the required high-voltage isolation or dielectric test?
- Who is qualified to disable and verify the high-voltage system?
- Can you provide the pre-repair and post-repair scan reports?
- Will you document whether the damage is cosmetic, structural, or outside the manufacturer’s repairable area?
- Will restricted procedures be referred to the appropriate manufacturer resource?
- Will the shop coordinate necessary supplements with my insurer?
A trustworthy facility should explain the process in plain language. If the answer is only “the battery looks fine,” ask what was actually inspected and tested.
Protect the miles ahead
An EV collision repair is successful when the vehicle is restored for safe, dependable use: not merely when the visible dent disappears.
At RVCCR, our Tesla Approved, Rivian 3P Certified, and Ford-certified teams combine collision repair, paint, mechanical work, high-voltage safety procedures, diagnostics, and manufacturer-specific repair information under one roof. We work with major insurance carriers, provide free estimates, use OEM parts where required by the repair plan, and back our work with a written lifetime warranty.
If your Tesla, Rivian, Mustang Mach-E, F-150 Lightning, or other EV has experienced an underbody impact, do not guess about the battery enclosure. Have the vehicle inspected before normal driving, charging, disassembly, or storage decisions are made.
Request a free EV collision repair estimate and send photographs of the vehicle, damage, and underbody area. Our team will review the information, explain the next step, and help restore your EV so you can return to work, family plans, and the adventures ahead with confidence.
Sources and manufacturer references
- Tesla Service Bulletin TN-18-16-001: Inspect Model 3 and Model Y HV Battery for Underside Damage
- Tesla Service Bulletin TN-21-16-001: Inspect MSP2 and MXP2 HV Battery for Underside Damage
- Tesla Service Bulletin TN-22-16-001: Inspect MYS HV Battery for Underside Damage
- Rivian RCI-30-23-002-1: High Voltage Battery Damage Inspection Guidelines
- Ford On Target 2020, Volume 3: BEV Requirements for Certified Shops
- Ford On Target 2021, Volume 4: High-Voltage Battery Inspection Job Aids
- OSHA 29 CFR 1910.333: Selection and Use of Work Practices
Need a repair estimate?
Skip the wait — send us a few photos and our team will get back to you fast.
Start a Photo Estimate →