RV Leveling System Repair After a Collision: Jacks, Hydraulics, and Sensors That Take the Impact
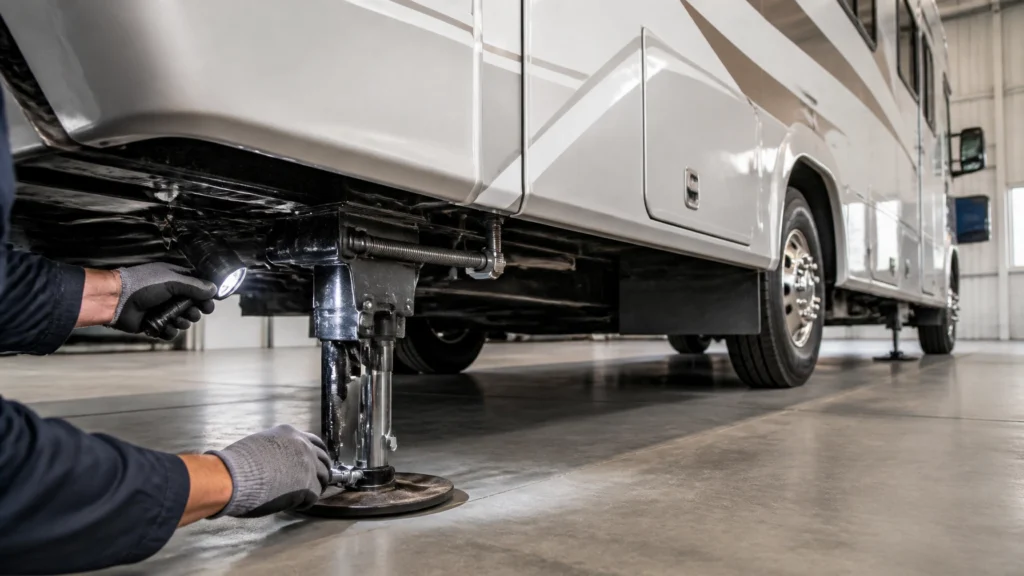
Updated September 8, 2026 | RVCCR, RVDA-Certified RV Repair Facility in Redlands
RVCCR’s RVDA-certified team has repaired motorhomes, fifth wheels, travel trailers, toy haulers, pop-up campers, and other recreational vehicles for 21 years. Our collision, paint, and mechanical technicians inspect the complete vehicle: not only the damaged panel: because a collision can affect a leveling or stabilizer system without leaving an obvious mark on the exterior…
A motorhome’s hydraulic leveling system may include jacks, mounting brackets, a pump and reservoir, hydraulic hoses, valves, a control module, wiring, pressure or fluid sensors, and a level sensor or control panel. A travel trailer may use electric stabilizer jacks, manual stabilizers, an electric tongue jack, wiring, switches, and structural mounting points. If any of those components moved during an impact, the system may no longer support, retract, level, or report its position correctly.
That is why motorhome collision repair and RV collision repair should include a systems inspection when the impact occurs near the front cap, rear frame, underbody, wheel area, hitch, landing gear, leveling jack, or stabilizer mount. A professional inspection can identify damage before a bent component causes a second failure at the campsite, during storage, or while the vehicle is being prepared for travel.
Why leveling-system damage can hide after an RV collision
Leveling equipment is mounted low on the vehicle, close to the frame and outside edges of the coach or trailer. Those locations expose the system to direct impact, side loading, road debris, ground contact, and movement transmitted through the structure.
A collision may:
- Bend a jack leg without visibly damaging the body panel above it
- Shift a jack mounting bracket or weld
- Kink a hydraulic hose
- Crack a fitting or create a slow leak
- Damage a pump, reservoir, manifold, valve, or solenoid
- Pull wiring from a sensor or control module
- Disturb the reference position used by an automatic-leveling system
- Change ground clearance after a frame or suspension shift
- Bend an electric stabilizer assembly or its support bracket
- Damage a trailer’s stabilizer switch, motor wiring, or limit components
- Create an intermittent fault that does not appear during a brief visual inspection
The system may still activate after the collision. That does not prove it is safe or correctly aligned. A jack can extend while moving sideways, a hydraulic system can operate with a damaged hose until pressure rises, and an electric stabilizer can run while its bracket is twisting under load.
Owners should avoid repeatedly cycling a questionable system to “see if it still works.” Lippert’s Power Gear materials warn that leveling systems require qualified service and that owners should not place themselves under an unsupported vehicle. Hydraulic oil can be under pressure, and a vehicle supported incorrectly can move unexpectedly.
First identify the type of system
The repair process depends on the RV’s design. Before estimating parts or labor, a technician should identify whether the vehicle uses hydraulic leveling, electric leveling, electric stabilizers, manual stabilizers, air-assisted leveling, or a combination.
Motorhome hydraulic leveling systems
A typical Power Gear hydraulic system may include:
- A 12-volt motor and hydraulic pump
- A fluid reservoir
- A manifold and valves
- Hydraulic hoses and fittings
- Hydraulic leveling jacks
- A control unit or control module
- A touch pad or switch panel
- A level sensor
- A pressure sensor or fluid-level component
- Wiring, fuses, grounds, and safety interlocks
Lippert’s official Power Gear support library identifies these systems and provides separate procedures for pump diagnosis, hose replacement, valve and coil inspection, fluid sensors, hydraulic bleeding, control calibration, jack inspection, and control replacement.
That list matters after a collision because a jack is not an isolated part. A damaged leg may place unusual loads on the bracket, hose, valve, and frame. A damaged line may allow fluid loss or introduce air. A shifted sensor may cause the control module to interpret a level coach as tilted.
Motorhome electric leveling systems
Electric leveling systems generally use powered jack motors, gearboxes or drive mechanisms, motor brakes, wiring, a control box, sensors, and a touch pad. Instead of hydraulic pressure moving a cylinder, an electric motor drives the jack mechanically.
An impact can damage:
- The outer jack tube or leg
- The motor or gearbox
- The motor brake
- A drive pin or gear
- The mounting plate
- The wiring harness
- The jack-position sensor circuit
- The controller or control box
- The touch pad or its mounting area
Lippert’s Power Gear electric leveling resources include official documentation for electric-jack calibration, sensor-circuit function checks, controller troubleshooting, motor service, drive-pin replacement, motor-brake testing, and error-mode resetting.
An electric jack that makes noise, stalls, moves unevenly, runs in the wrong direction, or stops before reaching its normal travel position should not be treated as a minor switch problem until the mechanical mounting and wiring have been inspected.
Travel-trailer stabilizers
Travel trailers, fifth wheels, and toy haulers may use electric or manual stabilizers at the front, rear, or both. Some units also have separate landing gear, a powered tongue jack, or a leveling system that is distinct from the stabilizers.
The terms can be confusing:
- Leveling jacks are designed to assist with leveling a vehicle according to the system design.
- Stabilizers help reduce movement after the RV is positioned.
- Landing gear supports the front of a fifth wheel when it is uncoupled.
- A tongue jack supports and raises the front of a conventional travel trailer during hitching and storage.
The correct inspection must follow the vehicle and component manufacturer’s design. A stabilizer should not be used for a function it was not designed to perform, and a collision-damaged stabilizer should not be judged only by whether its motor still turns.

Inspection points after a collision
A complete RV leveling-system inspection should move from the mounting structure outward to the mechanical, hydraulic, electrical, and control components.
1. Jack mounting brackets and frame attachments
The mounting bracket transfers force from the jack into the motorhome frame or trailer structure. Inspect the bracket for:
- Bent plates
- Cracked welds
- Elongated bolt holes
- Missing or loose fasteners
- Distortion around the bracket
- Fresh impact marks
- Separation between the bracket and frame
- Misalignment compared with the opposite side
A bracket can be bent even when the jack leg appears straight. Conversely, a straight bracket can be attached to a jack that has been pushed out of alignment. The technician should compare the damaged area with the opposite side when the design permits, review available manufacturer dimensions, and determine whether the frame itself moved.
If the frame or bracket is distorted, replacing only the jack may leave the replacement operating out of alignment. The mounting structure must be restored first or addressed as part of the same repair plan.
2. Bent jack legs and damaged stabilizer tubes
A jack leg that is bent, kinked, bowed, or no longer travels concentrically should be removed from service. Warning signs include:
- The leg does not retract fully
- The footpad contacts the ground at an angle
- The leg binds at one point in its travel
- The jack makes new grinding or popping noises
- The exposed rod or tube has impact marks
- The footpad is no longer parallel with the ground
- The leg extends farther on one side than the other
- The jack leans when loaded
- The system reports an error after the impact
A collision-bent leg should generally be replaced rather than straightened. Straightening may restore an approximate visual shape while leaving the tube out of round, the internal guide surfaces damaged, or the metal weakened by the original impact. Heat, pressing, hammering, or pulling can also change the component’s geometry and protective finish.
A jack is a guided load-bearing assembly. Its safe operation depends on the relationship among the outer tube, inner leg, screw or cylinder, gears, bushings, seals, mounting bracket, and footpad. A component can look straight while still binding under load or transferring force incorrectly into the frame.
The appropriate repair threshold is therefore conservative:
- Replace a leg or complete jack assembly when it is bent, cracked, distorted, leaking, binding, or outside the manufacturer’s service limits.
- Repair only when the component manufacturer provides a specific service procedure for that condition and the remaining parts pass inspection.
- Do not straighten a collision-damaged jack as an improvised repair unless the applicable manufacturer documentation expressly permits that method.
The exact replacement part should be identified by system model, jack position, dimensions, mounting pattern, travel, capacity, electrical or hydraulic configuration, and manufacturer part number where available.
3. Hydraulic hoses, fittings, and valves
Hydraulic damage may not produce a large puddle immediately. A hose can be kinked, internally restricted, abraded, or pulled at a fitting. A small leak may become apparent only when the pump builds pressure.
Inspect:
- Hoses near the jack and pump
- Hose routing near sharp edges and heat sources
- Crushed or flattened sections
- Abrasion marks
- Loose fittings
- Cracked fittings or manifold ports
- Dampness around connections
- Fluid on the jack body or footpad
- Damaged valve coils and wiring
- The dump valve and leg valves
- Any protective clamps or brackets that shifted during impact
Lippert’s official hydraulic support materials include procedures for hose replacement, valve and coil inspection, leaking-jack diagnosis, pump troubleshooting, and manifold service. The repair should follow the procedure for the actual system rather than a generic hydraulic repair method.
Never place a hand near a suspected high-pressure leak. Hydraulic fluid can penetrate skin. The system should be depressurized and serviced by qualified personnel using appropriate safety procedures.
4. Pump, reservoir, and fluid condition
The pump and reservoir may be located near the frame, generator compartment, front storage area, or another low-access location. Inspect the assembly for:
- Cracked or displaced reservoir material
- Fluid loss
- Bent mounting brackets
- Damaged motor wiring
- Loose grounds
- Blown fuses
- Damaged pump harnesses
- Contaminated or incorrect fluid
- A motor that runs without building pressure
- Excessive noise or vibration
- A pump that cycles longer than normal
- Fluid foaming or evidence of air in the system
The reservoir level should be checked according to the system’s instructions and under the specified jack position. Adding fluid without finding the source of a leak does not complete the repair.
If the system was opened, a line was replaced, or fluid was lost, the hydraulic system may require bleeding or purging. Lippert’s official oil-bleed procedure describes working through the jacks in sequence, managing fluid at the connection, and topping off the reservoir. The exact steps, fluid type, torque requirements, and sequence must match the system documentation.

Hydraulic bleeding is part of the repair
Air in a hydraulic leveling system can cause erratic movement, slow operation, noise, incomplete extension, or inconsistent retraction. After a collision repair involving a hose, jack, fitting, manifold, or pump, the technician should determine whether the system requires bleeding.
A proper post-repair process may include:
- Securing the RV and chocking the wheels.
- Confirming that no one is beneath the vehicle or near moving components.
- Checking hose routing and ensuring that lines are protected from heat and sharp edges.
- Working through the manufacturer-specified jack sequence.
- Purging trapped air according to the official procedure.
- Checking for leaks while the system operates.
- Confirming fluid level with the jacks in the specified position.
- Running the system through its normal operating cycle.
- Verifying that the jacks retract fully and that travel clearance is restored.
Bleeding is not a substitute for replacing a damaged component. It is a required finishing operation when the repair introduces air or removes fluid from the system.
5. Control panel, control module, wiring, and safety inputs
The control panel is the operator interface, but the panel is only one part of the control system. The module may receive input from position sensors, level sensors, pressure switches, fluid-level components, ignition circuits, parking-brake inputs, neutral-safety circuits, and other interlocks.
After an impact, inspect:
- The touch pad or switch panel
- The control module or control box
- Main power and ground connections
- Fuses and relays
- Harnesses near the impact area
- Pinched or stretched wires
- Corroded or displaced connectors
- Sensor harnesses
- Safety-interlock inputs
- Error codes or warning lights
- Communication between the panel and controller
A control fault should not automatically lead to control-module replacement. The technician should first test power, grounds, connectors, wiring, sensor input, and the relevant mechanical components. If the module is damaged or fails the manufacturer’s diagnostic procedure, replacement may be appropriate.
For electric systems, Lippert’s Power Gear documentation includes a sensor-circuit function check and controller troubleshooting information. Those procedures help distinguish a damaged sensor circuit from a motor, brake, drive, or control-box fault.
Sensor calibration and zero-point setup
Automatic leveling depends on a reference position. If a collision shifts the coach, damages a sensor, changes the mounting position, or leads to control-module replacement, the system may need calibration after mechanical repairs are complete.
Symptoms of a calibration or sensor problem can include:
- The coach stops noticeably out of level
- One corner keeps moving after the others stop
- The system reports that it is level when it is not
- The control panel shows an error
- The system refuses to enter automatic mode
- The jacks operate correctly in manual mode but not in automatic mode
- The system loses its zero point after battery or controller work
- The coach has correct physical geometry but incorrect electronic readings
Calibration should occur only after the mounting structure, jack travel, hydraulic or electric operation, wiring, and sensor installation have been checked. Recalibrating a damaged system can hide the original problem temporarily without correcting it.
The technician should level the coach using the manufacturer’s specified method, confirm the physical reference position, perform the applicable zero-point or sensor calibration, and then test automatic and manual functions. The final repair documentation should state that calibration was performed and identify the system procedure used.
6. Ground clearance and travel position
A collision can change the distance between the bottom of the RV and the road even when the leveling system still retracts.
Check:
- Whether every jack fully retracts
- Whether footpads remain within the designed travel position
- Whether a bent bracket leaves a jack lower than the opposite side
- Whether hoses hang below their original routing
- Whether wiring is exposed to road contact
- Whether a stabilizer or landing gear remains partially extended
- Whether the body, frame, suspension, or underbelly shifted
- Whether the entry step, exhaust, or other low component was affected
- Whether the system’s travel warning operates correctly
The owner should not drive the RV until the shop confirms that all leveling equipment is stowed and that the vehicle has adequate road clearance. If a jack cannot retract, the RV may require a manufacturer-approved manual-retraction procedure or transport rather than normal driving.
Repair versus replace: how the decision is made
The repair decision should be based on component condition, manufacturer service information, system function, and the effect of the collision on related structure.
Replacement is usually appropriate when:
- A jack leg or stabilizer tube is bent
- The outer housing is cracked or distorted
- A mounting bracket is torn or badly deformed
- A hydraulic cylinder leaks after inspection
- A hose is crushed, cut, kinked, or damaged at the fitting
- A reservoir is cracked
- A motor, gearbox, brake, or drive component fails testing
- A valve, solenoid, manifold, or control module is damaged
- Sensor wiring is broken or the sensor cannot be positioned correctly
- The component is outside the manufacturer’s repair limits
- The original part cannot be safely returned to its designed geometry
Repair may be appropriate when:
- A connector has been pulled loose but the terminals and wiring remain undamaged
- A protective harness mount has shifted
- A replaceable fuse or relay has failed after the root cause is addressed
- A serviceable valve or coil passes testing
- A bracket is within approved repair limits and can be restored without compromising alignment
- A sensor requires adjustment or replacement under the manufacturer’s procedure
- A system needs bleeding, fluid service, or calibration after an approved component repair
A lower-cost repair is not automatically the correct repair. If the method depends on heating, bending, welding, or reshaping a safety-relevant component, ask for the manufacturer’s written procedure or service limit. If no approved procedure exists, replacement is usually the more supportable path.
Insurance documentation for leveling-system damage
Leveling and stabilizer damage should be documented as part of the collision claim, especially when the damage is below the body or becomes visible only during testing and teardown.
Photograph:
- The complete RV before disassembly
- The point of impact
- The affected jack, stabilizer, or landing gear
- Mounting brackets and frame attachments
- Bent legs, tubes, footpads, and housings
- Leaking fittings, hoses, reservoirs, or cylinders
- Wiring and connectors
- Control panels and displayed error codes
- Ground-clearance changes
- Any related frame, hitch, suspension, underbody, or body damage
- Component identification labels and part numbers
The estimate should identify the inspection and repair operations separately. Useful line items may include:
- Leveling-system diagnostic inspection
- Jack or stabilizer removal for measurement
- Mounting-bracket and frame inspection
- Hydraulic hose and fitting inspection
- Pump and reservoir testing
- Valve and solenoid testing
- Controller and sensor-circuit diagnosis
- Replacement of the damaged assembly
- Hydraulic bleeding and fluid service
- Electric-jack calibration
- Automatic-leveling zero-point calibration
- Full travel and retraction test
- Ground-clearance verification
- Final road-position inspection
A supplement may be necessary if the initial estimate covered only visible body damage. RVCCR explains the role of additional documentation in our article on RV insurance supplements and hidden damage.
When submitting the supplement, include photographs, measurements, diagnostic findings, component part numbers, and the applicable manufacturer procedure. The file should explain how the collision caused or exposed the damage and why the proposed repair is necessary.
California regulation and non-OEM parts
California Code of Regulations, Title 10, section 2695.8(g), addresses an insurer’s use of non-OEM replacement crash parts in automobile repairs. The California Department of Insurance describes requirements involving kind, quality, safety, fit, performance, necessary modifications, manufacturer identification, disclosure, and the insurer’s warranty when qualifying non-OEM crash parts are specified.
Because this regulation is written for automobile insurance claims and replacement crash parts, owners should not assume that every provision automatically applies to every RV leveling component. However, it is a useful California reference when an insurer proposes non-OEM parts in a covered vehicle repair. Ask the repair facility and insurer to identify:
- Whether the proposed part is OEM, non-OEM, used, rebuilt, or reconditioned
- The manufacturer and part number
- Whether it matches the original system in fit, capacity, operation, and safety
- Whether additional modifications are required
- Who warrants the part and its performance
- How the part will be identified on the estimate and invoice
- Whether the proposed component is approved for the specific RV system
Do not present section 2695.8(g) as a blanket rule requiring an OEM leveling jack for every RV claim. Present the issue accurately: the part must be appropriate for the vehicle, the repair must be documented, and any disagreement about coverage or equivalency should be addressed in writing with the insurer.
What to ask before authorizing the repair
Before authorizing work on the leveling or stabilizer system, ask:
- Is the system hydraulic, electric, manual, air-assisted, or a combination?
- Which component shows direct collision damage?
- Has the mounting bracket and frame been inspected?
- Is the jack leg bent, or is the entire assembly being evaluated?
- Does the manufacturer approve straightening or repair of this part?
- If replacement is recommended, what is the exact part number?
- Have the hoses, valves, pump, reservoir, wiring, and sensors been tested?
- Will the hydraulic system be bled after the repair?
- Will the reservoir be checked and filled with the correct fluid?
- Will the control module and sensor circuits be tested?
- Will the zero point or electric-leveling calibration be performed?
- Will the jacks or stabilizers be tested through full travel?
- Will ground clearance be checked in the travel position?
- Are any error codes being recorded?
- What photographs and measurements will support the insurance supplement?
- Which parts are OEM or non-OEM?
- What happens if additional damage appears after disassembly?
- What portion, if any, could become the owner’s responsibility?
- What warranty applies to the repair?
- Is the RV safe to move, or does it need transport?
These questions help separate a complete repair from a quick operational check. A system that moves is not necessarily a system that is aligned, calibrated, leak-free, structurally secure, and safe to use.
How RVCCR handles leveling-related collision repairs
RVCCR combines RV collision repair, mechanical service, paint and body work, and insurance coordination under one roof. Our team can inspect motorhomes, fifth wheels, travel trailers, toy haulers, and other RVs for visible and concealed collision damage.
Depending on the loss, the inspection may include:
- Leveling jacks and stabilizers
- Hydraulic pumps, reservoirs, hoses, valves, and fittings
- Electric jack motors, gearboxes, brakes, and wiring
- Control modules, touch pads, sensors, and calibration
- Frame, brackets, landing gear, and hitch-related structure
- Underbody components and ground clearance
- Body, fiberglass, aluminum, paint, and finish work
- Related mechanical and electrical systems
Our technicians document the repair scope, coordinate with major insurance carriers, use appropriate manufacturer information, and provide a written lifetime warranty on qualifying completed repairs. Repair timing depends on access, teardown findings, parts availability, approval requirements, and the scope of structural, mechanical, and finish work. A detailed estimate should explain those variables rather than promise an arbitrary completion date.
For related towing-structure concerns, review our article on RV hitch and coupler repair after a collision. Damage near a hitch, tongue, pin box, landing gear, or rear frame can affect both the coupling system and the leveling equipment.
If you are searching for travel trailer repair near me, distance is only one consideration. Look for a facility that understands how structural, hydraulic, electrical, body, and interior systems interact on an RV.
Official technical resources
The following primary sources provide system-specific information relevant to inspection, repair, bleeding, control diagnosis, sensors, and calibration:
- Lippert Power Gear hydraulic leveling system support library
- Lippert Power Gear electric leveling system support library
- Power Gear leveling and stabilization jack inspection notice
- Power Gear hydraulic leveling oil-bleed procedure
- Power Gear automatic leveling setup and recalibration procedure
- California Department of Insurance information on 10 CCR §2695.8(g)
- California Department of Insurance Fair Claims Settlement Practices Regulations
Use the manual and service information for the exact system installed on the RV. Power Gear, Lippert, coach builders, chassis manufacturers, and trailer manufacturers may use different components and procedures.
Get the leveling system checked before the next trip
A collision-damaged jack or stabilizer can affect more than convenience. It can change how the RV is supported, how the frame carries load while parked, how the system retracts, and whether the coach or trailer maintains safe road clearance.
Do not straighten a bent leg as a shortcut. Do not ignore a slow hydraulic leak. Do not assume a working motor proves that the bracket, wiring, sensor, or frame is sound. Have the system inspected, document the damage for insurance, replace components that cannot be returned to manufacturer-approved condition, bleed hydraulic lines when required, and recalibrate the control system after repairs.
RVCCR’s certified team can inspect the complete vehicle and help explain the repair plan, supplement documentation, parts choices, and final testing. Start with our free RV collision repair estimate and send clear photographs of the RV, VIN, impact area, leveling equipment, and any warning messages.
Repair the jack. Restore the system. Reclaim the road: and get back to the campsite, the open highway, and the adventure ahead with confidence.
Need a repair estimate?
Skip the wait — send us a few photos and our team will get back to you fast.
Start a Photo Estimate →