RV Slide-Out Mechanism and Seal Repair After a Collision: Structural Realignment and Water Intrusion Prevention
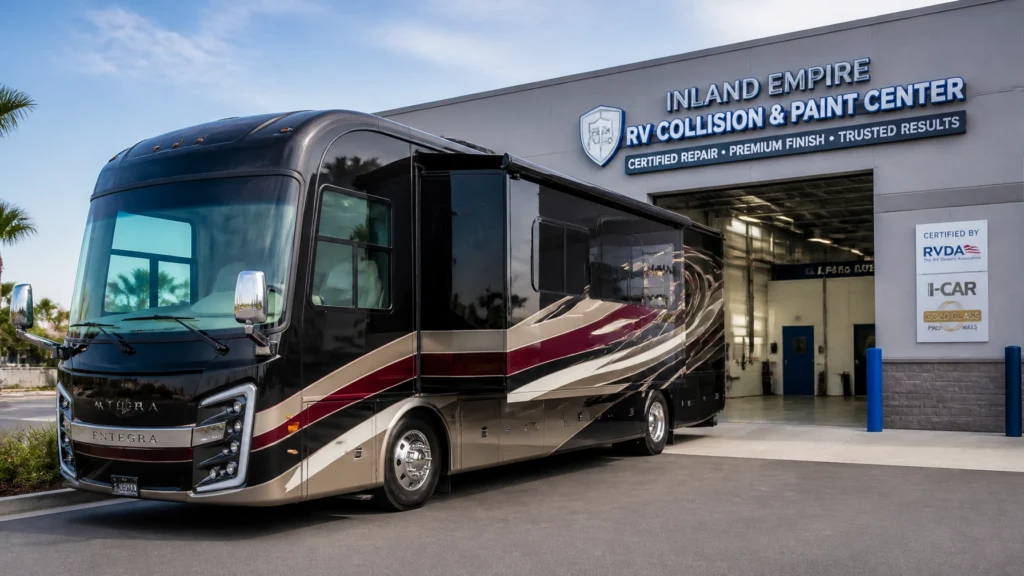
Operating as a family-owned collision and paint repair facility for 21 years across the Inland Empire, our certified technicians at RVCCR have evaluated thousands of motorized and towable recreational vehicles following highway incidents, campground impacts, and structural shifts. When a motorhome, fifth wheel, or travel trailer experiences a collision: even one that appears superficial on the exterior fiberglass sidewall: the underlying kinetic forces frequently transmit directly into the slide-out box, frame mounting brackets, gear tracks, and perimeter sealing systems. Navigating the aftermath of such an impact requires a rigorous understanding of structural engineering, OEM tolerances, precise mechanical realignment, and comprehensive water intrusion prevention…
1. The Anatomy of Slide-Out Impact Damage: Common Failure Patterns
When an RV is involved in a collision, the kinetic energy does not simply dissipate across the main chassis rails; it travels through the aluminum or steel superstructure framing into the rough openings that house slide-out rooms. Because slide-out rooms operate within tight engineering tolerances: often measured in fractions of an inch: any lateral, angular, or vertical distortion of the surrounding wall changes the geometry of the entire assembly.
Side Impacts and Wall Racking
A direct side impact or glancing blow along the perimeter of a motorhome or travel trailer frequently pushes the slide-out rough opening completely out of square. When the surrounding wall framing is forced backward or inward, the rigid box of the slide-out room binds against the deformed opening. This results in severe mechanical binding, fractured interior cabinetry, sheared gear teeth on rack-and-pinion systems, and twisted in-wall vertical tracks on Schwintek mechanisms. Owners attempting to force a bound slide-out in or out often compound the structural trauma, converting a manageable alignment correction into a catastrophic mechanical failure.
Front and Rear Impacts Affecting Mounting Brackets
Front-end collisions and heavy rear-end impacts generate longitudinal chassis flexing. Even though the primary impact occurs miles away from the living quarters, the flexing of the steel frame rails alters the alignment of under-floor slide-out mounting brackets and hydraulic or electric drive arms. When these mounting brackets are shifted by even two degrees, the drive motors apply uneven torque across the slide room. This uneven load causes the slide room to "rack": meaning one side travels faster and farther than the other: ultimately jamming the room halfway through its travel cycle and tearing the exterior rubber seals against the metal flange.
Roof Impacts and Slide-Out Topper Crushing
Overhead collisions involving low-hanging branches, service station overhangs, or parking structure clearances crush slide-out topper awnings, bend aluminum slide roof flanges, and compromise the upper wiper seals. When a slide-out topper roller tube or mounting rail is struck, the impact often tears the awning fabric and bends the upper aluminum drip cap away from the sidewall. Without an intact drip cap and undamaged upper seals, every subsequent rainstorm funnels water directly down the exterior face of the slide-out wall, overwhelming standard perimeter bulb seals and migrating into the subfloor and interior wall cavities.
For a deeper dive into how structural components interact with replacement parts after a major impact, review our guide on oem-parts-vs-aftermarket-which-is-better-for-your-motorhome-collision-repair.
2. The Professional Realignment Process: Restoring Factory Tolerances
Restoring a collision-damaged slide-out room to factory specifications cannot be accomplished through makeshift garage adjustments or temporary bracing. It demands a methodical engineering workflow executed by certified RV technicians using specialized measurement and alignment tools.

Measuring the Slide-Out Room Against the Chassis
The realignment procedure begins with laser-guided measuring equipment to assess the squareness of the rough opening relative to the main chassis frame rails. Technicians measure diagonal corners of both the rough opening and the slide-out box itself. If the diagonal measurements differ by more than one-eighth of an inch, the surrounding aluminum or steel stud framework must be unskinned, straightened, and reinforced with gussets or welded bracing before any mechanical components can be reinstalled.
Inspecting and Adjusting Drive Mechanisms
Depending on the vehicle’s engineering design, the slide-out will utilize one of several primary drive systems:
- Rack-and-Pinion Systems: Driven by gear packs and steel drive bars mounted under the floor. Collision impact often bends the gear rails or strips the hardened steel teeth. Technicians inspect rail parallelism using precision calipers, replacing bent square tubing and aligning gear packs to ensure equal engagement across the entire travel span.
- Schwintek In-Wall Systems: Utilizing synchronized dual motors operating on vertical column tracks attached to the exterior walls. If a side impact distorts the wall, the aluminum extrusions twist. Technicians must remove the motors, inspect the wire harnesses for pinching, realign the vertical wall tracks, and perform a factory electronic resynchronization sequence to re-establish equal motor RPM and timing.
- Hydraulic and Cable-Driven Systems: Found primarily in heavy-duty Class A motorhomes and select fifth wheels. Hydraulic cylinders require pressure testing, stroke measurement, and bracket shimming to ensure symmetrical extension, while cable-driven systems require precise tension adjustments on all four corner cables to prevent the room from cocking sideways during operation.
When structural repairs and insurance claims intersect in complex ways, understanding the broader regional restoration timeline is essential, as detailed in our analysis of travel-trailer-collision-repair-2026-navigating-the-inland-empire-insurance-and-restoration-process.
3. Water Intrusion Risks: Protecting the Envelope After Collision Damage
Water intrusion is the most insidious consequence of RV slide-out collision damage. Because an RV operates as a mobile home subjected to highway speeds, wind-driven rain, and thermal expansion, the perimeter seals surrounding a slide-out room act as the sole defense against moisture infiltration.
Pinched Wiper Seals and Torn Bulb Seals
When a slide-out room is pushed out of alignment by a collision, the rigid metal flange no longer exerts uniform pressure against the perimeter rubber seals. On the side of the impact, the slide room compresses the wiper seal violently, tearing the flexible rubber lip and crushing the internal hollow core of the bulb seal. On the opposite side, a wide gap opens up between the wall and the seal. During transit or rainstorms, wind-driven water bypasses the compromised wiper seal and pools directly onto the slide-out subfloor.

The Step-by-Step Seal Replacement Protocol
Restoring weather-tight integrity following a collision requires complete removal of damaged sealing systems:
- Trim and Flange Removal: Exterior aluminum trim, drip rails, and corner moldings surrounding the slide-out opening are carefully unfastened and removed.
- Old Seal Extraction: Damaged wiper seals and bulb gaskets are pulled from their aluminum extrusion channels, and residual butyl tape or urethane adhesive is scraped clean from the mounting surfaces.
- Substrate Inspection: Technicians inspect the exposed wooden or aluminum framing beneath the seals for moisture saturation, rot, or corrosion. Any compromised substrate is treated or replaced.
- OEM Seal Installation: New, factory-certified wiper seals and bulb gaskets matching the exact durometer and profile of the original manufacturer specifications are pressed into place.
- Resealing and Caulking: Exterior joints, corner miters, and fastener heads are sealed with high-grade, UV-resistant RV sealants, ensuring a continuous moisture barrier.
For insights into how professional sealing techniques protect structural integrity across other critical areas of the coach, consult our specialized guide on rv-roof-replacement-matters-why-a-professional-seal-is-better-than-a-diy-patch.
4. Repair Versus Replacement: Evaluating Slide-Out Walls and Mechanisms
When insurance adjusters and collision technicians evaluate a damaged slide-out, the central economic and structural question is whether to repair the existing components or execute a complete replacement of the slide room assembly.
Minor to Moderate Repair Scenarios
If the collision damage is confined to bent gear tracks, sheared motor pins, minor scuffs on the exterior fiberglass skin, or torn wiper seals, a targeted repair is the most efficient and cost-effective path. Technicians straighten or replace the affected drive components, install fresh perimeter seals, recalibrate motor synchronizations, and perform localized fiberglass refinishing at our certified rv paint and body shop.
Major Reconstruction and Full Replacement Scenarios
When high-speed collisions or heavy rollovers crush the slide-out sidewall framing, delaminate the exterior fiberglass composite panels, or warp the primary floor joists beyond straightening tolerances, component repair is no longer viable. In these instances, a complete slide-out box replacement or major structural rebuild is mandatory. This involves unbolting the slide room from its chassis mounts, lifting the damaged box out of the coach using overhead gantry cranes, constructing or ordering a factory-spec replacement room shell, transferring interior cabinetry and wiring harnesses, and reinstalling the entire assembly with laser alignment verification.
Understanding why certain comprehensive structural repairs require meticulous diagnostic phases and specialized parts ordering can help clarify shop turnaround times, as outlined in our overview on why-your-motorhome-repair-is-taking-so-long-and-how-to-fix-it.
5. Cost Expectations and Insurance Supplement Realities
Financial transparency is essential when navigating collision repairs for motorhomes and travel trailers. Slide-out damage frequently involves hidden mechanical complexities that standard initial insurance estimates overlook.
Common Cost Ranges for Slide-Out Restoration
- Perimeter Seal Replacement & Resealing: Typically ranges from $300 to $1,000 per slide room, depending on the linear footage, trim complexity, and whether underlying substrate repair is required.
- Mechanism Repair & Realignment: Ranges from $1,500 to $4,000, accounting for labor hours required to drop under-floor gear assemblies, replace bent drive rails, install new motors, and recalibrate electronic control modules.
- Full Slide-Out Box Replacement & Structural Rebuilding: Ranges from $5,000 to $12,000+ for large hydraulic or multi-room luxury Class A motorhomes, factoring in custom fiberglass wall fabrication, interior cabinetry restoration, and complete system integration.
Why Insurance Supplements Are Common
Initial insurance adjuster estimates written immediately after a collision almost invariably miss internal mechanical and structural damage. An adjuster viewing an RV from the exterior may note a scraped sidewall trim piece and allocate funds for basic cosmetic paint work. However, once the slide-out room is retracted in our shop, technicians frequently discover bent drive shafts, cracked gear boxes, internal electrical harness chafing, and water-saturated subfloor insulation.
At RVCCR, our certified estimators work directly with all major insurance providers, documenting every hidden structural defect, mechanical misalignment, and compromised seal through comprehensive photographic evidence and OEM service manual standards. We file precise insurance supplements to ensure that your motorhome collision repair covers 100% of the restoration required to bring your vehicle back to factory safety specifications.
6. Preventive Maintenance and Long-Term Care After Collision Restoration
Once your RV has been fully restored by our expert team, adopting a proactive maintenance routine ensures that your slide-out mechanisms and perimeter seals remain reliable for years of future travel.

Quarterly Mechanical and Seal Care
- Seal Conditioning: Clean rubber wiper and bulb seals quarterly with mild soap and water, followed by an application of a dedicated RV rubber protectant (such as 303 Aerospace Protectant). Never use petroleum-based lubricants or WD-40, as they degrade rubber compounds and attract road grime.
- Track and Gear Lubrication: For rack-and-pinion systems, apply a dry Teflon-based lubricant to the gear tracks. Avoid heavy greases that trap dust and sand, which can jam the gear teeth.
- Battery Health Monitoring: Electric slide motors are highly sensitive to low voltage. Ensure your coach house batteries maintain a healthy resting voltage above 12.6 volts to prevent motor stalling and erratic synchronization during operation.
Monthly Functional Inspections
Operate your slide-outs fully in and out on a monthly basis, even when stored, to keep mechanisms moving freely and prevent bearing seizure. Listen closely for unusual grinding noises, uneven movement, or binding. Catching a minor alignment shift early prevents catastrophic roadside jams and costly structural failures.
Conclusion
A collision involving your motorhome, fifth wheel, or travel trailer can disrupt your travel plans and create immediate anxiety regarding structural safety and water damage. However, you do not have to navigate the complexities of insurance claims, mechanical realignment, and professional seal restoration alone. Backed by 21 years of family-owned excellence, certified technical expertise across major manufacturers, and a comprehensive written lifetime warranty, our team at RVCCR is equipped to restore your vehicle to immaculate factory specifications.
Protect your investment, eliminate the risk of hidden water intrusion, and reclaim your peace of mind. Contact RVCCR today to schedule your free collision estimate, let our certified specialists handle your insurance supplement from start to finish, and get back on the open road toward your next unforgettable adventure!
Need a repair estimate?
Skip the wait — send us a few photos and our team will get back to you fast.
Start a Photo Estimate →