RV Winterization After a Collision: Protecting a Repaired RV Before It Goes Into Storage
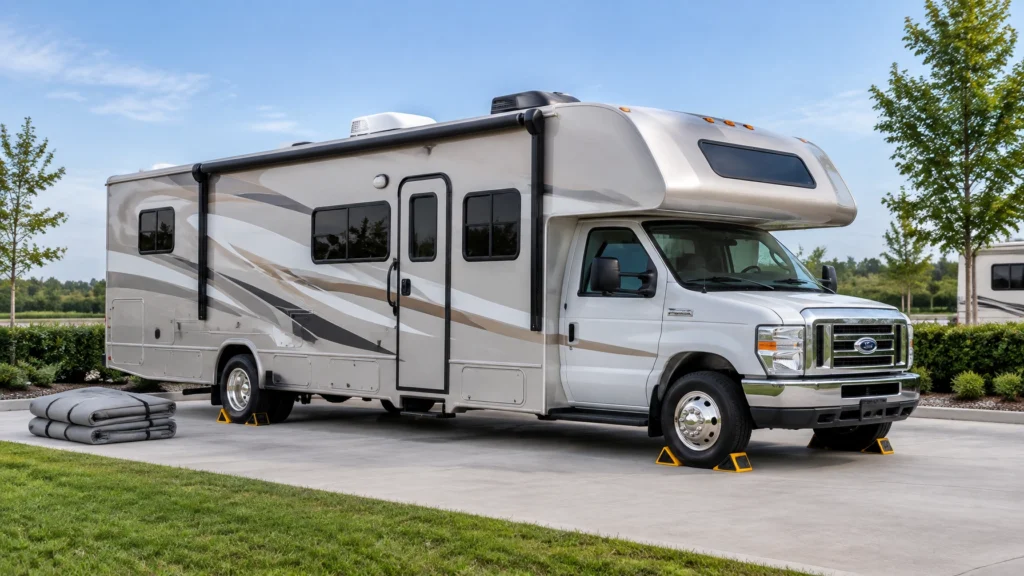
RVCCR is an RVDA-certified repair facility with 21 years of family-owned experience serving Redlands and the Inland Empire. Our team handles RV collision repair, motorhome collision repair, paint, structural restoration, and mechanical work under one roof, coordinating with major insurance carriers and supporting repairs with a written lifetime warranty.
Winterizing an RV after a collision is more involved than draining a few tanks before parking it. A collision can affect plumbing lines, water-heater connections, furnace compartments, propane routing, battery cables, roof seals, storage compartments, and interior cabinetry: even when the visible body damage has already been repaired. If the RV will sit for weeks or months, those systems should be inspected before winterization begins…
The correct order is important: confirm that the collision-related repairs are complete, inspect the water and heating systems, document any remaining concerns, and then winterize the RV according to the manufacturer’s instructions. That approach helps protect the repaired vehicle, reduces the chance of freeze-related damage, and creates a clearer record if an insurance supplement or warranty question develops later.
Why Winterization Matters After RV Collision Repair
RV plumbing systems contain multiple components that can retain water:
- Fresh-water tanks
- Water lines
- Low-point drains
- Water-heater tanks
- Exterior showers
- Toilet supply valves
- Faucets and shower diverters
- Water filters
- Washing-machine connections
- Sink and shower P-traps
- Black- and gray-water holding tanks
When an RV sits in cold conditions, trapped water can freeze and expand. That expansion may damage fittings, valves, tanks, and plumbing connections. Winterization reduces that risk by draining water, bypassing the water heater, removing water from the lines, and protecting traps and seals with RV-approved antifreeze where appropriate.
After a collision, the concern is not only cold weather. Impact forces can shift or damage plumbing components before the vehicle enters storage. A line may be kinked behind a cabinet. A fitting may have been stressed near a repaired wall. A water-heater connection may have been removed and reinstalled. A furnace vent may have been disturbed while body panels or cabinetry were repaired.
That is why winterization should not be used to conceal an unresolved problem. If a fitting leaks during the process, stop, document it, and have the system evaluated. A repaired RV should enter storage with known issues addressed: not with a water leak, damaged furnace compartment, or compromised seal waiting to become a larger claim.
For a broader look at hidden systems that can be affected by an accident, review our article on RV collision repair in the Inland Empire.
Start With the Repair Record and Collision Area
Before connecting an air compressor or introducing antifreeze, review the repair order. Ask which areas were repaired, removed, disconnected, or accessed during the collision restoration.
The relevant areas may include:
- Exterior walls and corner moldings
- Roof edges and cap transitions
- Water-heater access panels
- Furnace intake and exhaust areas
- Propane compartments and lines
- Fresh-water and waste plumbing
- Cabinets and interior wall sections
- Battery compartments
- Generator compartments
- Underbody panels and protective coverings
- Slide-out rooms and seals
The repair record may not list every component in the RV’s living systems, particularly if the original damage appeared cosmetic. A collision can transmit force beyond the first visible impact point. A damaged rear corner, for example, may affect a nearby water line, underbelly panel, holding-tank support, or furnace duct.
Take photographs before winterization begins. Photograph the repaired exterior, roof transitions, service compartments, water-heater area, furnace vent, battery compartment, and any visible plumbing connections. These images create a dated record of the RV’s condition before storage.
If the RV is part of an open insurance claim, send relevant photos and concerns to both the repair facility and the adjuster before performing additional work. Do not assume that a newly discovered leak is automatically covered or automatically excluded. Coverage depends on the policy, the cause of the damage, the repair history, and the insurer’s evaluation.
What a Repair Facility Should Check Before Returning the RV
A collision repair facility preparing an RV for winter storage should evaluate more than paint quality and panel alignment. The final inspection should consider the systems that could have been affected by the collision or by the repair process.
1. Water lines and fittings
The technician should inspect accessible hot- and cold-water lines for:
- Cracks
- Kinks
- Abrasion
- Loose fittings
- Improper routing
- Pinching behind panels
- Stress near repaired structures
- Signs of prior leakage
The inspection should include the area around the original damage and any location where cabinetry, wall panels, appliances, or exterior compartments were removed.
2. Fresh-water tank and supports
The fresh-water tank should be checked for visible damage, movement, cracked fittings, and secure support. A tank that shifted during a collision may place stress on its inlet, outlet, vent, or drain connections.
3. Water heater
The water heater should be inspected for damage to the tank, housing, access door, fittings, drain plug, pressure-relief valve, bypass plumbing, and mounting structure. If the unit was impacted or removed during repairs, the shop should confirm that it is correctly reinstalled before winterization.
Tankless water heaters may have different winterization requirements. Owners should follow the specific vehicle and appliance manual rather than applying a generic tank-style procedure.
4. Furnace and exhaust

The furnace itself does not receive antifreeze through the plumbing system, but its housing, intake, exhaust, wiring, and nearby ductwork still deserve inspection.
The technician should look for:
- A bent or blocked exhaust vent
- Damage to the intake opening
- Loose mounting hardware
- Crushed or displaced ductwork
- Damaged wiring
- Bodywork interfering with the vent
- Evidence of impact near propane components
If the collision affected the furnace or propane area, have the system inspected by a qualified RV or propane technician before relying on the furnace. Do not operate a furnace with a blocked exhaust or intake. Carbon monoxide and combustion safety are separate from winterization and should be treated as life-safety issues.
5. Roof and exterior seals
Collision damage can disturb roof-to-wall transitions, cap seams, marker lights, clearance lights, vents, windows, and exterior service doors. A professional should inspect repaired seals for gaps, lifting edges, incomplete adhesion, and incompatible materials.
If the collision involved the roof, front cap, rear cap, or upper sidewall, our article on professional RV roof replacement and sealing explains why a surface patch may not address hidden deck or framing damage.
6. Batteries and electrical connections
The battery compartment should be checked for damaged trays, loose hold-downs, cracked cases, corroded terminals, pinched cables, and damaged disconnect switches. A collision may disturb the battery area even if the electrical system appears to work.
Before storage, follow the RV manufacturer’s and battery manufacturer’s instructions for:
- Disconnecting or isolating the battery
- Maintaining charge
- Using a compatible maintenance charger
- Checking fluid levels on serviceable batteries
- Protecting terminals
- Ventilating the battery compartment
- Storing lithium batteries within the manufacturer’s temperature and charge guidance
Do not improvise a charging setup or place a battery in an unventilated interior area. The correct procedure depends on battery chemistry, vehicle design, storage temperature, and the installed charging system.
7. Underbody and holding tanks
Inspect underbody coverings, tank supports, drain valves, sewer connections, and protective panels. A collision may crack or dislodge an underbelly barrier, leaving plumbing exposed to road debris and temperature changes.
The Correct Winterization Sequence
Keystone RV’s official winterization guidance identifies two common methods: compressed air and RV-approved antifreeze. Both methods begin with draining the system. The exact procedure varies by RV model, floor plan, appliance package, and water-heater design, so the owner’s manual should control when it differs from a general checklist.
The following sequence is a practical framework for a repaired RV.
Step 1: Turn off utilities and let the water heater cool
Turn off the water heater in both gas and electric modes. If the heater has been operating, allow it to cool completely before opening the drain plug or pressure-relief valve.
Never remove a water-heater drain plug while the tank is hot or pressurized.
Turn off the water pump and disconnect city water. If the RV is connected to shore power, follow the manufacturer’s instructions for the water heater and battery system before disconnecting or switching modes.
Step 2: Drain the water heater
Open the water-heater access area and follow the appliance manufacturer’s instructions. Remove the drain plug or anode rod if applicable, and open the pressure-relief valve to allow air into the tank.
Inspect the drain opening and surrounding area for:
- Damaged threads
- Cracked fittings
- Corrosion
- Water stains
- A distorted access panel
- Evidence that the heater shifted during the collision
Leave the tank drained. Do not send RV antifreeze into the water-heater tank. Use the bypass system so antifreeze does not fill the heater.
Step 3: Open low-point drains
Locate the hot- and cold-water low-point drains. Open them and allow the lines to drain. Depending on the RV design, additional drain points may be present.
Because the RV was involved in a collision, watch the area beneath the unit while water drains. A drip in an unexpected location may indicate a cracked line, loose fitting, or damaged underbody component.
Step 4: Drain the fresh-water tank
Open the fresh-water tank drain valve or remove the applicable drain cap. Allow the tank to empty fully.
Do not assume that the tank is empty simply because water stops flowing from one fixture. The tank, pump inlet, drain line, and low-point plumbing can retain water in different locations.
Step 5: Open every fixture
Open hot and cold sides of the following fixtures, as equipped:
- Kitchen faucet
- Bathroom faucet
- Shower
- Exterior shower
- Toilet flush valve
- Washing-machine connections
- Any additional sink or appliance connection
Opening fixtures allows air to enter and helps the system drain. Check the repaired areas while each branch is open. If a line begins leaking under normal pump pressure, stop the process and arrange for inspection.
Step 6: Drain the waste tanks
Empty the black and gray tanks at an approved dump station. Flush and clean the black tank according to the RV manufacturer’s instructions.
The holding tanks are separate from the potable-water system, but leaving waste or liquid in them during storage can create odor, sanitation, and valve problems. Inspect the termination valves and sewer connection for impact damage, especially if the collision occurred near the rear or underside of the RV.
Choosing Between Compressed Air and RV Antifreeze
Keystone provides both compressed-air and antifreeze procedures. Neither method should be selected solely because it seems faster. The better choice depends on the RV design, the owner’s experience, the condition of the system, and the repair history.
Compressed-air method
Keystone’s compressed-air guidance specifies using an appropriate blowout adapter and limiting pressure to no more than 30 PSI. The air should be introduced through the city-water connection, not directly into an unapproved opening.
The general sequence is:
- Drain the water heater, fresh-water tank, and low-point lines.
- Remove or bypass the water filter as required.
- Set the water-heater bypass.
- Connect the blowout adapter.
- Use no more than the manufacturer-specified air pressure.
- Open one fixture at a time.
- Clear hot and cold branches.
- Include the toilet, shower diverter, outside shower, and washer connections if equipped.
- Disconnect the compressor.
- Add RV antifreeze to drains and P-traps.
Compressed air can leave moisture behind if the process is incomplete. It also requires careful pressure control. After collision repair, use additional caution because a weakened or improperly supported fitting may not tolerate unnecessary pressure.
RV-antifreeze method
Keystone’s antifreeze procedure calls for non-toxic RV or marine antifreeze: not automotive antifreeze. Automotive antifreeze is poisonous and is not intended for a potable-water system.
The general process is:
- Drain the water heater and fresh-water tank.
- Open low-point drains and fixtures.
- Remove or bypass the water filter as directed.
- Place the water heater in bypass mode.
- Connect the pump’s winterizing pickup tube or approved bypass hose.
- Place the hose in an RV-approved antifreeze container.
- Turn on the water pump.
- Open each cold-water fixture until pink antifreeze appears.
- Repeat on the hot-water side.
- Flush the toilet until antifreeze reaches the valve and bowl.
- Protect each P-trap and drain.
- Follow the appliance manufacturer’s instructions for washers, ice makers, and specialized fixtures.
The amount of antifreeze required varies by RV. Keystone’s guidance lists approximately four to six gallons for some antifreeze procedures, but owners should use the quantity specified for their model and plumbing layout.
Do not mix up potable plumbing and appliances
Some components require special treatment:
- Water heater: Drain and bypass; do not fill the tank with antifreeze.
- Tankless water heater: Follow its specific manual.
- Residential refrigerator ice maker: Follow the refrigerator manufacturer’s instructions; do not automatically pump antifreeze into the ice-maker line.
- Water filter: Remove or bypass the cartridge as directed.
- Washer: Use the washer and RV manufacturer’s winterization directions.
- Toilet: Protect the valve and seal with RV-approved antifreeze as specified.
- P-traps: Add RV-approved antifreeze to each drain trap.
If the plumbing was repaired after the collision, the facility should observe the system during antifreeze introduction. A pink solution appearing at a faucet does not prove that every hidden connection is sound.
Protecting Batteries and Covering Vents During Storage
Winterization is not complete when the plumbing is protected. An RV that sits unused needs a storage plan for its batteries, vents, seals, tires, and interior.
Battery protection
The correct battery procedure depends on the battery type and installed equipment. A repair facility should:
- Confirm that battery cables are routed and secured
- Check for collision-related damage to the tray or hold-down
- Inspect terminals and disconnect switches
- Identify whether the RV uses lead-acid, AGM, lithium, or another battery type
- Follow the battery manufacturer’s storage instructions
- Explain whether the batteries should be disconnected, removed, or maintained with a compatible charger
Do not leave a damaged battery connected simply because the lights still work. A collision-related case crack, loose terminal, or damaged cable should be addressed before storage.
Furnace and appliance vents
Exterior vents should remain clear and protected from pests, but they should not be sealed in a way that blocks required airflow. Cover or screen vents only with manufacturer-approved products and remove protective covers before operating appliances.
Pay attention to:
- Furnace exhaust and intake
- Refrigerator ventilation
- Water-heater combustion vent
- Dryer vent
- Plumbing vent caps
- Roof vents and skylights
- Generator exhaust
A breathable storage cover may help protect the exterior, but it should be appropriate for the RV and installed according to its instructions. Do not use an impermeable cover that traps moisture against repaired surfaces.
Insurance Relevance: Document the Condition Before Storage
American Family’s official RV insurance information describes coverage options that can include collision, comprehensive, personal property, and customization coverage, subject to the policy terms. Allstate’s official RV information similarly describes collision and comprehensive options, along with RV-specific coverage choices, with availability depending on the policy and location.
Those general descriptions do not determine whether a particular post-repair leak, freeze loss, or plumbing failure is covered. The cause of the damage matters.
For example:
- Damage caused directly by the original collision may be evaluated under collision coverage if that coverage applies.
- Damage caused by an incomplete or improper repair may raise a warranty or repair-facility issue.
- Freeze damage after an owner skipped required winterization may be evaluated differently from a concealed collision-related crack.
- A roof leak that existed before the collision may be treated differently from a roof seal damaged by impact.
- Personal property inside the RV may be subject to separate limits, exclusions, and documentation requirements.
If you discover a problem during winterization, document:
- The date and time
- The RV’s location
- The affected system
- Photos and video
- Whether the leak occurred under pump pressure or city-water pressure
- Which fixture or line was open
- The repair order
- Prior photographs
- The winterization steps completed
Notify the repair facility and the insurer before disassembling the area further. Ask whether the issue should be inspected as a supplement, warranty concern, or separate loss. Avoid making assumptions about coverage or admitting fault before the facts are evaluated.
California RV owners who need help with an insurance complaint can review the California Department of Insurance consumer assistance and complaint resources. The department provides consumer information and complaint channels, but it does not replace the policy, adjuster, repair documentation, or professional legal advice.
For travel trailers, the insurance process can involve different policies for the tow vehicle and trailer. Our guide to travel trailer collision repair and the Inland Empire insurance process explains why proper documentation and teardown findings matter.
A Final Pre-Storage Checklist
Before leaving a repaired RV in storage, confirm the following:
Collision and repair documentation
- The repair order identifies the work performed.
- Collision-related plumbing, heating, roof, and electrical areas were inspected.
- Remaining concerns were documented and communicated.
- Photographs were taken before winterization.
- Insurance supplements or warranty questions were reported promptly.
Water system
- Water heater is off and cool.
- Water heater is drained.
- Water-heater bypass is set correctly.
- Fresh-water tank is empty.
- Low-point drains were opened.
- Faucets and outside shower were drained.
- Black and gray tanks were emptied.
- Water filter was removed or bypassed.
- RV-approved antifreeze was used where required.
- P-traps and toilet seals were protected.
- No active leaks were left unresolved.
Furnace and propane
- Furnace housing was inspected.
- Intake and exhaust vents are unobstructed.
- Propane components near the collision area were evaluated.
- The furnace was not operated if the combustion or exhaust system is questionable.
- A qualified technician was involved when required.
Electrical and storage
- Battery type and storage method were confirmed.
- Battery cables, tray, terminals, and disconnect were inspected.
- Roof vents and appliance vents are protected without blocking airflow.
- Exterior openings are secured against pests.
- A suitable breathable RV cover is used if appropriate.
- Tires and support points are checked according to the owner’s storage plan.
- The storage location is stable and reasonably protected from standing water.
Give Your Repaired RV a Better Start to the Next Season
Winterization after a collision repair is not busywork. It is the final part of protecting the restoration. A repaired water line can still leak. A displaced furnace vent can still create a safety concern. A disturbed roof seal can still admit water. A battery compartment can still hide impact damage. Those issues are easier to address before the RV goes into storage than after months of sitting.
RVCCR combines RV collision repair, motorhome collision repair, paint, structural work, and mechanical service in one facility in Redlands. Our certified team works with major insurance carriers, documents the repair process, and helps owners understand what their RV needs before it returns to the road.
If your RV was recently repaired and you are preparing it for storage, request a free photo estimate from RVCCR. Send photos of the collision area, repaired panels, roof transitions, water-heater compartment, furnace vent, and any leak or storage concern. We will help identify the next practical step.
Protect the plumbing. Verify the heating system. Document the repair. Winterize with confidence: and get your RV ready to leave storage for the next trip, the next campsite, and the next adventure.
Sources
- Keystone RV: How to Winterize Your RV the Right Way
- Keystone RV: How to Winterize Your RV with Antifreeze
- Keystone RV: How to Winterize Your RV Plumbing System with Compressed Air
- American Family Insurance: RV Insurance
- American Family Insurance: RV Coverages
- Allstate: RV Insurance
- Allstate: RV Coverage Policies
- California Department of Insurance: Getting Help
Need a repair estimate?
Skip the wait — send us a few photos and our team will get back to you fast.
Start a Photo Estimate →