Tesla Crash Checklist: What Inland Empire Owners Should Do Before the Adjuster Arrives
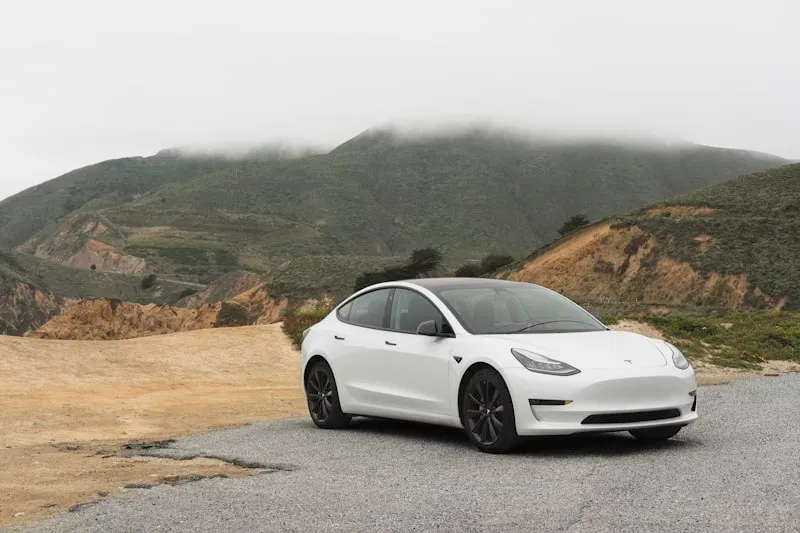
Operating a modern electric vehicle across the Inland Empire: from the bustling corridors of Interstate 10 through Redlands, San Bernardino, Riverside, and Ontario: demands an acute awareness of both road conditions and vehicle technology. When an unexpected collision occurs on these high-traffic arteries, the minutes and hours immediately following the impact dictate not only your physical safety but also the trajectory of your insurance claim and the structural integrity of your vehicle. Tesla vehicles, engineered with advanced aluminum-intensive unibody structures, high-voltage lithium-ion battery packs, and intricate Advanced Driver Assistance Systems (ADAS) sensor suites, do not tolerate conventional collision repair shortcuts. For vehicle owners navigating the stressful aftermath of a crash, knowing precisely what actions to take: and what critical mistakes to avoid: before an insurance adjuster evaluates the vehicle is the single most effective way to protect your investment, your safety warranty, and your peace of mind…
At RVCCR, operating as a family-owned collision, paint, and mechanical repair authority with 21 years of dedicated service in the Inland Empire, our certified technicians see firsthand the complications that arise when vehicle owners rely on guesswork or unverified insurance shop networks after an accident. As a certified collision repair facility holding direct OEM credentials from Tesla, Rivian, Ford, Honda, Mazda, and Subaru, our mission is to restore every vehicle strictly to factory specifications using genuine OEM parts and specialized diagnostic equipment. When an insurance adjuster schedules their preliminary inspection, you should never walk into that meeting unprepared. This comprehensive pre-collision and post-incident checklist outlines the exact protocols every Tesla owner in the Inland Empire must follow before the adjuster arrives.
Phase 1: At the Scene : Immediate Safety, Triage, and Data Preservation
The moments immediately following a collision are chaotic, but disciplined action at the scene protects both your legal standing and your vehicle’s electronic data logs.
1. Prioritize Safety and Assess Structural Hazards
Before examining sheet metal or glass, verify that all occupants are safe and emergency services have been notified if injuries are present. Once personal safety is assured, evaluate the vehicle's immediate condition. If the collision involved significant front, rear, or undercarriage impact, do not attempt to drive the vehicle. Tesla battery packs are integrated directly into the floor structure of the vehicle. Structural compromise in these zones demands professional flatbed transportation rather than roadside rolling.
Turn on your hazard lights immediately to warn oncoming Inland Empire traffic and mitigate the risk of secondary collisions. Visually inspect for deployed airbags, severe wheel misalignment, fluid leaks (such as coolant from the thermal management system or brake fluid), or unusual acrid odors resembling sweet chemical burning, which can indicate thermal activity within the high-voltage battery enclosure.
2. Preserve Tesla Sentry Mode and Dashcam Footage
Unlike traditional internal combustion vehicles that rely solely on external witness accounts, modern Teslas act as mobile data vaults. Your vehicle continuously records surroundings via Tesla Dashcam and Sentry Mode.
- Do not leave the scene without saving your footage.
- As soon as it is safe to do so, remove the USB flash drive or formatted solid-state drive from the glovebox, or save the recent clip history directly from the touchscreen controls.
- Insurance adjusters and liability investigators frequently request this unedited digital evidence. Preserving these files immediately prevents automatic overwriting during subsequent vehicle towing and storage cycles.
3. Capture Comprehensive Photographic Evidence
Take clear, high-resolution photographs of the entire accident scene before vehicles are moved, provided traffic safety permits. Document:
- Wide-angle environmental shots showing road conditions, traffic control signals, skid marks, and weather factors.
- Close-up and medium shots of all damaged areas on your Tesla, capturing multi-angle perspectives of panel deformation, bumper reinforcement zones, and wheel damage.
- The license plates, insurance documents, and contact information of all other parties involved.

Phase 2: Interfacing with Your Insurance Provider Before the Adjuster’s Visit
Once the vehicle is secured and the immediate emergency response is concluded, your next priority is establishing contact with your insurance carrier. How you frame this initial conversation determines whether your claim is routed to a certified facility or pushed toward a preferred-shop network that may utilize non-OEM parts or substandard repair procedures.
1. File the Claim Promptly and Secure Your Claim Number
Contact your insurance provider to report the incident. Provide the precise time, geographic location, police report number (if local law enforcement responded), and reference your saved Sentry Cam footage. Insist on receiving a formal Claim Number and the direct contact information for the assigned field or desk adjuster. You will need these details for every interaction with your chosen collision repair facility.
2. Exercise Your Right to Choose a Certified Repair Facility
Under California insurance regulations, vehicle owners maintain the legal right to select their own repair shop. Insurance companies frequently steer policyholders toward Direct Repair Program (DRP) shops that agree to lower labor rates and utilize aftermarket or recycled parts.
- Explicitly inform your adjuster: "My vehicle is a Tesla, and it requires specialized structural aluminum welding, HV safety isolation, and factory-certified calibration. I am having the vehicle towed to a Tesla Certified Collision Center."
- Never accept an insurance company’s assertion that you must use their network shop. Your safety warranty and vehicle resale value depend entirely on adhering to official Tesla repair guidelines.
3. Set Clear Expectations Regarding the Adjuster’s Inspection
Clarify with your adjuster whether they intend to inspect the vehicle at a storage tow yard, your residence, or directly at your chosen repair facility. Whenever possible, demand that the adjuster’s physical inspection take place at the certified body shop. Initial drive-by estimates performed in tow yards or parking lots invariably miss hidden structural damage, internal wiring harness shears, and high-voltage isolation faults that only become visible during a complete teardown on a professional lift.
Phase 3: What NOT to Touch on Your Tesla Before the Inspection
In the age of software-defined vehicles, well-meaning owners often commit critical errors by trying to "fix" or reset vehicle settings after a minor bump. Touching the wrong controls can corrupt vital diagnostic data or create severe safety hazards.
1. Do Not Reset the Touchscreen or Perform Hard Reboots
If warning lights illuminate on your center display, resist the urge to perform a steering-wheel-button reboot or disconnect the 12-volt auxiliary battery to clear error codes. These system logs are essential digital fingerprints for the repair facility and insurance adjuster. Clearing fault codes erases historical freeze-frame data that records sensor status, impact speed, and electronic control unit (ECU) responses at the exact millisecond of the crash.
2. Leave Sentry Mode Enabled (Until Drop-Off)
Keep Sentry Mode active while the vehicle sits in a secure tow yard or driveway, as it deters catalytic converter theft, vandalism, or tampering while waiting for transport. However, once the vehicle arrives at a secure indoor repair facility like RVCCR, the shop will coordinate disabling Sentry Mode to prevent unnecessary 12-volt battery drain during diagnostic testing.
3. Never Attempt to Charge a Damaged Vehicle
If your Tesla sustained any impact along the lower rocker panels, floor pan, or rear motor/battery enclosure zones, do not plug the vehicle into a Supercharger or a home wall connector. Internal damage to high-voltage bus bars, coolant jackets, or cell modules can create short-circuit risks. Always verify HV system isolation before introducing electrical current. Our technicians utilize rigorous Tesla EV safety protocols to test insulation resistance before any vehicle enters our active repair bays.

Phase 4: Preparing Your Vehicle for the Shop and Adjuster Inspection
Before the adjuster arrives to review the damage or before your vehicle is subjected to teardown, performing a few targeted preparation steps ensures a smooth, transparent evaluation process.
1. Optimize Battery State of Charge (SOC)
Ensure your Tesla’s high-voltage battery state of charge is maintained between 50% and 70% if the vehicle is still drivable, or ensure it is towed with sufficient charge remaining. Technicians and adjusters require active low-voltage and high-voltage power systems to cycle doors, adjust seats, run diagnostic scans, and power the main touchscreen during the estimation process. A depleted battery halts diagnostic progress immediately.
2. Secure Personal Items and Tidy the Frunk and Trunk
Remove valuable personal items, aftermarket accessories, and loose cargo from the interior, glovebox, frunk, and rear trunk. Insurance adjusters and body shop estimators need unobstructed physical access to interior trim panels, floor anchor points, strut towers, and structural gussets. Cluttered cargo areas delay structural inspection and obscure potential intrusion damage.
3. Document Pre-Existing vs. New Damage
Before the adjuster inspects the vehicle, take a complete 360-degree video walkaround. Document existing rock chips, minor parking lot scuffs, or wheel curb rash that predated the collision. Insurance adjusters occasionally attempt to conflate pre-existing cosmetic wear with accident-related damage. Having a timestamped video or photo log protects you from arbitrary estimate deductions.
Phase 5: The Initial Shop Assessment and Structural Blueprinting
When your Tesla arrives at a certified facility, the process transitions from initial insurance triage to rigorous technical assessment. Understanding what happens during this phase helps you evaluate whether your adjuster’s preliminary estimate matches reality.
1. High-Voltage Disconnect and Personal Protection Verification
Before a single bumper cover or fender bolt is removed, certified technicians execute Tesla’s mandatory High-Voltage (HV) First Responder and Shop Disconnect procedures. This involves shutting down the high-voltage interlock loop (HVIL), disconnecting the 12V negative terminal, and testing insulation resistance with calibrated multimeters to ensure zero electrical potential before structural work begins.
2. Pre-Repair Diagnostic Scanning
Modern Teslas rely on dozens of interconnected electronic control modules, ultrasonic sensors, forward-facing cameras, radar units, and structural bus networks. A pre-repair diagnostic scan reads all module health codes, identifying hidden faults in the restraint control module (RCM), pedestrian warning speakers, thermal management loops, and Autopilot hardware. Insurance initial estimates rarely account for these electronic scans until the certified shop submits formal diagnostic readouts.

3. Structural Blueprinting and Measuring
Unlike traditional steel-frame vehicles that can be straightened with brute hydraulic force, Tesla unibodies incorporate high-strength boron steel reinforcements, structural adhesives, and complex aluminum castings (such as the massive front and rear mega-castings utilized in Model Y and Model 3 production). These components are engineered for single-use energy absorption; they cannot be heated, straightened, or patched.
During structural blueprinting, technicians mount the vehicle on precision measuring benches to compare three-dimensional spatial coordinates against factory CAD tolerances. If structural deformation exceeds Tesla's strict thresholds, designated components must be sectioned and replaced using aerospace-grade rivet-bonding and MIG/MIG-pulse welding techniques specified by the manufacturer. You can request a formal estimate consultation with our team to review these exact structural findings alongside your insurance paperwork.
Phase 6: What Documentation to Demand From Your Shop and Adjuster
Transparency is the hallmark of a certified collision center. Do not settle for vague, hand-written repair summaries. Before approving final repair authorization, ensure you receive and retain the following documentation:
- Pre-Repair Diagnostic Scan Report: Verifies all electronic module statuses before teardown.
- Structural Measuring Sheet: Certified printout confirming frame and suspension mounting point accuracy against factory specifications.
- OEM Parts Invoice Breakdown: Itemized documentation proving that 100% of replacement structural components, fasteners, clips, and glass are genuine Tesla OEM parts rather than salvaged or aftermarket replicas.
- Post-Repair Calibration Certificates: Written verification that all ADAS cameras, ultrasonic sensors, and radar units have been dynamically and statically calibrated on specialized optical targets in accordance with Tesla service requirements.
- Written Lifetime Warranty: Comprehensive guarantee covering both workmanship and paint refinishing for as long as you own the vehicle.
Conclusion: Partnering with RVCCR for Seamless Inland Empire Restoration
Navigating the aftermath of a Tesla collision across Redlands and the wider Inland Empire does not have to be an overwhelming ordeal. By maintaining composure at the scene, preserving your Sentry Cam footage, refusing to compromise on insurance shop steering, and entrusting your vehicle to a facility equipped with genuine factory credentials, you safeguard your safety, your vehicle's structural integrity, and its resale value.
At RVCCR, our 21-year legacy of family-owned excellence, combined with rigorous Tesla, Rivian, and OEM certifications, ensures that your electric vehicle receives the exact factory-standard restoration it demands. We coordinate seamlessly with all major insurance carriers, handle every detail of the technical teardown and structural repair under one roof, and back our craftsmanship with a bulletproof written lifetime warranty.
Do not leave your vehicle's recovery to chance. Contact RVCCR today to schedule your free certified repair estimate, secure your insurance claim coordination, and let our expert technicians restore your Tesla to pristine factory specifications so you can get back to enjoying the open road with absolute confidence.
Need a repair estimate?
Skip the wait — send us a few photos and our team will get back to you fast.
Start a Photo Estimate →