Motorhome Roof Leak Repair After a Collision: How to Tell if Your Roof Damage Is From the Crash or Pre-existing Wear
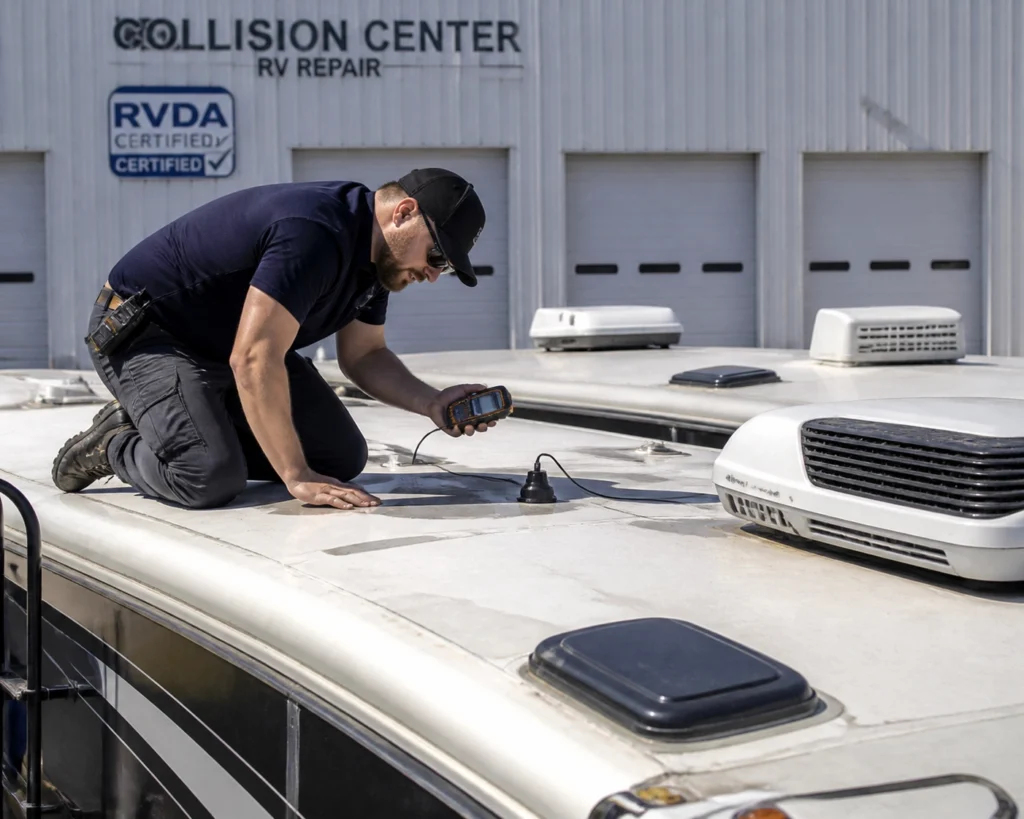
For vehicle owners and outdoor enthusiasts across Redlands and the wider Inland Empire, the moment an RV sustains an impact: whether from a low-hanging tree branch, an overpass clearance miscalculation, or a multi-vehicle highway collision: brings an immediate wave of stress. While side panels, windshields, and slide-outs receive instant visual scrutiny, the roof structure is frequently neglected during initial roadside assessments. Yet, the roof of a motorhome is not merely a flat cap; it is a vital, stressed structural diaphragm that ties the sidewalls, front and rear caps, and interior cabinetry together. When an impact sends kinetic energy cascading through the chassis and framing, the roof absorbs a tremendous share of the shock, often resulting in hidden breaches that invite destructive water intrusion.
Navigating the aftermath of a major impact requires discerning whether a resulting water leak stems directly from the collision forces or from years of normal environmental weathering. Insurance adjusters, collision estimators, and vehicle owners frequently lock horns over this exact distinction. Proving causation requires rigorous technical inspection, forensic analysis of seal failures, and an understanding of how dynamic stress alters RV construction. When you are standing beneath a dripping ceiling after a crash, knowing how to differentiate fresh impact trauma from age-related degradation makes the difference between a fully covered claim and an out-of-pocket repair bill…
The Physics of Impact: How Collision Forces Twist Motorhome Roof Structures
To understand why a motorhome roof leaks after an impact, one must examine how recreational vehicles are engineered. Unlike unibody automobiles or steel-framed commercial trucks, motorhomes: whether Class A diesel pushers, Class C gas coaches, or luxury conversions: rely on lightweight framing systems composed of aluminum tubing, laminated fiberglass panels, or wood skeletons anchored to a heavy-duty chassis. When a vehicle clips a low-hanging branch or suffers a glancing blow on the highway, the impact vector is rarely absorbed at a single point. Instead, the force is transferred through the sidewalls and roof rails, causing torsional twist and frame racking.
During a collision, the roof rail acts as a leverage arm. As the sidewall deflects inward or outward upon impact, the corner joint where the roof meets the sidewall experiences extreme shear stress. Sealants that have hardened over years of sun exposure will instantly fracture along these transition lines. Furthermore, the wooden or aluminum decking beneath the roof membrane can buckle microscopically, opening gaps in adhesive bonds long before the outer membrane tears. This structural deformation compromises the entire envelope, creating pathways for rainwater to migrate far from the initial point of impact.
Understanding these mechanics is essential for anyone seeking comprehensive rv collision repair that addresses underlying structural realignment rather than merely applying surface caulk. Without correcting the underlying frame distortion, any attempt at sealing the roofline is destined to fail under the natural flexing of the coach while driving.
Collision-Caused Roof Damage vs. Pre-Existing Weathering
One of the most contentious hurdles in an insurance claim is establishing whether roof damage and subsequent leaks are the direct result of a recent collision or the accumulated consequence of deferred maintenance and normal weathering. Adjusters are trained to look for pre-existing wear, and insurance policies routinely exclude damage caused by rot, lack of sealing, or ordinary environmental degradation.
Distinguishing between the two requires a trained forensic eye:
- Pre-Existing Weathering Indicators: Weather-related degradation typically exhibits progressive symptoms. TPO (Thermoplastic Polyolefin) and EPDM rubber membranes suffer from chalking, UV crazing, uniform thinning, and generalized hardening of lap sealants around roof vents, skylights, and ladder brackets. Sealants crack slowly over seasons, allowing water to seep in gradually, leading to localized staining, mold growth, and rotting of the wooden decking directly beneath the penetration. There are no sudden creases, sharp membrane tears, or metal buckling.
- Collision-Caused Damage Indicators: Impact-induced damage presents starkly different physical evidence. Technicians look for sharp, localized tears in the TPO or fiberglass membrane, spider-web fracturing radiating outward from a point of impact (such as an air conditioner shroud or TV antenna strike), sheared fastener heads, and sudden displacement or wrinkling of aluminum or fiberglass roof skins. Crucially, seal separation caused by a collision occurs instantly along linear stress boundaries, breaking the lap sealant cleanly away from the substrate due to frame flexing rather than chemical breakdown.
When evaluating a coach for motorhome collision repair, certified technicians document these forensic markers meticulously to ensure the distinction between acute impact trauma and chronic wear is crystal clear for the insurance carrier.

The Rigorous Inspection Protocol: From Trim Removal to Substrate Testing
A thorough inspection of a post-collision motorhome roof cannot be conducted with a quick visual glance from a ladder. At a certified repair facility, technicians execute a multi-step diagnostic protocol designed to uncover both visible breaches and hidden substrate failures.
1. Exterior Trim and Molding Detachment
The transition where the roof membrane meets the fiberglass end caps and sidewalls is protected by aluminum trim strips secured with dozens of screws and heavy-duty butyl tape or self-leveling sealants. Following a collision, technicians carefully remove these exterior trim moldings. This uncovers the factory edge crimps and reveals whether the framing behind the radius has shifted, pulled away, or sheared its fasteners.
2. Edge Delamination and Bonding Checks
Laminated RV roofs rely on industrial adhesives binding the exterior membrane and decking to interior luan panels and foam core insulation. Impact shockwaves frequently break this bond. Technicians perform tap tests across the roof surface, listening for hollow sound shifts that indicate widespread delamination where the membrane has separated from the substrate, creating a pocket for water pooling.
3. Substrate Moisture Mapping
Using advanced pinless capacitance moisture meters, certified inspectors map the moisture content of the wood decking, interior ceiling panels, and sidewall insulation. Baseline readings are compared against elevated readings near the collision zone. If moisture is detected exclusively along the stress-fractured sidewall transition: while the rest of the roof remains bone dry: it provides definitive proof that water intrusion is a direct consequence of the recent impact rather than an old, neglected roof leak.
For more insights into how structural damage extends beyond the roofline, review our detailed guide on rv roof replacement methodologies and structural restoration.
Material-Specific Repair and Replacement Methodologies
The correct repair approach for a motorhome roof depends heavily on the specific construction material utilized by the manufacturer. Applying universal patches to diverse materials inevitably leads to premature failure and recurrent leaks.
TPO and EPDM Rubber Roof Membranes
TPO (Thermoplastic Polyolefin) is common on modern motorhomes due to its puncture resistance and flexibility. However, when a collision tears a TPO membrane or deforms the underlying decking, simple tube caulking is unacceptable.
- When Patching Suffices: If impact damage is isolated to a small area (less than three feet across) with fewer than 10 to 15 impact points per square foot, and the substrate remains rigid, a professional TPO patch can be welded into place. The damaged area is thoroughly cleaned with approved solvents, and a matching TPO membrane patch is heat-welded or chemically fused with a minimum two-inch overlap, ensuring molecular bonding.
- When Full Replacement is Mandatory: If the collision caused extensive membrane tearing, widespread delamination, or severe twisting of the roof rails, patching is insufficient. A full rv roof replacement becomes necessary, requiring the removal of all accessories, stripping the old membrane, repairing or replacing compromised wooden decking, and laying down a fresh, seamless TPO sheet adhered to factory specifications using OEM-grade adhesives.
Fiberglass Roof Caps and Composite Panels
High-end Class A motorhomes frequently feature molded fiberglass roof caps or full fiberglass roofs. Fiberglass offers exceptional rigidity, but it behaves differently under impact than flexible rubber membranes.
- Crack and Gelcoat Repair: Localized impacts usually manifest as starburst fractures, spider cracks, or gouges in the gelcoat and outer fiberglass layer. Technicians grind out the damaged laminate, feathering the edges, and rebuild the structural integrity using multi-layer fiberglass mat and structural resin, finished with a color-matched gelcoat topcoat and UV-resistant clear coat.
- Structural Shell Reinforcement: If the collision forces fractured the fiberglass radius where the roof transitions into the front cap, structural fiberglass reinforcement must be applied from both the interior and exterior to restore the load-bearing capacity of the cap before cosmetics are addressed.
Aluminum Sheet Roofs
Though less common on modern luxury motorhomes, aluminum roofs remain prevalent on many vintage coaches and specialized utility haulers.
- Panel and Rivet Restoration: Collision damage on aluminum roofs typically involves buckled panels, sheared rivets, and torn seams. Repairs require cutting out damaged sections, installing internal backing plates, sealing joints with corrosion-inhibiting structural sealants, and riveting or bonding new aluminum sheets that match the original alloy thickness and temper.

Navigating the Insurance Claim: Collision Coverage vs. Comprehensive Coverage
Filing an insurance claim for motorhome roof damage requires understanding the distinction between collision coverage and comprehensive coverage, as this dictates how your deductible is applied and what evidence the adjuster will demand.
- Collision Coverage: Applies when your motorhome strikes another vehicle, a stationary object (such as a low garage door, guardrail, or bridge overhang), or when the vehicle rolls over. If a tree branch falls on your RV while you are driving down the road, it is often categorized under collision.
- Comprehensive Coverage: Applies to stationary perils: often termed "Acts of God." This includes a tree limb falling onto your parked RV during a windstorm, hail damage, vandalism, or fire.
When an insurer evaluates a roof leak claim resulting from an impact, they scrutinize whether the event qualifies as an acute collision or comprehensive loss. The challenge arises when an owner reports a "roof leak," which automatically triggers skepticism from claims adjusters accustomed to denying claims for old, worn-out roofs.
To prevent misclassification, professional repair facilities frame the initial documentation strictly around the mechanical impact event: for example, specifying "structural roof rail damage and membrane tearing resulting from low-clearance impact on [Date]" rather than generalized "roof leak repair." This subtle shift in terminology aligns the repair directly with policy coverage for accidental damage. Furthermore, ensuring the shop utilizes genuine OEM parts vs aftermarket components ensures that all replacement decking, extrusions, and membranes match factory build sheets, satisfying insurer requirements for proper indemnification.
Documentation and Evidence: Proving Causation to Your Insurer
When millions of dollars in insurance payouts are distributed annually, adjusters rely on concrete evidence to authorize major payouts. If you want your insurer to approve a comprehensive roof rebuild rather than a superficial patch, your claim file must be bulletproof.
A professional documentation package assembled by a certified collision center includes:
- Wide-Angle Impact Photos: Establishing the overall scene or the specific exterior contact point (such as scuff marks on the front cap or awning rail) that aligns with the roof damage.
- Macro-Level Forensic Photographs: High-resolution close-ups of torn membrane edges showing clean, unweathered tear lines, fresh fiber pulling, and sheared aluminum fasteners devoid of oxidation.
- Moisture Mapping Reports: Printed outputs from pinless capacitance meters showing high moisture levels directly beneath the impact zone contrasted against dry readings in unaffected areas of the roof.
- Structural Alignment Measurements: Laser or mechanical measurements proving that the roof rail or sidewall frame experienced deflection during the impact.
- Detailed Line-Item Estimate: Breaking down labor hours for trim removal, substrate replacement, membrane installation, and interior ceiling repair, referencing specific OEM service manual procedures.
By presenting this level of verifiable data, repair shops eliminate ambiguity, turning a contested claim into an approved, seamless restoration process.
Cost Range Analysis: Membrane Repair vs. Full Replacement
Understanding the financial scope of motorhome roof work helps vehicle owners evaluate repair estimates and prepare for out-of-pocket expenses beyond their deductible. Industry pricing varies based on coach size, labor rates, and material complexity, but established cost ranges provide a reliable benchmark:
- Localized Membrane Repair and Patching ($500 – $2,500): Professional repair of a localized TPO puncture, small fiberglass crack, or minor aluminum seam separation: including proper surface prep, heat-welded patching, and resealing of adjacent trim: typically ranges between $500 and $2,500 depending on accessibility and extent of minor substrate drying.
- Partial Roof Section Replacement ($1,500 – $4,000): When a collision causes localized rotting of decking or tears across a major roof section requiring the removal of an air conditioner unit and replacement of a four-to-eight-foot quadrant of decking and membrane, costs scale accordingly.
- Full Motorhome Roof Replacement ($4,000 – $14,000+): For large Class A motorhomes (35 to 45 feet) requiring a complete teardown of old accessories, total removal of the compromised TPO or EPDM membrane, reconstruction of rotted wooden or aluminum roof trusses, installation of fresh decking insulation, and laying a new seamless one-piece membrane, total costs commonly run between $4,000 and $14,000.
While these figures highlight the significant investment required for proper roof reconstruction, attempting to save money with temporary DIY patches after a structural collision inevitably leads to hidden rot, ruined interior cabinetry, and catastrophic loss of vehicle value.

Conclusion
A motorhome collision is an unwelcome disruption to any travel schedule, but when impact forces compromise your roof envelope, ignoring the hidden damage invites a cascade of structural and water-intrusion failures. By understanding the physics of frame twisting, demanding rigorous moisture and structural inspections, and partnering with certified professionals who can expertly differentiate fresh impact trauma from pre-existing weathering, you protect both your investment and your peace of mind.
At RVCCR, our family-owned facility brings 21 years of certified expertise to every auto, EV, and RV collision repair. Whether you are dealing with a complex motorhome roof rebuild, slide-out realignment, or comprehensive insurance coordination, our technicians restore your coach to uncompromising factory specifications. Do not let hidden roof damage cut your next journey short: reach out to our Redlands team today, schedule your free repair estimate, and let us get your home-on-wheels safely back on the open road.
Need a repair estimate?
Skip the wait — send us a few photos and our team will get back to you fast.
Start a Photo Estimate →