EV Charging Port Collision Repair: What Happens When the Charge Port Takes the Hit
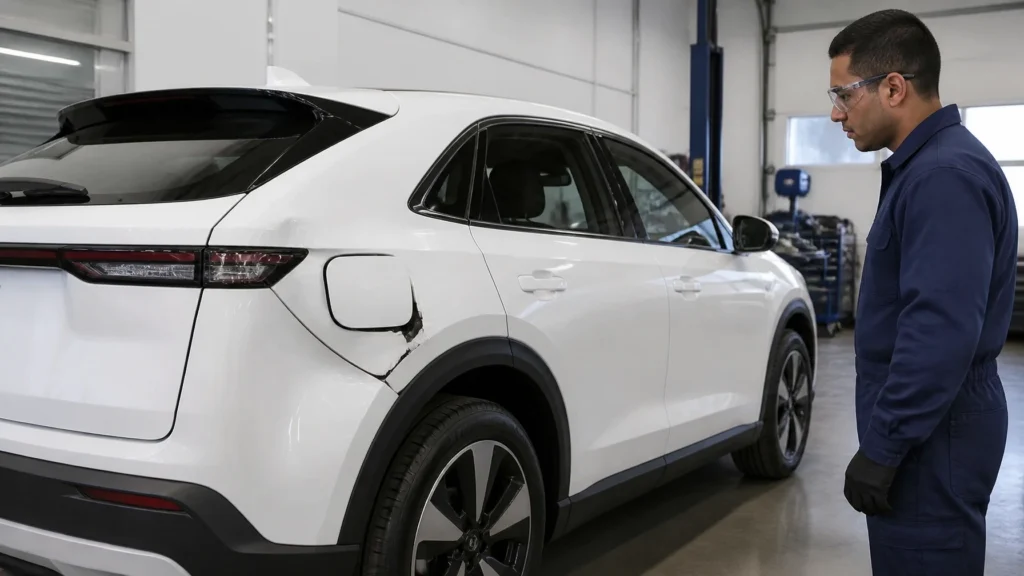
RVCCR is a Tesla Approved Body Shop, Rivian 3P Certified facility, and Ford/Lincoln Certified collision repair center serving Redlands and the Inland Empire. When a collision reaches an EV’s charge-port area, the repair involves more than replacing an exterior door or smoothing a quarter panel. Technicians may need to evaluate the port housing, latch, connector, wiring, sealing surfaces, communication systems, surrounding structure, and high-voltage safety condition before the vehicle can be cleared for charging again…
The charge port is an interface between the vehicle’s electrical system and an external power source. It is also installed into a body panel or structural assembly that can move, deform, or lose its water seal during a collision. Damage may be obvious, such as a broken door or crushed housing, or subtle, such as a bent latch pin, loosened connector, pin damage, harness strain, or a communication fault that appears only when charging begins.
This article explains what a proper EV charging port collision inspection includes, how Tesla, Rivian, and Ford repair pathways differ, what high-voltage precautions apply, and what documentation owners should request before accepting the completed repair.
Why Charge-Port Collision Damage Deserves a Full Inspection
A charge-port assembly usually includes several related parts:
- An exterior charge-port door or cover
- A hinge, spring, or actuator mechanism
- A latch or locking pin
- The charge inlet and terminal area
- Protective insulators or terminal covers
- Low-voltage control wiring
- High-voltage conductors or busbar connections, depending on the vehicle design
- Sealing materials, gaskets, foam barriers, and seam sealer
- Communication components that allow the vehicle and charger to confirm connection and charging status
The exact design depends on the make, model, production date, and charging standard. A Tesla, Rivian, Ford Mustang Mach-E, and Ford F-150 Lightning do not use interchangeable procedures simply because they all plug into a charger.
The impact location also matters. A rear-end collision can push a bumper, quarter panel, liftgate, or rear body structure toward the charge port. A side impact can distort the panel supporting the port housing. A parking-lot impact may only break the exterior door, but the force can still reach the hinge, latch, or housing bracket. A connector that looks intact can have internal damage or misalignment.
That is why a complete Tesla-certified collision repair after a crash process considers the entire damage path rather than treating the charge-port door as an isolated cosmetic part.
Where Technicians Locate the Damage
The first step is to identify the charge-port location and understand how it is integrated into the vehicle.
Location varies by manufacturer and model. Many Tesla vehicles place the port in a rear quarter-panel area, while Rivian and Ford models use different body locations and access designs. The technician identifies the vehicle by VIN, confirms the model year and production configuration, and then consults the manufacturer’s repair information for that specific vehicle.
A proper inspection generally moves through several layers.
1. Exterior charge-port door and surrounding panel
The technician checks:
- Whether the door opens and closes normally
- Whether the door sits flush with the surrounding panel
- Whether the hinge is bent or pulled away from its mounting area
- Whether the latch engages and releases correctly
- Whether the door has a consistent gap
- Whether the surrounding panel is wrinkled, stretched, or displaced
- Whether the paint has cracking that indicates deeper panel movement
- Whether the charge-port seal is compressed, torn, or displaced
A charge-port door can appear functional while remaining slightly out of position. That small misalignment may interfere with the latch, weather seal, or connector clearance.
2. Port housing and mounting structure
Once the appropriate trim and body components are removed, the technician can inspect the housing behind the exterior panel.
This area may reveal:
- Cracks in the housing
- Broken mounting tabs
- Deformed brackets
- Displaced welds or fasteners
- Damaged seam sealer
- Torn foam baffles
- Pinched wiring
- Evidence that the housing was pushed inward during impact
Tesla’s official Model 3 body repair information illustrates why this work is not generic body repair. Its charge-port housing procedure identifies a specific housing assembly, directs the repairer to use the VIN-specific parts catalog, and includes removal of the original component, preparation of mating surfaces, seam sealer, structural adhesive, approved welding, and post-repair operations. The procedure also warns that the vehicle’s electrical isolation process must be completed before welding.
That does not mean every Tesla charge-port repair follows the same sequence. It means the repairer must use the applicable procedure for the specific vehicle.
3. Connector and terminal area
The inlet itself must be checked for impact-related damage. Depending on the vehicle, the technician may inspect terminal alignment, protective insulators, the connector carrier, locking features, and the interface where the charge-port assembly connects to the vehicle harness or high-voltage system.
Owners should not probe terminals or attempt to straighten them. The charge port is not a safe do-it-yourself inspection area after a collision. Even when the vehicle appears switched off, the high-voltage system must be treated according to the manufacturer’s safety procedures.
4. Harness routing and connections
A collision can stretch, pinch, cut, or pull a harness without producing an immediate visible warning. The technician checks how the harness is routed and secured, including clips, retainers, grommets, grounding points, and connectors.
Harness damage can result in:
- Intermittent charging
- A charge-port door that fails to unlock
- A plug that will not lock
- A vehicle that cannot communicate with the charger
- Charging that starts and stops
- Diagnostic trouble codes
- A charge system that works on one charger but not another
A harness can also be damaged during body repair if it is not protected while panels are removed, cut lines are prepared, or welding and refinishing operations are performed.

Common Charge-Port Damage After a Collision
Rear-end and rear-quarter impacts
When the port is located near a rear quarter panel, rear-end or angled impacts can affect more than the bumper. The force may travel through the quarter panel, inner reinforcement, housing bracket, trunk or liftgate area, and nearby wiring.
A bumper cover can be replaced while the housing remains slightly displaced. If the technician does not inspect behind the panel, the vehicle may leave with a charge-port door that closes but does not seal correctly or a connector that later develops charging faults.
Broken or misaligned charge-port doors
The exterior door is often the most visible damage. It may be cracked, pushed inward, unable to open, or unable to remain closed. Replacement may be appropriate, but replacing the door alone does not address damage to the hinge, latch, housing, body panel, or sealing surfaces.
Latch and locking-pin failure
The latch helps keep the charge-port door closed, and the locking system may help retain the charge connector during a charging session. A bent or damaged lock mechanism can cause:
- The plug to remain locked in the port
- The vehicle to refuse charging
- The charge-port door to remain open
- A warning message
- A failure to recognize that the connector is fully seated
Ford’s owner-facing guidance specifically warns drivers not to force a stuck charge coupler because doing so can damage the lock pin. If the connector will not release normally, the manufacturer’s assistance procedure should be followed, and persistent problems should be handled by qualified service personnel.
Connector and terminal damage
A direct hit can crack the inlet, bend terminals, break protective components, or disturb the internal carrier. Damage may not be obvious from the outside. A charger can appear to connect while the vehicle fails to establish a reliable electrical or communication connection.
Cable and harness damage
The harness may be stretched by the collision or damaged by a sharp edge, crushed panel, displaced bracket, or incorrect reassembly. This type of problem can create an intermittent fault that is difficult to reproduce unless the vehicle is scanned and tested under the correct conditions.
Water intrusion
A damaged port door, gasket, housing, seam sealer, or surrounding panel can create a path for moisture. Water may reach areas that were designed to remain protected from spray, road debris, and weather exposure.
Possible signs include:
- Moisture or corrosion near the connector
- Repeated charging interruptions
- A warning that charging is unavailable
- A port door that freezes or sticks
- A fault that appears after rain or washing
- Corrosion at terminals or low-voltage connections
A technician should identify and correct the source of intrusion rather than simply drying the visible area.
Communication errors
Charging depends on communication between the vehicle, charge connector, and charging equipment. A collision-related fault in the port, control wiring, connector position, or vehicle module can result in messages such as:
- Unable to charge
- Check charging connection
- Charging interrupted
- Connector not detected
- Service required
- Charge port fault
A communication error does not automatically prove that the battery pack is damaged. It does show that the vehicle requires diagnosis before anyone assumes the problem is only the charger.
Why a Non-Certified Shop May Miss the Problem
A general repair facility may be highly capable with conventional body work and still lack the manufacturer-specific information, diagnostic access, high-voltage training, or charging test equipment needed for EV charge-port collision work.
Several shortcuts can hide damage.
Replacing only the visible cover
If the exterior door is replaced without inspecting the housing and mounting structure, the visible problem may disappear while the underlying alignment issue remains.
Skipping the pre-repair scan
A scan before disassembly documents existing diagnostic conditions and can help distinguish collision-related faults from unrelated issues. Without a baseline scan, it becomes harder to determine when a fault appeared.
Not removing enough trim
The charge port may connect to wiring or structural components behind interior trim, quarter-panel liners, trunk panels, bumper assemblies, or other access panels. If the repairer does not expose the area, hidden damage can remain undiscovered.
Treating charging as a customer problem
A vehicle that has not been connected to a charger after repair has not completed the charging-related portion of the repair. Road-testing the vehicle is not a substitute for verifying the applicable charge functions.
Failing to restore seals and barriers
Seam sealer, foam baffles, gaskets, and corrosion protection are functional repair materials. They help control water, noise, corrosion, and panel behavior. Omitting them can create a delayed issue even when the body lines look acceptable.
Using generic procedures
Tesla, Rivian, and Ford each direct technicians toward vehicle-specific service information. A generic replacement approach can miss one-time-use parts, isolation requirements, torque specifications, sealing instructions, initialization steps, or calibration requirements.
If you are searching for an EV repair shop near me, ask whether the shop can explain its manufacturer certification, scan process, high-voltage safety process, OEM parts policy, and final charging verification.
Tesla, Rivian, and Ford Repair Requirements
Tesla charge-port repair
Tesla’s public service and collision repair information shows that charge-port repairs can involve both body repair and electrical service procedures.
For example, the Tesla Model 3 charge-port housing procedure includes:
- Reviewing collision repair safety information and wearing appropriate PPE
- Using the vehicle VIN to identify the correct replacement parts
- Removing related trim and connectors
- Removing the original housing component
- Preparing the installation surfaces
- Applying specified seam sealer
- Applying structural adhesive
- Completing approved welding where required
- Restoring related components
- Performing post-repair operations
Tesla’s procedure also states that welding must not be performed before the vehicle electrical isolation procedure. That is an important distinction: the body repair and high-voltage safety work are connected.
Whether a Tesla charge port is repaired or replaced depends on the applicable model-specific procedure and the extent of damage. A shop should not promise that a damaged housing can be straightened, nor should it automatically replace an entire assembly without examining the manufacturer’s instructions.
After replacement or related body work, required diagnostics, initialization, sensor checks, and charging verification must be completed according to the vehicle’s repair information.
Rivian charge-port repair
Rivian’s published 2024 Repair Guidelines for the R1T, R1S, and EDV state that repairs should be performed by Rivian Certified Technicians using Rivian-approved repair procedures, tools, and Rivian Original Equipment Parts.
The same document states that:
- The latest corresponding repair procedure must be consulted
- Structural and cosmetic repairs must follow the specific model’s procedures
- Rivian does not support aftermarket, alternative, used, salvaged, or externally remanufactured parts in the cited repair-guideline context
- Collision repairs should be performed at a Rivian Certified Collision Center
- Diagnostic scans should be performed before and after repairs
- Systems should be calibrated and operating as designed after repair
- High-voltage de-energization requirements must be checked before work begins
Public Rivian documents do not provide a universal, step-by-step charge-port replacement procedure for every model and production date. The detailed repair decision belongs in the vehicle-specific service information. If the port, housing, latch, connector, or harness has collision damage, the technician should determine whether the affected component is repairable or replacement-only under the applicable procedure.
Ford charge-port repair
Ford’s customer support guidance directs owners not to force a stuck charge connector and to seek service if the connector will not release or charging problems continue. Ford technicians use the Workshop Manual and applicable service information for model-specific repair operations.
Ford EV charge-port repairs may involve the exterior door or cover, lock actuator, release cable, connector assembly, wiring, mounting components, or related trim. The correct replacement strategy depends on the Ford model and the diagnosed component.
A technician may need to:
- Stop the charging session
- Safely release the connector
- Inspect the lock pin and actuator
- Follow the Ford high-voltage disable procedure when required
- Remove body or bumper components to access the port
- Replace damaged components and specified hardware
- Reconnect and route the harness correctly
- Clear and verify diagnostic codes
- Test the applicable charging functions
The important point is that a Ford Mustang Mach-E and an F-150 Lightning should not be treated as generic EVs. The repairer should identify the vehicle-specific procedure and confirm whether calibration, initialization, programming, or additional system checks are required after replacement.

High-Voltage Safety After a Collision
The National Highway Traffic Safety Administration advises that EV and hybrid high-voltage systems require qualified technicians with specialized training, personal protective equipment, and appropriate diagnostic or testing equipment. NHTSA also explains that the high-voltage battery and associated components should be assumed to be energized.
For an owner, that means:
- Do not touch exposed orange cables or damaged electrical components
- Do not probe charge-port terminals
- Do not attempt to repair the port or harness
- Do not force a connector that will not release
- Do not continue charging if the port is visibly damaged or electrical components are exposed
- Do not ignore smoke, unusual heat, leaking fluids, sparks, or unusual battery noises
If there is smoke, fire, sparking, suspected battery damage, or another emergency, move away and contact emergency services. NHTSA warns that physical damage to an EV or its high-voltage battery can result in immediate or delayed release of hazardous gases or fire.
The correct repair process starts with hazard assessment and the manufacturer’s electrical isolation procedure. The technician determines which systems must be disabled, verifies safe conditions with the required equipment, and follows the make- and model-specific instructions before beginning work that could affect high- or low-voltage components.
High-voltage precautions are not limited to battery removal. Welding, cutting, drilling, harness handling, painting, lifting, and connector work may all require special instructions.
What Documentation EV Owners Should Request
A complete repair file should explain what was inspected, what was replaced, what was tested, and why the vehicle was cleared for return.
Ask for documentation that addresses the following.
Damage documentation
Request photos or written notes showing:
- The original exterior damage
- The charge-port door and surrounding panel
- The housing or bracket after disassembly
- Connector and harness condition
- Any water intrusion or corrosion
- Related structural or bumper damage
Diagnostic documentation
Ask whether the shop performed:
- A pre-repair scan
- A post-repair scan
- Manufacturer-specific diagnostic procedures
- Verification that relevant charging faults were cleared
- Confirmation that no unresolved charge-port-related codes remain
A scan report may not show every detail of the repair, but it creates a useful record of system condition.
Parts documentation
The file should identify:
- Whether the part was OEM
- The part description and, where appropriate, part number
- Whether the housing, latch, connector, harness, or complete assembly was replaced
- Any one-time-use hardware or sealing materials used
- Whether the repair followed a replacement-only instruction
Safety documentation
Ask whether the shop followed the manufacturer’s required high-voltage isolation process and whether the repair involved any high-voltage component. Owners do not need to perform or supervise these procedures; they should receive confirmation that the proper process was used.
Calibration and verification documentation
If the repair affected sensors, cameras, radar, body structure, or related modules, request confirmation of any required:
- Calibration
- Initialization
- Programming
- Relearn
- Alignment
- Charging-system verification
The exact requirements vary by vehicle. The shop should be able to explain what applied to your EV.
Final charging test
Ask whether the vehicle was tested with the applicable charging equipment after repair. Depending on the model, damage, and repair procedure, that may include an AC charging test, DC fast-charging test, connector-lock test, charge-port door test, or communication verification.
A proper final test should confirm more than “the car starts.” It should confirm that the repaired charge-port system performs its intended function.
Timeline and Cost Considerations
Charge-port repairs do not have one universal price or timeline. The final repair may depend on:
- Whether the exterior door is the only damaged part
- Whether the port housing or bracket is damaged
- Whether the quarter panel, bumper, or structural area requires repair
- Whether a harness or connector must be replaced
- Whether water intrusion caused secondary damage
- OEM parts availability
- Manufacturer-specific scan or calibration requirements
- Insurance inspection and supplement response
- Whether the vehicle requires high-voltage battery evaluation
A small cover replacement may be relatively straightforward. A collision involving the housing, surrounding body structure, harness, or high-voltage connection can require teardown, additional parts, safety isolation, and more extensive testing.
A responsible repair facility should communicate what is known, what remains uncertain, and what could change after disassembly. A precise promise made before the damage is exposed is less useful than a documented repair plan that changes for a clearly explained reason.
Why Choose a Certified EV Repair Facility in the Inland Empire?
A Tesla certified collision center or certified EV repair facility should offer more than a logo on the wall. Owners should look for evidence of:
- Current manufacturer certification
- EV-specific technician training
- High-voltage PPE and testing equipment
- Access to current repair procedures
- OEM parts sourcing
- Pre- and post-repair scanning
- Calibration capability
- Charge-system verification
- Clear documentation
- Insurance coordination
- A written warranty
RVCCR combines collision, paint, and mechanical repair under one roof and serves Tesla, Rivian, Ford/Lincoln, and other modern EV owners in Redlands and the Inland Empire. Our Tesla and EV certified repair services are designed around manufacturer procedures, trained technicians, OEM parts, high-voltage safety, and post-repair verification.
For owners preparing an insurance claim, our article on certified auto collision repair in Redlands explains what to review before selecting a shop and how documentation supports a complete repair.
Questions to Ask Before Authorizing the Repair
Before leaving your EV at a shop, ask:
- Are you certified by my vehicle’s manufacturer?
- Will you inspect the charge-port housing behind the exterior panel?
- Will you perform a pre-repair scan?
- Which OEM procedure governs this repair?
- Is the damaged component repairable, or does the procedure require replacement?
- Will you use OEM parts?
- How will you inspect the harness and connector?
- How will you address sealing and possible water intrusion?
- What high-voltage safety procedure applies?
- Are calibration, initialization, or programming required?
- Will you perform a post-repair scan?
- Will you verify the applicable charging functions?
- What documentation will I receive?
- What warranty backs the completed repair?
A shop that answers clearly is helping you understand the repair. A shop that dismisses these questions may not be equipped for the vehicle.
Getting Your EV Back to the Road
A damaged charging port can interrupt commuting, travel, work, and daily life even when the vehicle still drives. The safest path is to stop guessing, avoid charging a visibly damaged system, and have the complete port area evaluated by a qualified EV collision repair facility.
At RVCCR, we inspect the damage, coordinate with major insurance carriers, follow manufacturer repair information, use OEM parts when required, document the work, and verify the vehicle before delivery. Our goal is not simply to make the charge-port door look normal. It is to restore the interface, body structure, sealing, electronics, and charging function so you can return to the life your EV supports.

If your Tesla, Rivian, Ford EV, or other electric vehicle took a hit near the charging port, bring it to a team that understands the systems behind the panel. We will inspect the damage, explain the repair path, and help move you from collision stress back to your next commute, road trip, and adventure.
Need a repair estimate?
Skip the wait — send us a few photos and our team will get back to you fast.
Start a Photo Estimate →