Tesla ADAS Recalibration After Collision Repair: What Owners Should Expect From the Process
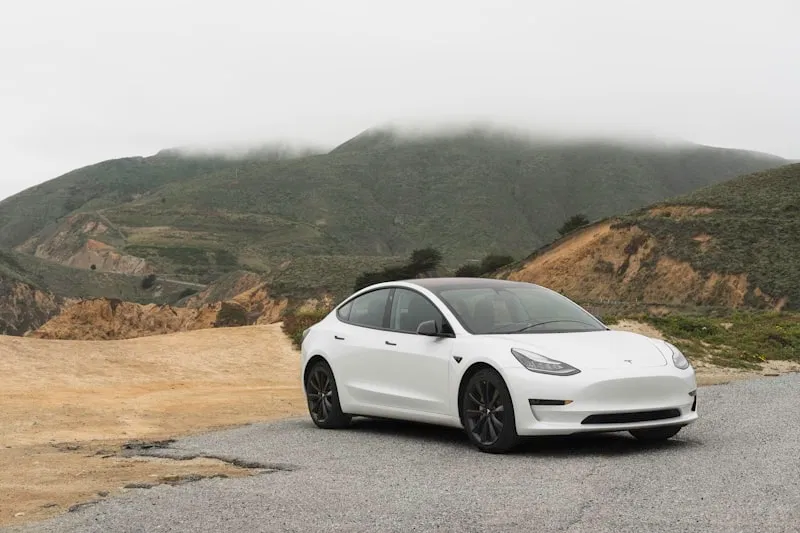
Published August 24, 2026
RVCCR is a Tesla Approved Body Shop serving Redlands and the Inland Empire, with Tesla-certified collision, paint, mechanical, and electric-vehicle repair performed under one roof. Our technicians use manufacturer repair information, OEM-directed procedures, and post-repair diagnostic checks to restore vehicles after a collision.
Tesla ADAS recalibration is not one universal button press. The correct process depends on the vehicle’s model, production configuration, sensor equipment, damaged area, windshield or body repairs, suspension condition, and current Tesla service information. A vehicle may look perfect after paint and still require additional camera, radar, parking-sensor, or system verification before it is ready for normal use…
This article explains what Tesla owners should expect when recalibration is required after collision repair, including the difference between static and dynamic calibration, typical timing, the Tesla systems involved, calibration documentation, and what happens if the process is skipped or does not complete.
Why Tesla ADAS recalibration may be required after a collision
Advanced Driver Assistance Systems, or ADAS, rely on cameras, radar on certain vehicles, parking sensors on equipped vehicles, vehicle-speed data, steering information, wheel alignment, and other inputs. These systems are designed around the vehicle’s physical geometry.
A collision can change that geometry even when the visible damage seems minor. A bumper cover can move around a parking sensor. A mirror housing can be replaced with a camera mounted at a slightly different angle. A windshield can be removed and installed again near the forward camera assembly. Suspension or steering damage can alter the vehicle’s direction of travel relative to the camera view.
Recalibration or functional verification may be required after work involving:
- The windshield or windshield-mounted camera housing
- Forward-facing Autopilot cameras
- Side repeater cameras
- B-pillar or side cameras
- Rear-view cameras or related mounting areas
- Camera brackets, mounts, or nearby body structure
- Front bumpers or fascia panels
- Radar-equipped front-end components
- Bumper-mounted ultrasonic parking sensors
- Side mirrors containing cameras or wiring
- Suspension, steering, ride height, or wheel alignment
- Structural repairs that change a sensor’s mounting relationship
Tesla’s official service information states that camera calibration data must be cleared whenever an external camera’s position has been altered, such as during camera reinstallation or replacement. Tesla’s owner manuals also explain that cameras self-calibrate while the vehicle is driven after certain service repairs.
The triggering question is not simply, “Was a sensor visibly broken?” The better question is, “Could the collision or repair have changed the sensor’s position, field of view, mounting structure, or relationship to the road?”
Which Tesla systems are involved?
“ADAS recalibration” can refer to several different systems. A qualified repair facility should identify the components on your specific Tesla instead of treating every model and year identically.
Autopilot and the external camera suite
Tesla’s Autopilot and active-safety functions use external cameras to observe lane markings, vehicles, objects, and the surrounding roadway. The camera configuration varies by model, production year, hardware generation, and software.
Depending on the vehicle, the affected camera may be:
- The forward-facing camera assembly behind the windshield
- A side-facing camera near a front fender or side repeater
- A camera in or near a side mirror
- A rear-facing camera
- A camera mounted on a pillar or other body location
If a camera is removed, replaced, or moved from its original position, the applicable Tesla procedure may require camera-calibration data to be cleared and the camera configuration to be updated through Tesla service tools. Some procedures also include a camera-orientation or pitch verification step.
A successful power-up is not proof that the camera is correctly calibrated. The module may communicate with the vehicle while still reporting an incomplete calibration or an unacceptable physical condition.
The cabin camera
The cabin camera is located above the rearview mirror on applicable Tesla vehicles. Tesla owner manuals describe it as a driver-attentiveness monitoring component when certain assisted-driving or Self-Driving features are engaged.
The cabin camera is not generally handled as a separate owner-performed calibration routine. Instead, Tesla’s published camera guidance treats the vehicle’s camera calibration process as a broader system procedure. If the windshield, camera area, or related mounting position was disturbed, the vehicle may need the overall camera-calibration process cleared and completed.
A repair facility should also verify that the cabin camera is:
- Properly installed
- Not obstructed by trim, adhesive, film, or debris
- Connected correctly
- Free from visible damage
- Reporting normally through the applicable diagnostic system
The cabin camera’s role is different from the forward road-view cameras. It monitors the driver rather than serving as the primary view of lane markings ahead. The two should not be described as interchangeable.
Radar on equipped Tesla vehicles
Tesla has used different sensor strategies across models and production periods. Some earlier Tesla vehicles were equipped with forward radar, while many newer configurations rely primarily on camera-based Tesla Vision systems.
If a Tesla is equipped with radar and the collision affected the radar unit, its mounting area, the front bumper, or related structure, the applicable Tesla service procedure must be reviewed. Tesla service information for radar-equipped vehicles describes a Toolbox-initiated radar drive-cycle calibration rather than a single universal static target-board process.
That means the repair plan must begin by confirming whether the vehicle actually has radar. A shop should not automatically charge for or perform a radar calibration on a Tesla that does not use that hardware.
Ultrasonic parking sensors
Older or otherwise equipped Tesla vehicles may use ultrasonic parking distance sensors in the front and rear fascia. These sensors support low-speed Park Assist and proximity alerts.
A bumper repair can affect ultrasonic sensors if:
- A sensor was cracked or pushed inward
- The mounting bracket was bent
- The sensor was installed at the wrong depth or angle
- Paint or repair material covered the sensor face
- The harness or connector was damaged
- A replacement sensor requires addressing or programming
Tesla service procedures for equipped vehicles may require sensor-address programming or other service routines after replacement. The exact operation depends on the model and sensor configuration.
Some newer Teslas use camera-based systems rather than ultrasonic sensors. The vehicle’s VIN and equipment configuration determine which inspection and verification steps apply.

Static and dynamic calibration: what is the difference?
ADAS calibration is generally described in two categories: static and dynamic. The categories explain how the system is verified, but the required method is always determined by the vehicle manufacturer and the specific repair.
Static calibration: an in-shop procedure
Static calibration is performed while the vehicle remains stationary in a controlled repair bay. When an OEM procedure calls for static calibration, technicians may use:
- Manufacturer-specific target boards
- Measuring equipment
- Laser levels
- A verified vehicle centerline
- A controlled floor surface
- Specified target distances and heights
- OEM diagnostic software
- Vehicle-specific calibration procedures
The vehicle must usually be positioned correctly before the procedure begins. Tire pressure, ride height, steering position, wheel alignment, floor level, lighting, and nearby objects may matter depending on the system.
A static calibration commonly takes about one to two hours when the vehicle is ready, the correct equipment is available, and no additional repair issue is discovered. That is a planning estimate, not a universal Tesla specification. Setup can take longer if the vehicle requires alignment, structural measurement, additional teardown, sensor replacement, or troubleshooting.
Tesla’s publicly available camera documentation primarily describes camera self-calibration through driving rather than a universal stationary target-board calibration for every Tesla camera. A shop may still perform physical alignment checks or use manufacturer-required static operations when the applicable vehicle-specific procedure calls for them. The documentation should identify what was performed and why.
Dynamic calibration: calibration while driving
Dynamic calibration takes place while the vehicle is driven under specified conditions. The vehicle’s sensors gather roadway information and compare it with vehicle movement, lane markings, and other references.
A planned dynamic calibration drive may take approximately 15 to 30 minutes when road conditions are suitable. However, Tesla’s official camera documentation measures the process more by distance and conditions than by a guaranteed time. Tesla states that camera calibration typically completes after approximately 20 to 25 miles, although the distance can vary. In some cases, the process may require up to 100 miles of manual driving before Tesla recommends contacting service.
For Tesla camera calibration, the vehicle generally needs:
- Clear and highly visible lane markings
- A straight or relatively consistent roadway
- Adequate visibility
- Suitable traffic conditions
- A safe and legal route
- A driver who remains responsible for the vehicle at all times
Tesla’s Model Y owner manual recommends a multi-lane road with clear markings in the driving lane and adjacent lanes for the best calibration conditions. Poor weather, faded lane lines, construction, heavy traffic, or winding roads can slow the process.
The important distinction is this: a 15-to-30-minute drive may be the shop’s initial road-test window, but it does not guarantee that the Tesla will report completed calibration in that time.
What happens before calibration begins?
Recalibration should occur after the physical repair is complete, not before. A camera cannot be accurately verified while a damaged bumper, bent bracket, incorrect windshield, incomplete suspension repair, or misaligned body structure remains unresolved.
A responsible workflow generally includes the following steps.
1. Vehicle identification
The shop confirms the Tesla model, model year, VIN, production configuration, and relevant sensor equipment. Model 3, Model Y, Model S, Model X, and Cybertruck procedures can differ. Even vehicles with the same model name may use different camera hardware or software generations.
2. Pre-repair diagnostic scan
A pre-repair scan documents the vehicle’s electronic condition before disassembly. It may identify existing faults, communication issues, camera status, sensor concerns, or unrelated conditions that should not be confused with collision damage.
The scan also creates a baseline for insurance communication and repair planning.
3. Physical inspection and teardown
Technicians inspect the parts that could affect sensor position or operation. This may include the windshield, camera mount, bumper, brackets, wiring, mirrors, suspension, steering components, wheel alignment, and surrounding structure.
Hidden damage can change the repair plan. A bumper that appears to need only refinishing may have a damaged sensor bracket behind it. A mirror shell may hide a camera connector or mounting problem. A front-end impact may affect radar hardware on an equipped Tesla.
4. Structural and suspension repair
Structural measuring, body repair, suspension work, and wheel alignment should be completed before final sensor verification. A sensor cannot be accurately evaluated if the vehicle’s physical reference points are still changing.
RVCCR’s article on Tesla frame sectioning and OEM cut lines explains why manufacturer-specific structural procedures matter when body geometry and sensor mounting locations are involved.
5. Component installation and inspection
The shop installs the required OEM or manufacturer-approved components according to the applicable procedure. Technicians check fasteners, brackets, connectors, seals, glass, trim, and mounting surfaces before beginning calibration.
6. Calibration preparation
For camera-related work, Tesla service information may require the technician to clear calibration data, update camera configuration, or complete a related service-mode routine. For radar-equipped vehicles, the applicable radar drive-cycle procedure may require Tesla Toolbox.
The touchscreen’s camera-calibration menu should not be used casually. Tesla’s owner information describes clearing calibration after a camera or windshield-related position change. Clearing calibration on an unrelated vehicle condition will not repair a bent bracket or damaged camera.
Tesla’s camera self-calibration process
Tesla owner manuals describe camera calibration as a process that occurs while driving. On applicable vehicles, the touchscreen displays calibration progress.
Tesla’s Model Y owner information states that calibration typically completes after driving approximately 20 to 25 miles, with the actual distance depending on roadway and environmental conditions. Tesla also states that the vehicle may require up to 100 miles in suitable conditions before the owner should contact Tesla about incomplete calibration.
The process generally works like this:
- The physical repair and required component service are completed.
- The applicable camera-calibration data is cleared.
- The vehicle reports that camera calibration is in progress.
- The driver manually operates the vehicle on suitable roads.
- The cameras gather roadway and lane-marking information.
- The vehicle completes calibration when its system requirements are met.
- Assisted-driving and active-safety features become available as permitted by the vehicle.
Until the process is complete, Tesla may display messages such as a camera-calibration notice or an alert that Autopilot features are unavailable. Owners should not treat those messages as harmless reminders. They indicate that the vehicle’s driver-assistance system has not completed the required learning process.
The driver remains responsible for steering, braking, monitoring the roadway, and taking over whenever a Tesla feature is engaged. Calibration does not make Autopilot autonomous, and a completed calibration does not remove the driver’s responsibility.
What should a calibration report show?
Tesla does not publish one universal, collision-repair calibration-certificate template for every model and repair. Documentation may therefore include Tesla service records, diagnostic reports, scan results, calibration status, repair worksheets, and road-test notes.
A useful post-repair file should identify:
- Customer and vehicle information
- VIN
- Tesla model and model year
- Mileage at the time of service
- Date of inspection and calibration
- Collision-related parts repaired or replaced
- Windshield, bumper, mirror, camera, radar, or parking-sensor work
- Pre-repair scan results
- Post-repair scan results
- Diagnostic trouble codes found and resolved
- Applicable Tesla service procedure or operation
- Camera-calibration status
- Radar calibration status, if the vehicle is radar-equipped
- Parking-sensor programming or function-test results, if applicable
- Wheel-alignment results when suspension or steering was involved
- Dynamic drive details, including the route or mileage when documented
- Final pass, completed, or no-fault status
- Any remaining warnings or recommended follow-up
- Technician or facility identification
A report should not simply say “calibration complete” if the vehicle still shows an active camera, sensor, or driver-assistance warning. If calibration fails, the report should record the failure and the next diagnostic step.
Owners should ask whether the documentation confirms successful completion or only confirms that a procedure was attempted. Those are not the same thing.
What happens if calibration is skipped?
Skipping required calibration can leave driver-assistance features limited, unavailable, or operating without the verification required after the repair.
Possible outcomes include:
- Autopilot features remain unavailable
- Lane-related safety features may be limited
- Automatic Emergency Braking or related features may be unavailable
- Parking alerts may be unreliable or disabled
- Camera-blocked or camera-uncalibrated messages may continue
- The vehicle may require a return visit
- Insurance documentation may be incomplete
- A later technician may have difficulty determining what was repaired
A clear dashboard does not automatically prove that every system has been restored. Some physical problems may require diagnostic testing even when the owner does not see a warning.
Calibration is also not a substitute for correct body repair. Software cannot compensate for:
- A bent camera bracket
- A distorted windshield mounting area
- An incorrectly installed windshield
- A damaged bumper sensor mount
- A misaligned side mirror
- Incorrect ride height
- Incomplete suspension repair
- A wheel-alignment problem
- Damaged wiring or connectors
- An incorrect or incompatible component
If the physical condition is wrong, the calibration may fail or the system may remain unreliable.
What if calibration fails?
A failed calibration is useful information. It indicates that the vehicle has not accepted the current sensor condition or roadway data. The correct response is diagnosis, not repeated driving without a plan.
The shop should review:
- Whether the correct vehicle-specific procedure was used
- Whether calibration data was properly cleared
- Whether the camera or sensor is the correct part
- Whether the mount or bracket is damaged
- Whether the windshield is correctly installed
- Whether the camera view is obstructed
- Whether the bumper or mirror was installed correctly
- Whether wiring and connectors are secure
- Whether suspension and wheel alignment are within specification
- Whether the vehicle has active diagnostic trouble codes
- Whether road conditions were suitable
- Whether the Tesla requires additional service-mode operations
If a Tesla does not complete camera calibration after appropriate driving conditions and mileage, the vehicle should be evaluated by Tesla Service or a qualified Tesla repair facility. Do not rely on Autopilot while the vehicle reports that calibration is incomplete or a camera is unavailable.
Our related article on ADAS recalibration after an EV collision explains why modern EV repair involves electronic verification in addition to body and paint work.

How bumper, mirror, windshield, and suspension repairs connect to ADAS
Bumper repairs
A bumper can contain or position parking sensors, radar hardware, wiring, brackets, and other components. Removing the bumper may disturb a sensor even if the sensor itself is not visibly broken.
After bumper repair or replacement, the shop should inspect sensor seating, mounting depth, connector condition, paint coverage, and the applicable system test.
Mirror repairs
A side mirror may contain a camera, wiring, blind-spot-related hardware, or other electrical components. Replacing the mirror housing or mounting base can change camera orientation.
The shop should verify the mirror mount, camera connection, image quality, and any required camera-calibration process for the vehicle.
Windshield replacement
The windshield is especially important because the forward camera assembly views the road through the glass. Tesla’s manuals identify a camera or windshield replacement as an example of a condition that can shift a camera from its calibrated position.
Glass quality, camera mounting, bracket position, adhesive installation, and unobstructed visibility all matter. Clearing calibration will not correct a camera that is improperly mounted or a windshield that does not meet the applicable requirements.
Suspension and alignment
Suspension damage can change ride height, wheel position, steering angle, and the direction the vehicle travels. Those changes can affect the relationship between the car and the camera or radar field of view.
When suspension, steering, wheel, or structural work is involved, the shop should determine whether a wheel alignment, measurement report, sensor inspection, or additional calibration is required before delivery.
Charge-port and adjacent body repairs
Some Tesla collision repairs involve body areas near the charge port, wiring, or rear quarter panel. Charge-port damage requires its own inspection and high-voltage safety process, but surrounding body repairs can also affect cameras, wiring, seals, and mounting points.
If the collision reached the charging area, review our article on Tesla EV charging-port collision repair before authorizing a cosmetic-only repair.
How RVCCR documents Tesla calibration for insurance
Collision claims can involve multiple inspections, supplements, parts decisions, and questions about whether a diagnostic or calibration operation is necessary. RVCCR coordinates with major insurance carriers and uses manufacturer requirements to support the repair plan.
Our documentation process may include:
- Vehicle identification and VIN verification
- Photographs of collision damage and affected sensor areas
- Pre-repair diagnostic information
- Teardown findings
- Manufacturer repair-procedure references
- OEM parts and component records
- Structural measurement or alignment information when applicable
- Calibration or sensor-test results
- Post-repair scan information
- Road-test and final quality-control notes
- A written explanation of unresolved conditions, if any
Insurance coverage and claim approval remain subject to the policy, the carrier, and the facts of the loss. Our role is to explain the necessary repair operations, communicate with the insurer, and provide documentation showing why those operations belong in a complete repair.
A vehicle that requires calibration should not be released simply because the visible body work is finished. The electronic verification is part of the repair plan.
How to choose a Tesla-certified collision center
When searching for a tesla certified collision center, look beyond a general statement that the shop works on electric vehicles. Ask whether the facility is currently listed in Tesla’s approved program and whether it has the equipment, training, software access, and procedures required for your repair.
Useful questions include:
- Are you currently Tesla Approved?
- Do you repair my Tesla model and production configuration?
- Will you use current Tesla repair information?
- Will you perform a pre-repair diagnostic scan?
- Which cameras, radar units, or parking sensors may be affected?
- Will you inspect the windshield camera mount?
- Will you verify bumper and mirror-mounted components?
- Will suspension or alignment work be completed before calibration?
- Is static calibration required for my specific repair?
- How will Tesla’s dynamic camera calibration be completed?
- What happens if calibration fails?
- What report will I receive at delivery?
- How will you document the work for my insurance claim?
- What written warranty applies to the repair?
RVCCR’s Tesla certification page explains our Tesla Approved Body Shop status, model coverage, high-voltage training, aluminum repair capability, OEM parts access, and calibration services.
A nearby shop may be convenient, but an EV repair shop near me should also be equipped to manage the electronic, structural, and safety requirements of the vehicle.
Tesla ADAS recalibration checklist for owners
Before picking up your repaired Tesla, confirm that:
- The collision repair is complete
- The windshield, bumper, mirror, and camera areas were inspected
- The relevant components were repaired or replaced correctly
- Any suspension or alignment issues were resolved
- A post-repair diagnostic scan was completed
- Required camera-calibration data was cleared
- Dynamic camera calibration was completed or the remaining owner drive process was clearly explained
- Radar calibration was completed if the vehicle is equipped with radar and the procedure required it
- Ultrasonic parking sensors were programmed or function-tested when applicable
- No unresolved camera, radar, parking-sensor, or driver-assistance warnings remain
- The shop provided calibration and scan documentation
- The insurer received the necessary repair records
- You understand whether any additional driving is required
- You know whom to contact if a warning returns
If the vehicle still displays “calibration in progress,” “Autopilot features unavailable,” or another related message, ask the shop to explain the status before relying on the affected feature.
Certified repair protects the drive ahead
Tesla collision repair combines body structure, glass, paint, electronics, software, and high-voltage safety. ADAS recalibration is one part of that larger process, but it is an important part because it verifies that the vehicle’s cameras and related systems can interpret the road after the physical repair.
At RVCCR, our Tesla-certified team evaluates the damage, follows current manufacturer information, coordinates with insurance, performs the required scans and calibration procedures, and documents the repair before delivery. We restore more than the appearance of the vehicle. We restore the systems that support your commute, your family, and the miles ahead.
If your Tesla was involved in a collision in Redlands or the Inland Empire, send us the VIN, damage photos, and insurance information through our free photo estimate request. We will help determine whether your repair requires camera recalibration, radar verification, parking-sensor testing, windshield inspection, suspension alignment, structural repair, or a combination of these services.
Get the physical repair right. Verify the technology. Then put your Tesla back to work for the drives, plans, and adventures that matter.
Official sources
- Tesla Model Y owner manual: Calibrating Cameras
- Tesla Model 3 service manual: Vehicle Cameras and Autopilot
- Tesla Model Y service manual: B-Pillar Camera Remove and Replace
- Tesla Model Y owner manual: Park Assist
- Tesla Model 3 owner manual: Cabin Camera and Driver Attentiveness
- Tesla Collision Support
Need a repair estimate?
Send us your Tesla’s VIN, four-corner photos, and damage photos. RVCCR will review the information and respond with a written estimate.
Need a repair estimate?
Skip the wait — send us a few photos and our team will get back to you fast.
Start a Photo Estimate →