Motorhome Collision Repair Timelines in 2026: How Long the Process Really Takes and Why
Updated August 19, 2026
RVCCR is an RVDA-certified collision and repair facility serving Redlands and the Inland Empire, with 21 years of experience working on motorhomes, travel trailers, fifth wheels, toy haulers, and other recreational vehicles. Our team combines collision, paint, body, structural, and mechanical services under one roof, coordinates with major insurance carriers, and restores vehicles according to applicable manufacturer repair information.
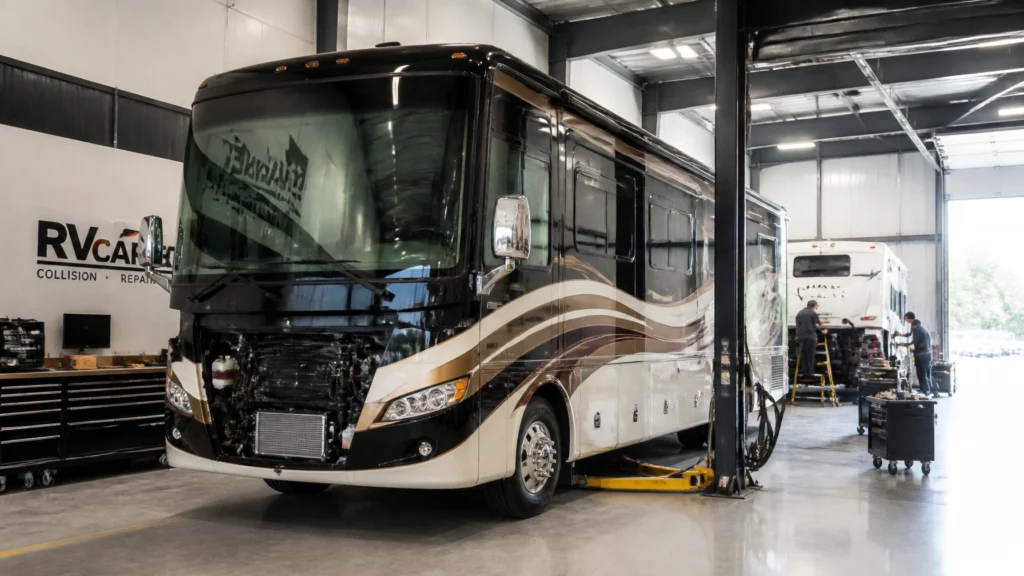
A motorhome collision rarely follows the same schedule as a passenger-car repair. The coach may be 30 to 45 feet long, constructed with fiberglass, aluminum, wood, adhesives, insulation, plumbing, wiring, and multiple exterior systems, and built on a separate automotive chassis. The repair may also depend on an insurance inspection, hidden-damage documentation, model-specific parts, large-format paint booth availability, and final mechanical or electronic checks. That is why a realistic 2026 timeline must account for every stage: not just the hours spent repairing a damaged panel…
The short answer: how long does motorhome collision repair take?
For planning purposes, a repairable motorhome collision may take:
- Minor damage: Approximately 1 to 3 weeks when the damage is cosmetic, parts are available, and no structural or mechanical work is required.
- Moderate damage: Approximately 3 to 8 weeks when several panels, trim pieces, seals, or limited structural areas are involved.
- Major damage: Approximately 8 to 16 or more weeks when the coach requires structural repairs, a cap or sidewall replacement, extensive refinishing, mechanical work, or model-specific parts.
- Long-lead parts situations: Potentially longer than the active repair time when a specialized fiberglass cap, windshield, structural extrusion, slide-out component, or custom graphics package must be manufactured or shipped.
These are planning ranges, not guarantees. The actual delivery date depends on the damage discovered during teardown, the insurer’s response to supplements, parts availability, the coach’s construction, shop scheduling, and whether additional work is required after disassembly.
The most important distinction is between active repair time and elapsed calendar time. A shop may need several weeks of labor to complete a large repair, but the total time from accident to delivery may be longer because the motorhome is waiting for an adjuster, approval, parts, freight, or a production opening.
Why RV collision repair takes longer than ordinary auto body work
A motorhome is both a vehicle and a living space. Its exterior may include a molded fiberglass front or rear cap, laminated sidewalls, aluminum framing, windows, doors, compartments, awnings, slide-outs, exterior lighting, graphics, roof systems, and sealant joints. Underneath, the chassis may contain steering, suspension, cooling, braking, electrical, and drivetrain components that also need inspection after an impact.
The damage path is not always obvious. A collision that appears to involve one exterior panel can affect:
- Aluminum or wood framing behind the panel
- Fiberglass or gelcoat layers
- Insulation and laminated wall material
- Wiring for lights, cameras, slide-outs, or leveling systems
- Roof, corner, window, or compartment seals
- Suspension, steering, brakes, wheels, or chassis components
- Interior cabinets, flooring, trim, or appliances
- Exterior graphics that must be matched after refinishing
A proper motorhome collision repair process therefore begins with documentation and inspection. It does not begin with sanding the visible damage immediately.
For more background on common causes of delay, see RVCCR’s article on why motorhome repair is taking so long.
Motorhome collision repair timeline: every phase from accident to delivery
Phase 1: Accident response, claim opening, and towing
Typical timing: same day to several days
The timeline begins with safety, not repair scheduling. If the motorhome has steering, braking, suspension, lighting, windshield, tire, fuel, fluid, structural, or water-intrusion concerns, it should not be driven simply because the engine starts.
The first steps usually include:
- Move away from traffic and document the accident scene when safe.
- Photograph the exterior damage, surrounding area, license plate, and VIN information.
- Contact the appropriate insurance carrier and open the claim.
- Obtain the claim number and assigned adjuster information.
- Confirm whether the motorhome needs specialized towing or transport.
- Choose an RV-capable collision facility.
- Arrange delivery or towing to the shop.
A large diesel pusher may require a heavy-duty tow provider with the correct equipment and experience. A travel trailer may require a separate decision about the tow vehicle, hitch, coupler, axle, brakes, and trailer storage. If the unit cannot be safely towed, the owner and insurer may need to coordinate specialized transport.
This stage may move quickly, but weekends, holidays, remote accident locations, tow availability, and insurer response can extend it.
Phase 2: Initial inspection and adjuster estimate
Typical timing: several days to approximately one week
The initial inspection documents visible damage and establishes the first repair estimate. Depending on the carrier and claim, the inspection may take place at the shop, at the vehicle’s storage location, or through a field or remote process.
The first estimate is not always the final repair scope. An adjuster may be able to document a cracked cap, damaged trim, broken lamp, scraped sidewall, or dented compartment door without seeing the damage behind those components. That estimate provides a starting point, but the repair facility still needs to inspect the coach directly.
Owners should ask whether the initial estimate is based on:
- Photographs only
- A visual inspection
- A complete physical inspection
- A partial teardown
- A manufacturer-specific repair procedure
- A preliminary assumption that hidden damage may exist
The answer affects what happens next.
Phase 3: Teardown and blueprinting
Typical timing: approximately 2 to 7 shop days, depending on damage
Teardown means carefully removing damaged or obstructing components so technicians can inspect the underlying structure and systems. Blueprinting means documenting the complete repair plan, including labor operations, parts, materials, related damage, and required quality checks.
On a motorhome, teardown may involve removing:
- Exterior moldings and trim
- Fiberglass or aluminum body panels
- Front or rear cap components
- Lamps, mirrors, cameras, and grilles
- Compartment doors and hardware
- Interior panels or cabinets for access
- Slide-out trim or seals
- Underbody panels or wheel-well components
- Damaged roof or corner materials
This is often where the original timeline changes. A visible scrape may reveal a bent support member. A cracked cap may conceal wiring damage. A sidewall impact may have disturbed a window opening or broken the seal between the wall and roof.
The goal is not to disassemble unnecessarily. The goal is to identify the complete repair scope early enough to avoid discovering critical parts one at a time.
A well-documented blueprint may include photographs, measurements, parts identification, manufacturer information, labor operations, and notes explaining why a damaged component must be repaired or replaced.
Phase 4: Supplement preparation and insurance approval
Typical timing: several days to several weeks
A supplement is an updated estimate that addresses damage or repair operations not included in the initial estimate. Progressive’s published repair guidance, for example, describes supplements as appropriate when hidden damage is found or when the original repair method or parts plan needs to change. Other carriers use their own systems and procedures.
The shop may need to submit:
- Additional damage photographs
- Teardown photographs
- Measurements
- Parts documentation
- Manufacturer repair information
- Revised labor operations
- Additional materials and hardware
- Mechanical or electronic inspection findings
- A revised completion estimate
Insurance approval can be straightforward when the documentation clearly supports the additional work. It can take longer when the carrier requests more photographs, another inspection, a different repair method, alternative parts, or additional justification.
Owners can reduce avoidable delays by:
- Providing the claim number and policy information promptly
- Signing the repair authorization without unnecessary delay
- Responding quickly to questions from the shop or insurer
- Asking who is responsible for submitting supplements
- Confirming whether the insurer requires preapproval before additional work
- Keeping all claim communications in one place
- Requesting written updates when the approved scope changes
A supplement is not automatically evidence that a shop made a mistake. It is often the result of hidden damage becoming visible only after disassembly.
Phase 5: Parts identification and ordering
Typical timing: days to several months, depending on the component
Parts are one of the largest variables in 2026 motorhome collision repair. Some items are common and may be sourced quickly. Others are specific to a manufacturer, model year, floor plan, chassis, or production run.
A practical planning framework looks like this:
| Part category | Planning expectation |
|---|---|
| Common fasteners, sealants, lamps, and service items | Often available through local or regional distribution |
| Common chassis components | May be sourced through established automotive dealer networks, subject to inventory |
| Exterior trim and model-specific molding | Often requires specific coach identification and supplier confirmation |
| Fiberglass front or rear caps | May require manufacturer verification, production scheduling, and specialized freight |
| Class A windshields | Can require specialized sourcing, handling, and delivery coordination |
| Structural aluminum or composite components | May be among the longest-lead items because the exact profile or material matters |
| Slide-out components | Highly specific to the system, coach, and model year |
| Custom graphics and decals | May require matching, production, and large-format shipping |
The key question is not, “How long do RV parts take?” The useful question is, “Which parts on this specific repair are critical-path items, and what is the current supplier ETA?”
A shop should be able to explain:
- Which parts have been ordered
- Which parts are confirmed in stock
- Which parts are on backorder
- Which parts are being manufactured
- Whether the part is OEM, approved aftermarket, or a repairable existing component
- Whether a substitute is technically acceptable
- Whether the part requires VIN, model-year, or build-sheet confirmation
- Whether freight damage or inspection could affect delivery
A long-lead part may not prevent every other operation from moving forward. In some repairs, technicians can complete structural preparation, mechanical work, or unrelated body operations while waiting. In others, the missing part is necessary before the coach can move safely into the next stage.
RVCCR explains this supply-chain issue in more detail in RV parts lead times and what they mean for motorhome repairs.

Phase 6: Structural and body repairs
Typical timing: approximately 1 to 3 or more weeks once the scope and required parts are ready
Structural work must be completed before the final body and paint operations. The exact process depends on the motorhome’s construction and the affected area.
A Class A motorhome may require work on:
- Front or rear cap supports
- Chassis-mounted body attachments
- Aluminum or composite framing
- Engine-access panels
- Bumper and grille structures
- Windshield and front-opening areas
- Sidewalls, roof transitions, or storage compartments
- Suspension or steering components connected to the impact
Technicians may need to restore alignment, replace damaged structural components, repair mounting points, replace one-time-use hardware, and verify that adjacent systems fit correctly. Manufacturer repair information determines what can be repaired, what must be replaced, and which joining or attachment methods are permitted.
A repair should not be rushed simply to meet a target delivery date. If a structural component is still being evaluated, paint and reassembly may need to wait.
Travel trailers follow a different structural path. They do not have an engine or motorhome chassis, but their trailer frame, tongue, axles, suspension, coupler, brakes, safety chains, and body structure must be inspected after a collision. A trailer can look straight while still having a bent tongue, shifted axle hanger, damaged brake wiring, or compromised wall framing.
The structural phase is complete only when the repair team has restored the affected areas and confirmed that related mechanical and body systems can be correctly reinstalled.
Phase 7: Mechanical, electrical, and system repairs
Typical timing: several days to several weeks, depending on damage
Collision damage may involve more than body panels. On a motorhome, the inspection may include:
- Steering and suspension
- Brakes and brake lines
- Wheels and tires
- Cooling systems
- Chassis wiring
- Exterior lighting
- Cameras and sensors
- Generator or auxiliary-system connections
- Leveling systems
- Slide-out mechanisms
- Entry steps
- Plumbing or water-system connections
- Heating, ventilation, and air-conditioning components
If the motorhome has driver-assistance systems, the required diagnostic and calibration process is manufacturer-specific. NHTSA does not publish one universal calibration procedure for every vehicle. The applicable vehicle and chassis manufacturer’s repair information controls the required process.
Mechanical work can happen before, during, or after body repair. For example, a damaged suspension component may need to be replaced before body alignment can be confirmed. A wiring issue may be found during teardown but tested after reassembly. A camera or sensor may require calibration only after the bumper, windshield, body structure, ride height, and alignment are restored.
Phase 8: Paint booth scheduling and refinishing
Typical timing: several days to approximately two weeks for larger or more complex work
A motorhome requires a different refinishing plan than a sedan. The size of the coach, the number of colors, the amount of masking, the material being refinished, the existing finish, graphics, clear coat, and booth availability all affect the schedule.
Paint and body operations may include:
- Surface cleaning and preparation
- Removal or protection of adjacent hardware
- Sanding and substrate repair
- Fiberglass or composite repair
- Primer and surfacer application
- Color matching
- Masking of windows, lights, trim, vents, and roof equipment
- Base-coat application
- Multi-color sequencing where needed
- Graphics or decal installation
- Clear-coat application
- Curing, denibbing, polishing, and inspection
The booth itself can become a scheduling constraint. A full-size motorhome occupies more space and requires more preparation than a passenger vehicle. Large surfaces also make color transition, texture, blending, and contamination control more visible.
A qualified RV paint and body shop should be able to explain when the coach is expected to enter the booth, what preparation must be completed first, and whether the finish will be repaired in sections or refinished across a larger area for color consistency.

Phase 9: Reassembly and calibration
Typical timing: approximately 2 to 5 shop days, sometimes longer
Reassembly is not simply putting the removed parts back in place. The technician must confirm fit, function, attachment, sealing, and alignment.
Reassembly may include:
- Exterior panels and trim
- Mirrors and cameras
- Lamps and marker lights
- Compartment doors
- Moldings and sealants
- Windshield or window components
- Awnings and slide-out trim
- Interior panels and cabinets
- Sensors and electronic modules
- Chassis components
- Roof and corner seals
If a sensor, camera, bracket, windshield, suspension component, bumper, or structural attachment was disturbed, the manufacturer may require a diagnostic scan or calibration. Calibration cannot compensate for incorrect ride height, poor alignment, loose mounting, an incorrectly installed bracket, or an incomplete structural repair. Those conditions must be corrected first.
The shop should be able to tell you whether the motorhome required:
- Pre-repair diagnostic scanning
- Post-repair diagnostic scanning
- Static calibration
- Dynamic calibration
- A road test
- System fault-code verification
- Documentation of successful completion
Not every motorhome has the same technology. The correct process depends on the chassis, model year, equipment, and manufacturer’s instructions.
Phase 10: Final quality control and delivery
Typical timing: approximately 1 to 3 days
Final quality control is the last phase before delivery. It should confirm that the repair is safe, complete, weather-tight, functional, and visually consistent with the approved scope.
A thorough final inspection may include:
- Panel fit and body gaps
- Paint color, texture, gloss, and blend quality
- Graphics alignment
- Lamps and exterior electrical functions
- Door, compartment, and window operation
- Slide-out operation
- Awning operation where involved
- Roof and body seals
- Water-intrusion concerns
- Steering and suspension condition
- Wheel and tire condition
- Brake performance
- Alignment
- Diagnostic scan results
- Calibration results where applicable
- Road-test observations
- Interior cleanliness and removal of repair materials
The owner should receive an explanation of completed work, any maintenance recommendations, warranty documentation, and information about follow-up inspections if a sealant or finish needs to be rechecked after use.

Realistic timelines by damage level
Minor motorhome collision repair
Planning range: 1 to 3 weeks
A minor repair may involve a scrape, small fiberglass area, trim, molding, compartment door, lamp, or limited paint work. The timeline is shortest when:
- The coach is safely movable
- No structural damage is found
- No mechanical or electronic systems are affected
- Parts are available
- The insurer approves the visible scope promptly
- The repair does not require a full-coach booth schedule
Even a minor repair may take longer if the damaged graphics, molding, or model-specific part is unavailable.
Moderate motorhome collision repair
Planning range: 3 to 8 weeks
Moderate damage may include several exterior panels, a sidewall area, a cap section, doors, windows, trim, seals, limited structural work, or related mechanical components.
The process typically includes more teardown, a supplement, multiple parts orders, body repair, paint blending, reassembly, and final inspection. The calendar can extend when a single missing component prevents completion.
Major motorhome collision repair
Planning range: 8 to 16 or more weeks
Major damage may involve a front or rear cap, multiple structural areas, extensive sidewall or roof work, chassis components, windshield replacement, mechanical systems, large-format paint, or complex reassembly.
The active repair work may take several weeks, but a long-lead part can make the total elapsed time substantially longer. A major repair should be planned around the longest critical-path item, not around the fastest body operation.
Class A diesel pusher versus travel trailer timelines
A Class A diesel pusher generally involves a heavy coach body mounted to a motorhome chassis. Front-end damage may affect the cap, windshield, cooling package, lighting, cameras, chassis components, and body mounts. Access, coach length, lift capacity, and mechanical inspection can add complexity. A rear collision may involve the engine-access area, rear cap, exhaust or cooling components, and structural attachments.
A travel trailer has no engine or drivetrain, but the repair still requires careful inspection of the trailer frame, tongue, coupler, axles, suspension, brakes, body structure, roof, windows, and seals. Because trailer bodies often use laminated panels or lightweight framing, a seemingly small impact may require more disassembly than expected.
A Class A diesel pusher may have more mechanical and chassis operations. A travel trailer may have fewer drivetrain components but can have difficult-to-source body panels, graphics, windows, slide-out components, or structural materials. Neither category has one universal timeline.
How to avoid unnecessary insurance delays
Owners cannot control every insurer response, but they can make the claim easier to process.
Choose the repair facility early
Do not wait until after an adjuster writes an estimate to decide whether the shop has the space, equipment, training, and experience to work on the coach. A shop that understands RV construction can identify relevant hidden-damage areas sooner.
RVCCR’s RV repair and collision service page explains the types of coaches and repairs our facility handles.
Give the shop complete information
Provide:
- VIN and coach identification
- Year, make, model, and floor plan
- Chassis make and model
- Insurance claim number
- Policy and adjuster information
- Previous repair history if relevant
- Keys, remotes, and access codes
- Information about stored belongings
- Details about warning lights, leaks, slide-outs, or system failures after the collision
Approve documentation and teardown promptly
If the shop is waiting for authorization to inspect or disassemble the damaged area, the parts and supplement timeline may not begin. Ask what authorization is needed and complete it as soon as practical.
Ask whether the insurer requires reinspection
Some carriers may want to inspect supplemental damage before additional work continues. The shop should explain the procedure for the carrier handling your claim.
Keep the communication specific
Instead of asking only, “How much longer?”, ask:
- Is the claim waiting on the insurer, a part, labor, booth space, or quality control?
- Has the supplement been submitted?
- Has it been approved?
- Which part is the current critical-path item?
- Has the supplier confirmed an ETA?
- Is the ETA a production date, ship date, or delivery date?
- What work can proceed while waiting?
- What event must occur before the delivery date can be confirmed?
Specific questions produce more useful answers.
Questions to ask before dropping off your motorhome
Before authorizing repairs, ask the shop:
- Do you regularly perform motorhome collision repair, not only passenger-car repairs?
- Are your staff or technicians RVDA certified or otherwise trained for RV construction and systems?
- Can you repair the body, paint, structure, and mechanical systems, or will major portions be subcontracted?
- Will you perform a teardown and blueprint before confirming the final timeline?
- Who communicates with the insurance carrier about supplements?
- Which parts are expected to be OEM, approved aftermarket, repaired, or reused?
- Which parts are already confirmed available?
- Which components could create a long delay?
- How will you handle a backordered part?
- Do you have paint facilities sized for my motorhome?
- Will seals, windows, roof edges, slide-outs, and exterior accessories be inspected?
- Will steering, suspension, brakes, wheels, and chassis systems be checked when relevant?
- Are pre- and post-repair scans or calibrations required for my coach?
- What final quality-control checks will be completed before delivery?
- How often will I receive status updates?
- What written warranty backs the completed repair?
- Where will the motorhome be stored while waiting for parts or approval?
- What items must I remove before drop-off?
- What is the current expected delivery window, and what could change it?
- Can you provide the repair plan and final documentation in writing?
A responsible shop should be comfortable answering these questions without promising a date that the damage and parts information do not support.
Planning your next trip around the repair
If your motorhome is needed for a wedding, family vacation, seasonal trip, or long-distance journey, do not plan around the most optimistic estimate. Plan around the current parts status and the possibility of hidden damage.
For cosmetic damage with readily available parts, several weeks may be adequate. For a major Class A repair involving structural components, a windshield, a cap, a slide-out, or custom graphics, begin planning months ahead. Ask the shop to identify the critical-path component and to update you when the part is ordered, shipped, received, inspected, and ready for installation.
You should also ask whether the motorhome can safely remain at another location during a parts wait or whether the repair facility needs it on site for teardown, storage, or ongoing work. That decision depends on the damage, weather exposure, insurance requirements, and the shop’s workflow.
Choosing an RV paint and body shop in the Inland Empire
The right repair partner is not simply the shop with the shortest quoted timeline. It is the shop that can explain the timeline, document changes, source the correct parts, communicate with the insurer, and complete the work safely.
Look for:
- RV-specific experience
- RVDA-certified staff or technicians
- Large-coach access and storage
- Structural repair capability
- Controlled paint facilities
- Mechanical inspection and repair capability
- Insurance-claim coordination
- Manufacturer repair information
- Clear supplement documentation
- Written warranty coverage
- A defined quality-control process
RVCCR is family-owned and has served the Redlands and Inland Empire area for 21 years. Our team handles RV collision, paint, body, structural, and mechanical repairs, including Class A motorhomes, Class B and C coaches, fifth wheels, travel trailers, toy haulers, popups, and truck campers.
The goal is not just a shorter repair: it is a safer return to the road
A motorhome repair timeline can feel frustrating because every day in the shop represents a missed trip, a disrupted plan, or a lifestyle put on hold. But rushing a structural, mechanical, paint, or sealing operation can create problems that last far longer than the original delay.
The better approach is a complete inspection, an accurate blueprint, early supplement documentation, realistic parts planning, disciplined repair work, controlled refinishing, and final quality control. That process gives you a clearer answer about where the repair stands and what must happen next.
At RVCCR, we restore more than damaged panels. We restore the confidence to steer, tow, camp, and travel again. Bring your motorhome to our Redlands facility or send photos for a free estimate. We will help organize the claim, explain the repair path, and move your coach toward its next adventure with the care, equipment, and certified experience it deserves.
Tier 1 reference sources
Need a repair estimate?
Skip the wait — send us a few photos and our team will get back to you fast.
Start a Photo Estimate →