RV Generator Damage After a Collision: Inspecting Fuel, Exhaust, Mounts, and Electrical Systems
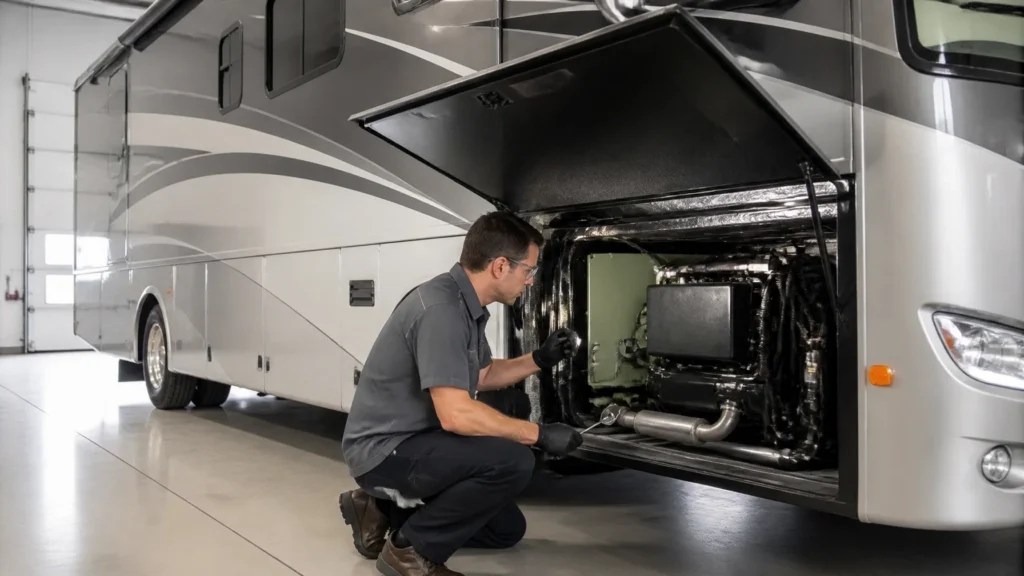
Updated September 2, 2026 | RVCCR, RVDA Certified Repair Facility in Redlands
RVCCR combines RVDA-certified experience, collision repair, paint and body work, and mechanical service under one roof. That combination matters after a motorhome collision because the generator is not simply another appliance. It is a fuel-powered mechanical system connected to the coach through mounting hardware, fuel delivery, exhaust routing, cooling airflow, electrical wiring, and a compartment that must remain properly separated from the living space.
A collision can damage the generator even when the unit still starts. Impact forces may bend the generator cradle, loosen isolation mounts, pinch a fuel line, shift an exhaust pipe, damage the sound enclosure, interrupt cooling airflow, or pull on wiring and grounds. Some problems are immediately visible. Others appear only when the generator runs, vibrates, warms up, carries an electrical load, or is inspected from underneath…
For that reason, a generator should be inspected as part of a complete motorhome collision repair process: not treated as a component that can be ignored because the dashboard lights work or the engine turns over.
Why the generator belongs in the collision inspection
Many motorhomes have a permanently installed generator in a compartment built into the front, rear, or mid-coach area. Exact placement varies by motorhome type, chassis, floor plan, generator model, fuel type, and manufacturer design.
A Class A motorhome may have its generator mounted behind a front access door, beneath the cockpit, in a front overhang, or in another chassis-supported compartment. Some coaches place the unit farther back to balance weight or accommodate the floor plan. Class C motorhomes may use a front or midship compartment, while other configurations use a different layout altogether.
The generator is connected to the RV through several systems:
- A metal mounting cradle or support structure
- Bolts, brackets, and rubber isolation mounts
- A fuel line and, depending on design, a fuel filter or shutoff
- An exhaust manifold, pipe, muffler, hangers, and tailpipe
- Cooling-air intake and discharge paths
- Electrical cables, grounds, circuit protection, and control wiring
- A compartment door, enclosure, seals, and heat-management materials
- A remote start or monitoring system inside the coach
When a collision changes the position of the body, chassis, compartment, or generator support, those connections can be placed under stress. A short, abrupt impact may create a problem that does not show up during a quick visual inspection.
The damage may also be indirect. A rear impact can transfer force through body structure toward a generator compartment. A front impact can affect the cradle, compartment opening, wiring, or exhaust routing. A side impact can distort the compartment wall or crush lines and wiring that run beside the generator. A collision with a curb, driveway transition, or road debris can strike a low-hanging exhaust component without causing major body damage.
The generator therefore needs an inspection based on its installation and the path of the collision force.
The first safety decision: do not run a questionable generator
If the motorhome has been involved in a collision and the generator compartment, exhaust, fuel system, wiring, or underbody may have been affected, do not start the generator simply to see whether it works.
A generator can run while still having:
- A fuel leak
- A damaged exhaust pipe
- A loose exhaust hanger
- A cracked muffler or connection
- A compromised compartment seal
- A damaged ground cable
- A crushed wiring harness
- A blocked cooling-air path
- A shifted mounting cradle
- A loose or damaged sound enclosure
Fuel and exhaust concerns deserve immediate attention. Carbon monoxide is colorless and odorless, and an exhaust problem may not be obvious from inside the RV. NHTSA recall documentation has described motorhome situations in which a gasoline generator exhaust pipe was improperly located or missing. The stated safety risk was that carbon monoxide could build up around the motorhome and enter the interior, creating a risk of serious injury or death.
The NHTSA generator exhaust recall report is specific to the affected Thor Motor Coach vehicles identified in that recall. It is not a statement that every RV has the same defect. It does demonstrate why exhaust routing, installation, and termination must be verified rather than assumed.
Cummins Onan operator manuals likewise instruct owners to check for fuel and exhaust leaks and to avoid operating a generator when a leak, damage, or a possibility of exhaust entering the vehicle exists. The correct manual depends on the exact generator model.
If you smell fuel, hear an unusual exhaust sound, see visible damage, or receive a carbon monoxide alarm, shut the generator down if it can be done safely, leave the RV for fresh air, and seek appropriate emergency or medical assistance. Do not re-enter or resume generator use until the system has been inspected and cleared by qualified personnel.
Inspection point 1: generator mounting cradle and isolation mounts
The cradle is the structure that supports the generator and transfers its weight into the motorhome. It may be attached to the chassis, body structure, compartment framing, or a combination of these components, depending on the vehicle design.
The cradle and its attachment points should be inspected for:
- Bent rails or support members
- Cracked welds
- Torn or elongated bolt holes
- Shifted brackets
- Missing or damaged fasteners
- Fresh contact marks
- Distorted compartment framing
- Separation between the cradle and surrounding structure
- Changes in clearance around the generator
- Evidence that the generator moved during the impact
The generator itself may appear intact while the support beneath it has shifted. That matters because the generator is a vibrating machine. A support that is only slightly distorted can allow excessive movement once the engine is operating.
Rubber isolation mounts are designed to reduce vibration transferred between the generator and the motorhome. After a collision, a mount may be:
- Torn
- Compressed
- Cut
- Pulled out of position
- Separated from its metal sleeve
- Loaded unevenly because the cradle moved
- Damaged along with its mounting bolt
A damaged isolation mount can create new vibration, noise, and stress. It can also allow the generator or connected exhaust components to move more than intended. That movement may affect fuel-line routing, wiring, the muffler, the tailpipe, or the enclosure.
A proper inspection should compare the affected mounting points with the installation arrangement and available manufacturer information. Technicians should not simply tighten every visible bolt and return the vehicle to service. Tightening a fastener does not straighten a bent bracket or restore a torn rubber mount.

Inspection point 2: fuel tank connections and fuel lines
A motorhome generator may draw fuel from the vehicle’s fuel system or from a dedicated arrangement specified by the manufacturer. The exact configuration varies. The inspection should follow the vehicle and generator documentation rather than assume that every coach uses the same routing.
Collision-related fuel-system inspection points may include:
- Fuel lines near the generator compartment
- Connections at the generator
- Fuel filters and fittings
- Shutoff components where equipped
- Clamps and retainers
- Lines passing near brackets or sharp edges
- Areas where a line may have been pinched
- Abrasion marks
- Fresh wetness or staining
- Damaged tank supports or nearby structure
- Fuel-system wiring or control components
A line may not be visibly broken yet still be unsafe. It could have been crushed, kinked, pulled from its intended routing, or placed against a vibrating metal edge. A fitting may have been loosened by movement. A support may have shifted and changed the line’s bend radius.
Fuel leaks are not always obvious immediately after a collision. Temperature, pressure, fuel level, movement, and the time since the impact can affect what is visible. A qualified technician should use a controlled inspection process appropriate to the system and generator manufacturer’s instructions.
The repair facility should also check whether the collision damaged the access door or compartment structure around the fuel system. A door that no longer closes correctly can expose components to road debris or affect the compartment’s intended protection. A crushed panel can contact a fuel line or restrict access for future maintenance.
If fuel odor is present, the owner should not attempt to identify the source by repeatedly starting the generator. The coach should be treated as unsafe until the fuel system has been evaluated.
Inspection point 3: exhaust manifold, pipe, muffler, hangers, and tailpipe
Generator exhaust is one of the most important post-collision inspection areas because the system must move combustion gases away from the RV and prevent those gases from entering the living space.
The inspection should cover the complete exhaust path, including:
- The exhaust outlet at the generator
- Exhaust manifold connections where accessible
- Pipes and elbows
- Flexible sections where used
- Muffler
- Hangers and brackets
- Clamps and fasteners
- Heat shields
- Tailpipe
- Tailpipe termination
- Penetrations through the compartment or body
- Seals around the generator compartment
- Areas near windows, doors, vents, slide-outs, and sleeping areas
A collision can create several types of exhaust damage:
A shifted or shortened tailpipe
An impact with the ground, a curb, towing equipment, or another object may bend or shear a tailpipe. If the outlet no longer extends or terminates where the manufacturer intended, exhaust may discharge beneath or alongside the coach instead of away from it.
Cummins Onan RV generator manuals provide model-specific exhaust guidance, including inspection for leaks, routing concerns, clearances, and obstructions. One gasoline-generator manual available through Cummins is the Onan HGJAA/HGJAB operator manual. Owners and technicians should use the manual that matches the installed generator.
A cracked pipe or muffler
A pipe or muffler can crack from direct impact, heat cycling after a bracket shifts, or vibration after a mounting support is damaged. Some cracks are easier to hear while the generator is running, but the system should be inspected before operation if collision damage is suspected.
Loose or broken hangers
Exhaust hangers hold the system in its intended position. A broken hanger can allow the pipe to contact the frame, body, enclosure, or other components. That contact may create a rattle, transmit vibration, or place stress on another exhaust connection.
A damaged compartment seal
The generator compartment must be properly isolated from the interior. A collision can open a seam, distort a door, pull away a seal, or damage a panel that separates the generator from the living space. The exhaust system can be intact and still create a risk if the compartment barrier has been compromised.
Exhaust routed toward a vulnerable opening
The final position of the outlet matters. Exhaust should not be directed toward openings or locations where gases can collect around the coach. NHTSA’s recall materials and generator safety guidance emphasize that exhaust routing and vehicle openings must be considered together.
A technician should confirm the system’s condition while cold and, when safe and appropriate, observe it during controlled operation. The inspection should include looking and listening for leaks, checking for abnormal movement, and verifying that the tailpipe is not blocked or damaged.
Inspection point 4: cooling airflow and heat management
A generator requires adequate air for operation and heat removal. The body compartment is designed around specific intake, discharge, ventilation, and heat-management arrangements.
After a collision, inspect:
- Air intake openings
- Cooling-air discharge paths
- Compartment louvers
- Ducts and shrouds
- Fan areas
- Heat shields
- Insulation
- Panels that may have moved into the airflow path
- Debris or crushed material
- Wiring or hoses routed near hot components
- Clearance between the generator and enclosure
A dented compartment panel may restrict airflow. A shifted generator may place a fan shroud or hot component too close to the enclosure. A missing heat shield may expose wiring, fuel components, or body materials to temperatures they were not intended to withstand.
Not every visible deformation requires replacement, and not every component can be repaired in the same way. The decision should be based on the generator model, the compartment design, the manufacturer’s requirements, the damage, and the effect on safe operation.
Cooling problems may not appear during a brief idle test. The generator can run normally for a short time and develop a problem as temperature rises or the unit operates under load. That is one reason final testing should occur only after the mechanical and body repairs are complete.
Inspection point 5: wiring, grounds, controls, and electrical connections
Collision forces can pull, pinch, cut, or stretch electrical wiring. The generator may still start even when a secondary circuit has been damaged.
Inspect the wiring associated with:
- The generator starting circuit
- Battery cables
- Ground connections
- Remote-start controls
- Output wiring
- Circuit breakers
- Transfer-switch connections where relevant
- Monitoring panels
- Fuel-system controls
- Temperature or safety sensors
- Exterior harness retainers
- Wiring passing through body panels
- Conduit and protective loom
A damaged ground can create intermittent operation, difficult starting, nuisance shutdowns, or unsafe current paths. A pinched harness can work initially and fail later when vibration or heat affects the damaged section.
The inspection should look for fresh abrasion, crushed insulation, exposed conductors, pulled connectors, displaced retainers, and contact with sharp edges or hot surfaces. Any repair should use a method and materials appropriate to the vehicle and generator system. Twisting wires together and covering them with ordinary tape is not an adequate substitute for a documented electrical repair.
A post-repair scan or diagnostic check may be appropriate for systems equipped with electronic controls. The exact test depends on the generator and motorhome design.
Inspection point 6: sound enclosure, compartment door, and sealing surfaces
The sound enclosure reduces noise and helps control the generator’s relationship to the surrounding compartment. It may include panels, access doors, insulation, seals, latches, hinges, and fasteners.
Collision damage may cause:
- A bent enclosure panel
- A damaged access door
- Broken hinges
- Misaligned latches
- Missing fasteners
- Torn insulation
- Open seams
- Gaps around wiring or exhaust penetrations
- Contact between the enclosure and generator
- A door that appears closed but does not seal evenly
A sound enclosure should not be evaluated only by how quiet the generator sounds. A panel that is loose or misaligned may permit vibration, heat, or exhaust-related problems. A damaged seal can create an opening between the generator compartment and the interior.
Technicians should inspect the fit of the compartment door, confirm that latches engage correctly, and examine the perimeter seals and penetrations. If an access panel is replaced, the replacement must be compatible with the original installation and should not obstruct the required airflow or maintenance access.
How collision forces affect the whole generator assembly
The generator does not experience the collision in isolation. Its behavior depends on how the motorhome body and chassis moved around it.
Common force patterns include:
Front impact
A front impact may affect a generator located behind the front cap, bumper, or cockpit area. Possible inspection areas include the cradle, front compartment structure, wiring, exhaust outlet, fuel lines, and body-to-chassis attachments.
The front compartment door may be damaged even if the generator itself was not struck directly. If the door or surrounding wall moved, the generator’s clearances and sealing may have changed.
Rear impact
A rear impact may affect a rear-mounted generator, exhaust routing, body structure, or wiring. Even if the generator is located forward, force can travel through the coach structure or underbody components.
The repair team should inspect the collision area and trace nearby systems rather than assume that only the exterior panel was involved.
Side impact
A side impact may crush a compartment, pinch lines and wiring, or distort a support wall. A sidewall can look repairable from outside while the generator compartment frame or internal attachment points have shifted.
Undercarriage impact
A road object, steep transition, or towing incident can strike the lowest parts of the generator installation. The exhaust, brackets, cradle, and lower enclosure are common areas to check when the coach has bottomed out.
The collision history and the vehicle’s exact configuration should guide the inspection.
Why a generator should be tested after body repair
A generator should not be considered repaired merely because a damaged panel has been replaced or the unit starts.
Testing should be planned around the generator manufacturer’s procedures and the repair findings. Depending on the system, a complete post-repair evaluation may include:
- A visual inspection
- A fuel-system leak check
- An exhaust-system inspection
- A compartment-sealing check
- A starting and shutdown test
- An operating run test
- An electrical output or load test
- Verification of cooling airflow
- Inspection for abnormal vibration
- Verification of remote controls and safety functions
- Carbon monoxide detector verification inside the RV
- A final review of noise, movement, and exhaust routing
The run test
A run test allows the technician to observe starting, idle behavior, shutdown, unusual sounds, vibration, warning indicators, and operating stability. The test duration and procedure should be appropriate to the generator model and repair condition.
The owner should ask whether the generator was tested cold, whether it reached normal operating temperature, and whether the technician observed it after the compartment and surrounding body components were reinstalled.
The load test
An electrical load test evaluates whether the generator performs under a controlled demand rather than only at no load. The test should be performed using appropriate equipment and within the generator’s rated operating limits.
The purpose is not to create a universal pass/fail number for every RV. Generator ratings, control systems, and test procedures differ. The useful question is whether the facility followed the applicable procedure and documented acceptable operation for that specific unit.
A generator that starts but cannot carry the RV’s expected electrical demand may have an issue involving output, controls, wiring, cooling, fuel delivery, or another system. That condition may not be obvious during a short no-load run.
Exhaust sealing and routing verification
The exhaust system should be inspected for leaks and checked for proper routing after the body, compartment, mounts, and panels have been repaired. Reassembly can change how a pipe sits relative to the body.
The technician should confirm:
- Connections are secure
- Hangers support the system
- The pipe is not contacting the body
- The tailpipe is not blocked
- The outlet is positioned correctly
- Compartment penetrations are sealed as required
- Exhaust is not directed toward vulnerable openings
- The system does not move excessively during operation
Cummins guidance emphasizes checking for fuel and exhaust leaks before operation and observing for abnormal leakage or noise while running. If a leak or abnormal condition is found, the generator should be shut down and repaired before further use.
Carbon monoxide detector verification
A working carbon monoxide detector is an important safety device, but it does not replace correct generator installation, exhaust routing, sealing, and inspection. The detector should be tested according to its manufacturer’s instructions.
The NHTSA recall report cited above noted that the affected motorhomes were equipped with carbon monoxide detectors intended to monitor the air inside the vehicle. The presence of a detector does not make an improperly routed exhaust system safe. It is one layer of protection, not permission to operate a damaged generator.
What carbon monoxide risk means after an RV collision
Carbon monoxide can enter an RV when exhaust is misrouted, leaking, discharged beneath the coach, drawn through an opening, or allowed to pass through a compromised compartment barrier.
NHTSA’s recall documentation has identified the risk of carbon monoxide building up around a motorhome and entering the interior when a generator exhaust pipe is missing or improperly located. The practical lesson for collision repair is direct: exhaust inspection must include the whole system and its relationship to the RV body.
Owners should take immediate action if:
- A CO detector sounds
- Anyone develops headache, dizziness, nausea, weakness, confusion, or unusual sleepiness while the generator is running
- Exhaust odor is noticed inside the RV
- The generator sounds different after the collision
- The exhaust pipe appears bent, loose, short, or missing
- The generator compartment door no longer fits correctly
- A fuel smell is present
- The unit vibrates more than before
Leave the RV for fresh air and seek emergency assistance if exposure is suspected. Do not rely on opening a window, turning on a fan, or moving the generator switch off as a substitute for professional evaluation.
How generator damage fits into an insurance collision claim
Generator damage caused by a covered collision may be considered part of the vehicle’s collision repair scope, but coverage depends on the policy, the facts of the loss, the cause of the damage, and the insurer’s claim determination.
The generator is installed equipment within the motorhome. If the collision damaged its cradle, exhaust, wiring, fuel connections, compartment, or related components, the repair facility should document those findings and explain how they relate to the loss.
The NAIC auto insurance consumer information explains that collision coverage generally applies to physical damage to the insured vehicle when it collides with another vehicle or object, subject to the policy’s terms and deductible. It also distinguishes collision coverage from liability and comprehensive coverage.
That general explanation does not determine an individual RV claim. A carrier may review:
- Whether collision coverage applies
- Whether the generator damage is consistent with the reported impact
- Whether any condition existed before the accident
- Whether the damage resulted from a separate mechanical failure
- Whether the repair is necessary to restore the motorhome
- Whether the cost is reasonable and supported
- Whether the vehicle is repairable under the policy’s valuation provisions
- Whether the damage affects the actual cash value or total-loss decision
The repair shop should not promise that every generator-related line item will be approved. Instead, it should provide clear documentation:
- Photographs before disassembly
- Photographs of the damaged cradle, exhaust, lines, wiring, or enclosure
- Measurements where relevant
- Diagnostic findings
- A written explanation of the damage path
- Part numbers and sourcing information
- Manufacturer or component documentation
- Testing recommendations
- A revised estimate or supplement
For additional background, read RVCCR’s article on RV insurance supplements and hidden damage. A generator problem may not be visible until the compartment is opened or the system is inspected under controlled conditions.
Owners generally have the right to discuss their repair-facility choice with their insurer, but state law and policy terms can vary. Ask the carrier how the claim will be handled, what deductible applies, whether an inspection or reinspection is required, and whether approval is needed before supplemental work proceeds.
Why generator damage may appear on a supplement
An initial estimate may include the visibly damaged compartment door, bumper, fascia, cap, or sidewall. It may not include the generator system if the unit was not directly visible or tested during the first inspection.
A supplement may become necessary when teardown reveals:
- A bent cradle
- A damaged mounting bracket
- Torn isolation mounts
- A pinched fuel line
- A broken exhaust hanger
- A cracked muffler or pipe
- A displaced tailpipe
- Damaged wiring or grounds
- A distorted enclosure
- A compromised compartment seal
- Cooling-air obstruction
- Required post-repair testing
The supplement should connect each item to evidence. For example, a photograph can show the bent support. A measurement can document changed clearance. A test can identify excessive vibration or unstable output. A manufacturer manual can support the need to inspect the exhaust before operation.
A supplement is not automatically a sign that the original estimate was inaccurate. On a large RV, the first estimate often documents visible conditions. Controlled disassembly and system testing reveal the rest.
Questions to ask the repair facility
Before authorizing work, ask the shop:
- Where is the generator mounted on my specific motorhome?
- Was the generator compartment directly involved in the collision?
- Will the cradle and its chassis or body attachment points be inspected?
- Will the isolation mounts be checked for tearing, compression, and movement?
- Will the fuel lines, fittings, filters, and retainers be inspected?
- Will the full exhaust path be checked from the generator outlet to the tailpipe?
- Will the exhaust hangers, muffler, heat shields, and termination be verified?
- Will the compartment door, seals, penetrations, and enclosure be inspected?
- Will cooling-air openings and heat-management components be checked?
- Will wiring, grounds, remote-start controls, and circuit protection be tested?
- Which generator model manual or service information will guide the inspection?
- Will the generator be tested before the coach is delivered?
- Will the test include a controlled run at operating temperature?
- Will the generator receive an electrical load test appropriate to its model?
- Will the exhaust be checked for leaks during operation?
- Will the carbon monoxide detector be tested according to its instructions?
- What findings will be submitted to the insurer as a supplement?
- Which repairs are approved, pending, or potentially owner-paid?
- Will I receive photographs and copies of revised estimates?
- What warranty covers the generator-related repair work?
A trustworthy facility should answer these questions in concrete terms. “We will check it” is less useful than an explanation of what will be checked, how it will be documented, and when testing will occur.
Why an auto-only facility may not be enough
A motorhome combines an automotive chassis with a coach body and multiple living-space systems. A general automotive repair shop may be capable of working on an engine or electrical circuit, but that does not automatically mean it is equipped to inspect the generator’s installation within the RV.
Generator-related collision work may require coordination among:
- Collision technicians
- RV structural technicians
- Mechanical technicians
- Electrical technicians
- Paint and body staff
- Insurance documentation personnel
- Generator or component specialists when needed
The repair also may involve full-size access, secure storage, underbody inspection, compartment sealing, fiberglass or composite repair, paint matching, and final road-readiness checks.
That is why owners searching for rv collision repair or an rv paint and body shop should ask whether the facility can evaluate the generator as part of the complete repair rather than sending the coach away without a coordinated inspection.
RVCCR’s article on RV collision repair in the Inland Empire explains why motorhomes require attention to structural, mechanical, and house systems after a collision.
How generator inspection affects the repair timeline
Generator-related findings can change the repair schedule. The first estimate may cover exterior damage. After teardown, the shop may need to submit a supplement, obtain approval, order model-specific components, complete structural work, and perform testing before reassembly.
Potential timeline variables include:
- The generator’s exact make and model
- Availability of a replacement cradle or bracket
- Exhaust-pipe or muffler sourcing
- Access to the damaged compartment
- Whether the generator must be removed
- Whether the body structure needs repair first
- Insurance reinspection requirements
- Electrical or mechanical diagnostic findings
- The need for a load bank or other test equipment
- Parts availability
- Final sealing and paint operations
A generator problem should not automatically delay every repair operation. Some body or mechanical work may proceed while parts or insurance decisions are pending. However, the coach should not be declared complete until the generator and related systems have been evaluated if they were within the collision path.
For more context about the stages that influence a motorhome repair schedule, review motorhome collision repair timelines in 2026.
What owners should document before the RV reaches the shop
Owners can help the inspection by recording the vehicle’s condition after the collision, provided it is safe to do so.
Useful information includes:
- Photos of the motorhome from all four corners
- Photos of the generator compartment
- Photos of the impact area
- Photos underneath the coach
- Photos of a bent or displaced exhaust pipe
- Photos of fluid or fuel staining
- A description of new odors
- A description of new sounds or vibration
- Whether the generator was running at the time of the collision
- Whether the generator was used after the collision
- Any warning lights or shutdowns
- Whether the carbon monoxide detector alarmed
- The generator make, model, and serial information where accessible
- The insurance claim number
Do not crawl beneath an unstable or damaged motorhome. Do not open a compartment if there is an active fuel leak, fire risk, or other unsafe condition. A towing or repair professional should handle access when necessary.
If you need to start the insurance process, RVCCR’s photo estimate form allows owners to submit vehicle information, VIN documentation, insurance details, and photographs for an initial review. A photo estimate is a starting point; it does not replace an in-person teardown or system test when hidden damage is possible.
A generator inspection is part of restoring the whole motorhome
The generator supports the motorhome lifestyle. It helps provide power when the coach is away from electrical hookups, during travel interruptions, and at destinations where independent operation is part of the trip. But that convenience depends on a safe installation and a system that performs as intended.
After a collision, the right repair process looks beyond the visible body damage. It checks the generator’s mounting cradle, isolation mounts, fuel system, exhaust routing, cooling airflow, wiring, grounds, enclosure, compartment seals, carbon monoxide protection, and electrical output. It documents the findings for the insurer and tests the completed system before delivery.
Do not let a generator that still starts create false confidence. A motorhome can look finished while a shifted exhaust, loose mount, damaged fuel line, or compromised compartment seal remains unresolved.
RVCCR brings RVDA-certified experience, collision repair, paint and body work, and mechanical service together in Redlands. Our team can help document the damage, coordinate with the insurance carrier, inspect hidden systems, repair the coach, and verify the work before you return to the road.
Bring your motorhome to a facility that understands the entire vehicle: not just the panel that was struck. Let the technicians find the hidden damage, secure the systems, test the generator, and restore your coach for the next trip, the next campsite, and the adventure waiting beyond the repair bay.
Request a free RV repair estimate and tell our team whether the generator compartment, exhaust, fuel system, or underbody was near the collision.
Need a repair estimate?
Skip the wait — send us a few photos and our team will get back to you fast.
Start a Photo Estimate →