Tesla Glass Roof Repair After a Collision: Why OEM Replacement and Camera Recalibration Go Together
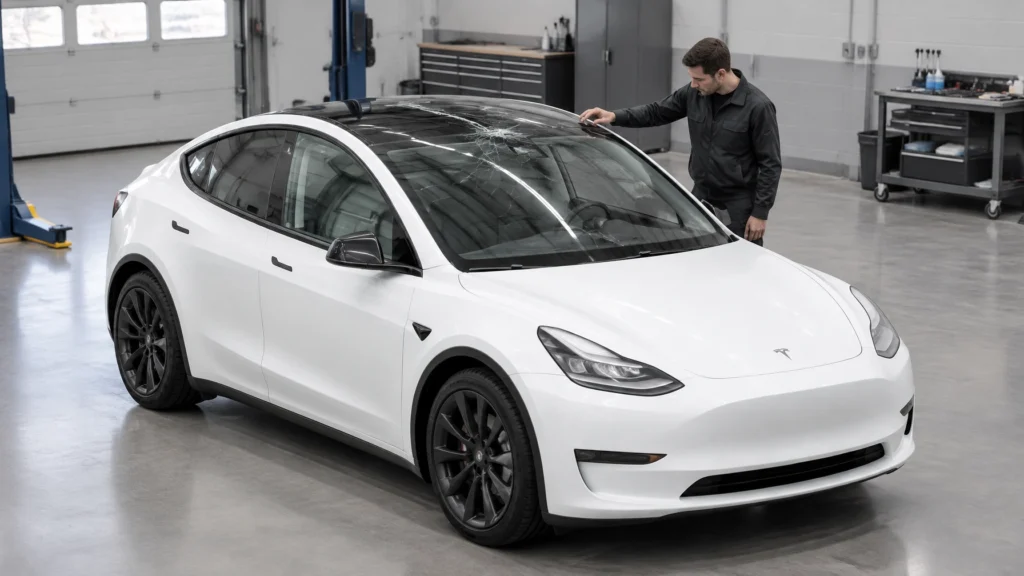
RVCCR is a Tesla Approved Body Shop serving Redlands and the Inland Empire, with manufacturer-trained technicians, OEM repair information, and the equipment required for Tesla collision work. As a family-owned shop with 21 years of experience, we understand that Tesla glass roof repair is not simply a matter of removing broken glass and installing a replacement panel. The roof glass, windshield, body opening, adhesives, seals, cameras, and structural reference points all have to work together after the collision…
For Tesla owners searching for a Tesla body shop in the Inland Empire, an EV repair shop near me, or certified auto collision repair, the first distinction is important: a fixed glass roof panel is not the same component as the rear windshield, sometimes called the backlite. The correct repair also depends on the Tesla model, model year, glass configuration, damage location, damage depth, and whether the collision affected the surrounding structure or forward-facing camera system.
This article explains how those decisions are made for the Model 3, Model Y, Model S, Model X, and Cybertruck.
The first distinction: fixed roof glass versus rear windshield
Tesla vehicles may have a large glass roof, but that roof panel is a separate assembly from the rear window.
The terms can become confusing because a Tesla’s roof glass may extend far toward the rear of the vehicle, creating one continuous visual surface from the windshield area to the liftgate or rear body. From outside, the glass can look like one panoramic component. From a repair standpoint, however, technicians identify separate assemblies, separate urethane paths, separate alignment points, and separate replacement procedures.
Fixed glass roof
The fixed roof panel is bonded into the roof opening above the passenger compartment. Depending on the vehicle and configuration, it may be described in Tesla service information as:
- Fixed roof glass
- Fixed glass roof
- Fixed roof glass assembly
- Roof glass
It is not a sliding sunroof panel. It is a bonded fixed component that must be removed with appropriate glass-removal equipment and installed with a controlled urethane process.
On Model 3 and Model Y, Tesla service procedures require technicians to measure the gaps between the roof glass and nearby glass or body surfaces before removal. Those measurements help establish the correct position of the replacement panel. The procedure is not based on simply placing the new glass “where it looks right.”
Rear windshield or backlite
The rear windshield is commonly called the backlite in automotive repair documentation. It is the fixed rear glass installed in the liftgate or rear body opening.
The backlite may include:
- Defroster elements
- Molded or attached trim
- Alignment datums or clips
- A dedicated urethane path
- Model-specific seals and surrounding trim
The backlite is not interchangeable with the fixed roof panel. It has different curvature, dimensions, mounting points, visibility requirements, and replacement instructions.
On the Cybertruck, Tesla service information identifies the rear glass as fixed backlite glass and the roof component as a fixed glass roof assembly. Tesla’s published service information treats these as separate bonded glass assemblies.
Model-specific differences matter
The same general principles apply across the Tesla lineup, but the actual glass design and repair limits can vary:
- Model 3: The fixed roof glass is separate from the windshield and backlite. Tesla publishes a dedicated remove-and-replace procedure with gap measurements and controlled urethane installation.
- Model Y: The fixed roof configuration can vary by model year and production version. Roof glass repair guidelines establish limited repair zones, while the service manual provides the replacement procedure.
- Model S: Roof and rear glass procedures vary between earlier vehicles and newer refresh or Palladium configurations. The VIN and production version should be confirmed before ordering parts.
- Model X: The roof and rear glass arrangement can vary by generation and configuration. A shop should identify the exact glass assembly through the vehicle and the applicable Tesla service information rather than relying on a generic Model X assumption.
- Cybertruck: Tesla service documentation identifies a fixed glass roof assembly and fixed backlite glass. Owners may hear the term “Armor Glass,” but service decisions should be based on the applicable Tesla repair documentation and the exact component involved.
That distinction becomes critical after a collision because a shop that estimates “roof glass” without confirming the assembly may be looking at the wrong part, the wrong labor procedure, or the wrong calibration implications.
Why Tesla roof glass should be evaluated as part of the roof system
A bonded glass roof is not merely decorative. It closes a large body opening and must be installed with the correct position, adhesive, cure time, and surrounding seals.
The exact engineering contribution varies by model and body design, so a repairer should not make a blanket statement that every glass roof carries the same structural load. However, the bonded glass assembly is part of the completed vehicle roof system. The body structure, pillars, roof rails, cross-members, bonding materials, glass, and surrounding joints work together to preserve the designed passenger compartment.
The federal roof-crush standard, FMVSS No. 216a, evaluates the roof structure of covered vehicles as a complete system. It is performance-based rather than a simple requirement for one particular roof material. A glass roof does not eliminate the need for roof strength; the completed vehicle must still meet the applicable roof-strength and occupant-survival-space requirements.
That is why the following problems matter after a collision:
- A bent or distorted roof opening
- A damaged roof flange
- Uneven glass-to-body gaps
- Incorrect adhesive bead placement
- Insufficient adhesive cure
- Glass installed under uneven tension
- Missing or damaged seals
- Roof-panel movement during removal
- Hidden damage near the A-pillars, roof rails, or rear header
A replacement panel cannot correct a distorted opening by itself. If the body aperture is out of specification, the repair plan must address the structure before the new glass is bonded into place.
For a deeper explanation of Tesla structural repair decisions after an impact, see our article on Tesla-certified collision repair and EV structural safety.

When can Tesla roof glass be repaired instead of replaced?
Not every small mark requires a full roof glass replacement. Tesla’s published repair guidelines allow limited glass repairs in certain circumstances. The decision depends on the location, size, layer, and type of damage.
The important caution is that Tesla’s dimensions and repair zones can vary by model. The following examples come from Tesla’s published glass repair guidelines and should not be treated as a universal substitute for the procedure applicable to a particular VIN.
Edge damage generally requires replacement
Tesla’s roof glass guidelines identify areas near the front, rear, and side edges where repairs are not allowed. For example, the Model Y roof-glass guideline identifies a no-repair area within:
- 50 millimeters of the front edge
- 50 millimeters of the rear edge
- 254 millimeters of the left and right edges
The Model 3 and Model S documentation uses similar concepts with model-specific measurements. Because the side-edge dimensions may differ, technicians must use the correct service information for the vehicle being inspected.
An edge crack is especially important because it can extend into the bonded perimeter, the frit area, or the edge of the laminated glass. Even when the visible crack appears short, its location can make the panel replacement-only under Tesla’s criteria.
Inner-layer damage requires replacement
Tesla’s guidelines distinguish between damage limited to the exterior layer and damage that reaches the inner layer of laminated glass.
If the inner layer is damaged, the roof glass is not repairable under the published Tesla guideline. It must be replaced.
This can be difficult to judge by looking at the outside of the panel. A technician may need to inspect both surfaces and assess whether the impact affected the laminate, not just the outer glass surface.
Size and location both matter
In an allowed repair area, Tesla’s published guidelines generally limit repairs to small exterior-layer damage, such as:
- Cracks shorter than 50 millimeters
- Chips less than 50 millimeters wide
- Certain star breaks measured according to the longest crack and the opposing crack
The exact definition of the damage matters. A chip, bullseye, combination break, edge crack, floater crack, and stress crack are not interchangeable descriptions.
A crack that reaches an edge is treated differently from a short floater crack. A star break that looks small from a distance may exceed the allowable measurement once all relevant directions are measured.
A fourth repair may require replacement
Tesla’s published guidelines for several models limit the number of repairs that may be performed on a roof glass panel. If a fourth repair becomes necessary, the roof glass must be replaced under those guidelines.
That is another reason to document prior repairs. A shop should not evaluate a new chip as though the panel has never been repaired if the repair history is unknown.
Cybertruck roof glass has a stricter service path
Tesla’s Cybertruck body-repair documentation states that roof glass repairs are not allowed and that damaged roof glass must be replaced.
That is different from the limited repair zones described for some Model 3, Model Y, or Model S glass procedures. Cybertruck owners should not assume that a small-looking chip can be treated under the same rules as another Tesla model.
The rear Cybertruck backlite is also handled as a fixed bonded glass assembly. A collision-related crack, broken edge, damaged defroster, or compromised mounting area should be evaluated for full replacement rather than treated like a simple windshield chip.
Why “Armor Glass” does not replace the need for model-specific documentation
Cybertruck owners commonly use the term “Armor Glass” when discussing the vehicle’s glass. That name is associated with Tesla’s product presentation, but the service documentation identifies the repair components by their functional names, including fixed glass roof assembly and fixed backlite glass.
For the repairer, the practical questions are:
- Which glass assembly is damaged?
- Does Tesla allow a repair for this component?
- Is the glass laminated and bonded?
- Does it include defroster elements or attached hardware?
- What inspection is required before installation?
- What adhesive and cure procedure applies?
- Are the surrounding body dimensions within specification?
Using the service manual’s component name helps prevent a common mistake: treating marketing terminology as though it were a repair procedure.
Why OEM replacement glass matters
OEM glass is not simply a piece of transparent material cut to fit an opening. The glass assembly must match the vehicle’s design in several ways.
Correct curvature and dimensions
A roof panel that is slightly different in curvature or perimeter shape may not sit correctly in the opening. Incorrect fit can create:
- Uneven gaps
- Poor flushness
- Wind noise
- Water leaks
- Trim interference
- Stress concentration in the glass
- Difficulty aligning adjacent glass
Tesla’s Model 3 roof-glass procedure specifically instructs technicians to record the gaps between the existing roof panel, windshield, body sides, and backlight glass before removal. The purpose is to reproduce the correct installation position with the replacement panel.
Correct edge treatment and frit
The dark perimeter area around automotive glass is commonly called the frit. It helps conceal the bond line and may define the adhesive path. The shape and location of the frit are part of the glass assembly’s fit and appearance.
A generic replacement may have a different frit pattern, edge treatment, tint, or surface finish. Even if the glass can be placed into the opening, those differences can affect the visible result and the bonding process.
Correct acoustic and solar characteristics
Tesla glass may be designed with particular tint, infrared filtering, acoustic properties, or other characteristics depending on the model and configuration. A substitute may not match the original appearance or cabin sound environment.
These differences are not always obvious at the parts-counter stage. They become apparent when the glass is installed next to the windshield or backlite and the tint, reflection, or color does not match.
Correct compatibility with surrounding systems
The windshield is especially sensitive because forward-facing cameras view through a defined area of the glass. If the replacement windshield has optical distortion, incorrect camera-area geometry, or a camera bracket that is not positioned correctly, the calibration process may fail or the system may not perform as intended.
The fixed roof panel usually does not sit in front of Tesla’s forward camera. That is why replacing the roof glass alone does not automatically mean camera recalibration is required. However, the surrounding collision may still affect the windshield, camera housing, roof structure, A-pillars, or vehicle geometry.
The right conclusion is not “roof glass never requires calibration.” The right conclusion is that calibration is determined by what was disturbed during the collision and repair.
The correct roof-glass removal and bonding procedure
Tesla’s service procedures show why this work should be handled by a trained collision or glass technician rather than a general shop using improvised tools.
A high-level roof-glass replacement process includes the following stages.
1. Identify the vehicle and inspect the damage
The technician confirms the VIN, model year, body configuration, roof-glass part, and applicable Tesla procedure. The roof opening, surrounding body, interior trim, headliner, windshield edge, and backlite area are inspected for hidden damage.
The vehicle should also be scanned when appropriate so pre-existing warnings and collision-related faults are documented before disassembly.
2. Measure and record existing gaps
Before removing the original panel, the technician records the relationship between the roof glass and nearby surfaces. On the Model 3 procedure, that includes the windshield, body sides, and backlight glass.
This gives the technician a reference for positioning the replacement panel. It also helps identify whether the opening was already distorted before removal.
3. Protect paint and interior trim
Masking and interior protection help prevent damage to:
- Painted roof surfaces
- Roof rails
- Headliner fabric
- Trim pieces
- Windshield or backlite edges
- Weather seals
The removal line must be controlled so the cutting tool does not damage the body flange or interior components.
4. Cut the urethane with an appropriate tool
Tesla’s Model 3 procedure describes use of a dedicated glass-removal system and cautions technicians to protect the headliner and paint. The cutting line must remain in the correct position around roof brackets and datums.
This is not an area for a technician to use excessive force. Damage to the body flange can create a leak, alignment, or corrosion problem that may not appear until after delivery.
5. Remove the old glass and prepare the bond path
After the old panel is removed, remaining urethane is carefully reduced and the body surface is cleaned. Tesla’s procedure specifies a controlled remaining-urethane thickness for the applicable vehicle and calls for cleaning with isopropyl alcohol wipes.
The body is then inspected for:
- Bare-metal exposure
- Corrosion
- Scratches from removal
- Distorted flanges
- Contamination
- Old sealant
- Damaged clips or datums
6. Inspect the new glass before installation
Tesla’s service information requires new windshield, roof, door, and fixed-glass components to be inspected before installation. A replacement panel should not be bonded into the vehicle before checking for defects, damage, fit, and finish.
That inspection is especially important when a part has been shipped or stored outside the vehicle.
7. Apply the correct primer and urethane
The technician prepares the glass and body along the specified urethane path. Primer is applied where required, and the adhesive is placed in the correct bead shape and location.
The bead dimensions are procedure-specific. For example, the Model 3 fixed-roof procedure gives a particular approximate bead width and height. Those measurements should not be copied blindly to every Tesla model; the technician must follow the procedure for the vehicle being repaired.
8. Set the glass using datums and recorded measurements
The replacement glass is lowered into position with appropriate lifting equipment. The technician aligns the specified datums and checks the gaps and flushness against the earlier measurements.
The panel is then held in place while the adhesive cures. Temporary tape or other approved retention methods may be used according to the procedure.
9. Observe safe drive-away time
The vehicle must not be driven before the adhesive manufacturer’s minimum safe drive-away time has passed. Temperature, humidity, adhesive product, bead size, and manufacturer instructions can affect the required cure period.
Moving the car too soon can compromise the bond. High speeds, rough roads, and speed bumps may also need to be avoided for a specified period after installation.
How roof-glass work connects to camera recalibration
The connection between roof glass and camera calibration is often misunderstood.
Tesla’s forward-facing cameras are generally positioned in the upper windshield area rather than inside the fixed roof glass. Therefore, a roof-panel replacement with no windshield, camera, bracket, A-pillar, or roof-geometry disturbance may not require camera recalibration by itself.
However, a collision is rarely limited to the visible crack in the glass. The repair plan should determine whether any of the following were affected:
- Windshield
- Forward camera housing
- Camera bracket
- A-pillars
- Roof header
- Roof rails
- Front body structure
- Suspension or alignment
- Other sensor mounting locations
Tesla’s camera-calibration instructions state that if a camera has shifted from its calibrated position: for example, because the camera or windshield was replaced: the calibration must be cleared. The vehicle then repeats its calibration process while being driven under suitable conditions.
Tesla’s Model Y owner documentation says calibration typically completes after approximately 20 to 25 miles, although the distance varies with road and environmental conditions. Tesla advises contacting Service if calibration has not completed after 100 miles in the described conditions.
That owner-drive process is not a substitute for inspecting the camera mount or structural geometry. If the collision disturbed the camera bracket, windshield, roof structure, or body reference points, the repair facility must follow the applicable Tesla diagnostic and calibration procedure before delivery.

Windshield replacement has different camera implications
The windshield has a dedicated camera field-of-view area. Tesla’s repair guidelines identify the camera field of view and a surrounding margin as a no-repair zone for the windshield. Other windshield areas have their own limits for cracks, chips, and inner-layer damage.
This is different from the fixed roof panel.
If the windshield is replaced, the technician must verify:
- Correct windshield part
- Correct camera bracket and mounting
- Proper adhesive bonding
- Camera seating
- Camera field-of-view clarity
- Required diagnostic reset or calibration
- Completion of the dynamic calibration process, when applicable
A shop should not tell an owner that a camera “will calibrate itself” without first confirming whether Tesla requires calibration to be cleared, whether the camera bracket was disturbed, and whether any static procedure is required by the model or repair condition.
For additional context on high-voltage and post-collision EV inspections, read our article on an EV battery safety inspection after a collision. Glass work may be the visible part of the repair, but collision evaluation on an EV should consider the complete vehicle.
What does Tesla glass roof repair cost?
There is no responsible single price for Tesla glass roof repair across every model and year.
The cost can change substantially based on:
- Model and production configuration
- OEM glass availability
- Roof panel design
- Rear backlite involvement
- Windshield involvement
- Headliner or trim removal
- Damage to the roof opening
- Adhesive and consumables
- Calibration requirements
- Water-leak testing
- Insurance supplements
- Hidden collision damage
- Paint or structural repairs around the opening
A glass-only replacement and a collision repair involving the roof opening can differ by thousands of dollars. Adding a windshield, camera bracket, rear glass, roof structure, interior trim, or ADAS calibration can change the estimate again.
For budgeting purposes, treat a Tesla roof-glass replacement as a substantial OEM glass operation rather than a minor chip-repair bill. Ask for a VIN-specific, itemized estimate instead of relying on online averages or a quote for a different model.
An itemized estimate should separate:
- Glass assembly
- Removal and installation labor
- Adhesive, primer, and related materials
- Trim or headliner operations
- Structural inspection or repair
- Windshield replacement, if applicable
- Camera or ADAS calibration, if required
- Water-leak testing and quality control
- Insurance-related supplements
RVCCR provides free estimates and coordinates with major insurance carriers. A proper estimate may change after disassembly because the body opening and surrounding structure cannot always be fully evaluated from the exterior.
Documentation Tesla owners should request
A professional repair file should explain what was done and why. Before authorizing the repair, ask the shop for the following documentation.
Vehicle and part identification
Request:
- VIN confirmation
- Tesla model and production configuration
- Glass assembly description
- OEM part number when available
- Explanation of whether the part is roof glass, windshield, or backlite
Damage decision
Ask the shop to document:
- Damage location
- Damage type
- Whether the inner glass layer was affected
- Whether the damage reached an edge
- Whether Tesla allows repair for that component
- Why repair or replacement was selected
Structural and fit verification
If the collision involved the roof perimeter, ask for:
- Photos of the roof opening
- Evidence of inspection for distortion
- Gap and flush measurements
- Notes about damaged flanges, datums, clips, or seals
- Explanation of any structural repair
Bonding information
Request:
- Adhesive product or system used
- Primer and preparation steps
- Safe drive-away time
- Any required temperature or cure conditions
- Confirmation that the vehicle was not released before the minimum cure time
Calibration and diagnostic records
If the windshield, camera, camera bracket, A-pillars, roof structure, or sensor mounting areas were disturbed, request:
- Pre-repair scan results
- Post-repair scan results
- Camera calibration status
- Static calibration documentation, if required
- Dynamic calibration completion, if applicable
- Confirmation that warning messages and relevant fault codes were addressed
Final quality checks
Ask whether the shop completed:
- Water-leak testing
- Wind-noise inspection
- Glass gap and flush inspection
- Trim and headliner inspection
- Defroster verification for rear glass
- Road test
- Final cleaning and delivery inspection
Documentation protects the owner long after the vehicle leaves the shop. It can help with future service, resale questions, insurance records, and warranty discussions.
Why a Tesla Approved Body Shop matters
Tesla collision repair requires more than access to a glass supplier. It requires the ability to connect glass replacement with body repair, structural inspection, EV safety, diagnostics, and calibration.
A properly equipped Tesla repair facility should be able to explain:
- Which Tesla procedure applies
- Whether the roof glass is repairable or replacement-only
- Whether the rear window is involved
- Whether the roof opening is dimensionally correct
- Which parts are OEM
- How the urethane will be applied and cured
- Whether camera recalibration is required
- What documentation will be provided
At RVCCR, our Tesla and EV service includes collision, paint, mechanical work, glass replacement, battery-safety evaluation, and post-repair verification under one roof. Our team uses manufacturer-specific procedures and OEM parts when required, coordinates with insurance, and backs completed repairs with a written lifetime warranty.
You can learn more about our Tesla and EV repair services or review our Tesla certification information.
Questions to ask before choosing a shop
When comparing a Tesla body shop in the Inland Empire, ask:
- Are you a Tesla Approved Body Shop?
- Will you identify the roof glass, windshield, and backlite as separate assemblies?
- Are you using OEM Tesla glass?
- Will you inspect the roof opening before bonding the replacement?
- Will you measure and document glass gaps?
- What adhesive and safe drive-away procedure will you use?
- Was the windshield or camera bracket disturbed?
- If calibration is required, who performs it?
- Will I receive scan and calibration documentation?
- Is water-leak testing included?
- How will you handle hidden collision damage and insurance supplements?
- What warranty applies to the completed repair?
A shop that cannot answer those questions clearly may not have the right process for a Tesla glass-roof collision repair.
Frequently asked questions
Does replacing Tesla roof glass automatically require camera recalibration?
No. The fixed roof glass is generally separate from the forward camera’s windshield viewing area. If only the roof panel is replaced and the windshield, camera, bracket, A-pillars, and relevant structure are not disturbed, recalibration may not be required. The repair facility should still complete appropriate diagnostics and confirm the condition of surrounding components.
Does replacing a Tesla windshield require camera recalibration?
Tesla’s owner documentation states that camera calibration must be cleared when a camera or windshield has been replaced or the camera has shifted. The vehicle then performs its calibration process while driving under suitable conditions. The exact process depends on the model and repair procedure.
Can a Tesla roof-glass chip be repaired?
Sometimes, depending on the model, damage location, size, glass layer, and previous repair history. Tesla’s published guidelines allow limited repairs for certain exterior-layer damage in approved areas. Edge damage, inner-layer damage, damage outside the permitted limits, and certain Cybertruck roof damage require replacement.
Is Cybertruck roof glass the same as the rear windshield?
No. Tesla service information identifies the roof as a fixed glass roof assembly and the rear glass as fixed backlite glass. They are separate components with separate replacement procedures.
Should I accept aftermarket roof glass?
Ask whether the glass is approved for your exact vehicle configuration and whether the shop can document fit, tint, curvature, sealing, and compatibility. OEM glass is the most direct match to Tesla’s published replacement procedure. A generic substitute may create fit, water-sealing, wind-noise, appearance, or compatibility concerns.
Can a cracked roof glass panel affect rollover safety?
A cracked or improperly bonded roof assembly should not be treated as cosmetic damage. The completed roof system contributes to the vehicle’s designed body performance, and the correct repair depends on the glass, body opening, bonding, surrounding structure, and applicable manufacturer procedures.
How long does Tesla roof glass repair take?
The timeline depends on part availability, disassembly, hidden damage, adhesive cure time, trim operations, insurance approval, and any required calibration. A glass-only replacement may follow a different schedule from a collision repair involving the roof structure or windshield.
Restore the view: and the confidence behind the wheel
A collision can leave a Tesla looking repairable while creating questions about the roof opening, glass layers, adhesive bond, water sealing, camera alignment, and hidden structure. Those questions deserve a complete answer, not a quick glass swap.
RVCCR brings Tesla-approved collision expertise, OEM repair procedures, EV safety knowledge, insurance coordination, and documented final checks together in one Redlands facility. We inspect the complete repair area, explain the difference between roof glass and backlite damage, use the correct replacement process, and verify the systems affected by the collision.
If your Tesla needs glass roof repair after a collision, request a free estimate from RVCCR. We will help restore the vehicle so you can stop thinking about the impact and start planning the drive ahead.
Sources and technical references
Need a repair estimate?
Skip the wait — send us a few photos and our team will get back to you fast.
Start a Photo Estimate →