Tesla Headlight Assembly Repair After a Collision: Why Modern EV Lighting Is More Than a Bulb
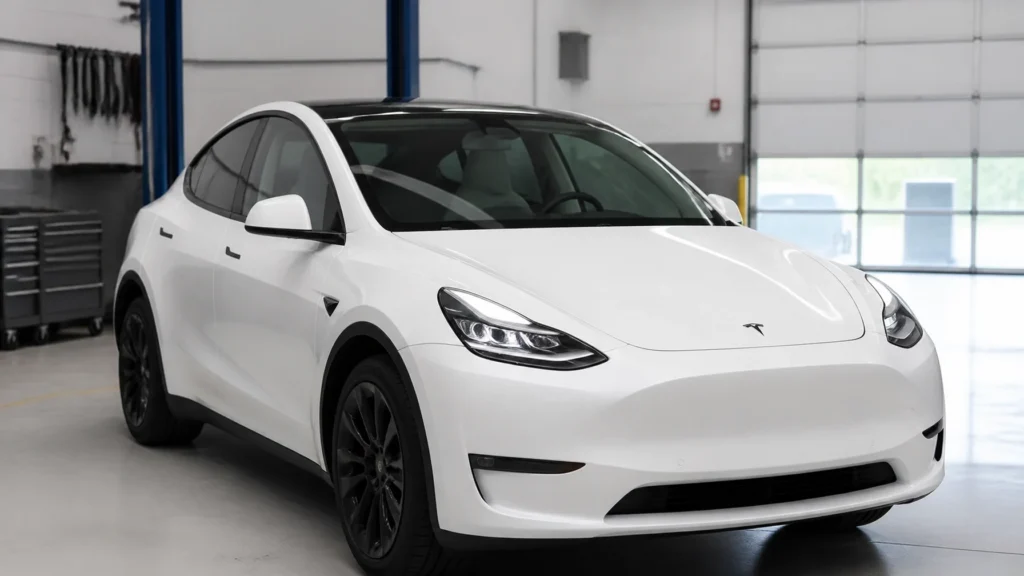
Updated September 2, 2026 | Tesla and EV collision repair | Redlands and the Inland Empire
Tesla-certified collision repair requires more than matching paint and replacing visible panels. A modern Tesla headlight assembly may include LED light sources, optical elements, electronic drivers, adaptive-lighting functions, leveling mechanisms, mounting hardware, and communication connections that must work together after the vehicle is repaired. Depending on the model year and equipment package, nearby cameras, sensor modules, ride-height inputs, and vehicle software may also affect how the lighting and driver-assistance systems operate…
For owners searching for a Tesla body shop Inland Empire drivers can trust, an EV repair shop near me, or certified auto collision repair, the important question is not simply whether the headlight turns on. The repair must restore the lamp’s physical condition, beam aim, mounting position, electrical integrity, moisture resistance, and any manufacturer-required calibration or diagnostic checks.
A cracked lens, broken tab, or intermittent daytime-running light may be the first visible sign. The more important damage can be behind the lens, below the bumper, inside a connector, or in the structure that supports the assembly. The correct repair path becomes clear only after the vehicle is identified, the headlight and surrounding area are inspected, and the applicable Tesla repair information is reviewed.
Why Tesla lighting repair starts with certification and procedure
RVCCR is a family-owned collision, paint, and mechanical repair facility in Redlands with 21 years of experience serving local vehicle owners. The shop provides Tesla and EV repair, works within the Fix Auto Network, coordinates with major insurance carriers, offers free estimates, and backs its work with a written lifetime warranty. Tesla and EV collision work is handled as a specialized repair process rather than as a conventional bulb replacement.
That distinction matters because Tesla lighting varies by model, production year, region, trim level, and software configuration. A Model 3, Model Y, Model S, or Model X may use a different headlight design, connector, mounting arrangement, control strategy, or aiming process. Even vehicles that look similar from the outside can have different internal components and different service requirements.
Tesla’s service information illustrates the precision involved. One current Model Y service procedure for global headlight adjustment calls for a dedicated headlight tester, a level surface, correct tire inflation, vehicle ballast, controlled tool positioning, and touchscreen-based headlight adjustment mode. The procedure also states that headlight calibration may require a drive of up to 2 kilometers, or approximately 1.24 miles, before adjustment can be completed. That information is specific to the procedure and vehicle configuration; it should not be treated as a universal instruction for every Tesla.
The practical takeaway is straightforward: a shop should identify the exact vehicle and follow the applicable manufacturer procedure. Generic assumptions can result in a lamp that appears functional but is aimed incorrectly, cannot complete calibration, or continues to report a fault.
A headlight assembly is a system, not a replaceable bulb
Traditional headlamps often allowed a technician or owner to replace a replaceable bulb without changing the housing, reflector, lens, and mounting structure. Many modern Tesla headlight assemblies work differently. They may be designed as integrated LED units in which the light source, optics, electronics, and housing are supplied as one assembly or as manufacturer-defined service components.
That does not mean every Tesla headlight must automatically be replaced after any contact. It means the repair decision has to be based on the specific part design and the actual damage.
A Tesla headlight assembly can include:
- A clear outer lens
- Internal optical elements
- LED light sources
- Electronic light drivers
- Daytime-running-light elements
- Turn-signal or side-marker functions, depending on configuration
- Adaptive-lighting hardware or control functions, where equipped
- Vertical or horizontal aiming mechanisms
- Leveling motors or actuator components, where equipped
- Housing seals and vents
- Mounting tabs and locating points
- Electrical connectors and terminals
- Wiring leading to body or lighting control modules
The assembly may communicate with the vehicle through low-voltage wiring and electronic control modules. That communication can support fault monitoring, lighting commands, adaptive functions, and diagnostic reporting. A lamp can therefore have a physical, optical, and electronic condition at the same time.
For example, a headlight may illuminate but still have:
- A broken mounting tab that allows vibration
- A distorted beam pattern
- A failed leveling motor
- A damaged connector terminal
- Water inside the housing
- An adaptive-lighting fault
- A warning message stored in the vehicle
- A housing crack that will allow future moisture intrusion
This is why “the light turns on” is only one part of a complete inspection.

Common Tesla headlight damage after a collision
Front-end collisions can damage the headlight directly or transfer force through surrounding components. The impact may be centered on the bumper, fender, hood, wheel area, or front structure while the headlight damage remains subtle.
Cracked lens or housing
A cracked lens can be obvious, such as a visible break across the front of the lamp. It can also be small and hidden near a corner, mounting point, or seam. A housing crack matters because the headlight depends on controlled optical geometry and environmental sealing.
A temporary clear film or exterior sealant may hide the crack, but that does not necessarily restore the assembly’s original integrity. The repair facility must determine whether the manufacturer permits repair of that specific component or requires replacement of the complete unit.
Broken mounting tabs
Mounting tabs position the headlight relative to the bumper, fender, hood, and body structure. A tab can break while the lens remains unmarked. The lamp may still operate, but vibration, movement, or uneven panel alignment can develop during driving.
A broken tab can also make the beam aim unstable. If the assembly moves relative to the vehicle, a previously correct adjustment may no longer remain correct. The shop should inspect the headlight brackets, adjacent body mounting points, bumper guides, fender edges, and any support structure that locates the lamp.
Moisture intrusion
A damaged lens, housing, seal, vent, or connector can allow water or excessive humidity to enter the assembly. Light condensation can occur in some lamp designs and weather conditions, but standing water, pooling, persistent heavy fogging, or corrosion requires further evaluation.
Moisture may affect:
- LED driver electronics
- Internal connectors
- Circuit boards
- Reflective or optical surfaces
- Actuator motors
- Terminal contacts
- Light output and beam uniformity
The correct response depends on the amount, location, duration, and source of the moisture. Drying the housing without correcting the leak may only postpone the failure.
Wiring and connector damage
A collision can stretch, pinch, cut, or dislodge a wiring harness. Connector damage may include a cracked shell, bent terminal, loose retention feature, water contamination, or poor pin contact. A harness can also be damaged while the bumper, fender, undertray, or headlight is removed.
Intermittent lighting faults are especially important. A lamp that operates in the repair bay may fail when the vehicle vibrates, the temperature changes, or the connector moves. The technician should inspect wiring and terminals rather than immediately assume that the headlight assembly itself is defective.
Leveling motor or actuator failure
Some headlight systems use an actuator or leveling mechanism to control the vertical position of the beam. The component may be integrated into the headlight assembly or connected to a separate system, depending on the vehicle.
A collision can damage the actuator, strip its gears, bend an internal linkage, or change the position of the assembly. Symptoms may include:
- A beam that points too high or too low
- One side that moves differently from the other
- A humming or clicking sound
- A headlight that fails to complete calibration
- A warning message
- A beam that does not respond correctly to vehicle load or system commands
A technician should not force an actuator by hand or substitute a generic motor without confirming that the repair is permitted for the exact assembly. The correct part and calibration procedure are model-specific.
How modern lighting relates to ADAS and vehicle cameras
Modern lighting and driver-assistance systems are related, but they are not always physically combined in the same component.
Tesla Autopilot and other vision-based functions use cameras and electronic systems that may be mounted in locations such as the windshield area, pillars, fenders, bumpers, or other vehicle zones depending on model and production configuration. The forward camera is not automatically part of the headlight assembly. However, a collision near the front of the vehicle can affect the camera’s view, mounting geometry, wiring, nearby sensors, body structure, or the vehicle’s ability to complete required system checks.
The relationship can involve several separate layers:
- The headlight assembly produces and controls exterior illumination.
- The lighting control system commands functions and monitors faults.
- Adaptive-lighting hardware or software, where equipped, modifies the beam.
- Cameras or other sensors detect roadway conditions or objects for driver-assistance functions.
- Vehicle geometry and ride height influence aiming and sensor orientation.
- Diagnostic software checks whether modules communicate and whether required calibration is complete.
These systems can interact without being the same part. For example, an adaptive headlight system may use a camera or sensor input to identify vehicles ahead and modify the beam. NHTSA describes adaptive driving beam systems as technology that dynamically changes portions of the projected light to provide more illumination while reducing glare toward other traffic participants. NHTSA’s final rule also recognizes that ADB systems use advanced sensors, data-processing software, and headlamp hardware such as shutters or LED arrays.
The repair implication is important: if the headlight is replaced or the front-end area is disturbed, the shop should determine which lighting, camera, sensor, and calibration procedures apply. A headlight replacement does not automatically mean that every Autopilot camera needs calibration, but the repair team should not assume that no additional check is needed.
The vehicle’s diagnostic scan, physical inspection, and manufacturer procedures should guide that decision.
For background on why electronic diagnostics belong at the beginning of an EV collision repair, review RVCCR’s article on the pre-repair diagnostic scan for Tesla and EV collision work.
Adaptive headlights, auto high beam, and standard LED functions
Owners sometimes use “adaptive headlights” to describe several different technologies. They are not interchangeable.
Standard LED lighting
A standard LED headlight can provide low beam, high beam, daytime-running-light, or turn-signal functions through fixed optical elements and electronic controls. The assembly may still require precise aiming and diagnostic verification after replacement.
Automatic high beam
Automatic high beam generally switches between low and high beam based on detected traffic and conditions. It may use a camera or other input to determine when a beam change is appropriate.
Adaptive driving beam
Adaptive driving beam, or ADB, can modify portions of the beam rather than simply switching the entire headlight between low and high beam. NHTSA’s Federal Motor Vehicle Safety Standard No. 108 rule describes an adaptive driving beam as a long-range beam that automatically modifies portions of projected light to reduce glare dynamically.
Not every Tesla has the same lighting capability. The equipment may vary by model, production date, market, and software configuration. A shop should verify the vehicle rather than promise an adaptive-lighting function based only on the badge or general model name.
When an adaptive system is equipped, the repair must preserve more than basic illumination. The headlight must be mounted correctly, the optical output must be appropriate, sensors must be unobstructed and properly positioned, and system faults must be addressed. Incorrect aim or a displaced camera can affect how the system identifies and shades other vehicles.
NHTSA’s ADB requirements focus on visibility and glare prevention. That regulatory context reinforces why headlight alignment is a safety function, not merely a cosmetic finishing step.
Repair versus replacement: how the decision should be made
A headlight repair or replacement decision should be based on the component design, damage type, manufacturer instructions, safety function, and ability to validate the finished result.
When a repair may be considered
A repair may be possible when the damage is limited to an approved serviceable component and the repair does not compromise the sealed housing, optical system, mounting integrity, electronics, or manufacturer-required performance.
Examples might include a separately serviceable bracket, harness, connector repair, or surrounding body support. Whether a particular item can be repaired depends on the exact Tesla procedure and part design.
A shop should not assume that an internal LED module, actuator, lens, or driver is serviceable simply because it can be physically removed. “Possible to disassemble” is not the same as “approved to repair.”
When replacement is more appropriate
Replacement is more likely when the assembly has:
- A cracked or distorted housing
- A compromised seal
- Standing water or internal corrosion
- Broken structural mounting points
- Damaged optical elements
- A failed integrated LED or driver module
- An actuator failure that is not separately serviceable
- A persistent communication fault
- Damage that prevents accurate aiming
- Evidence that the lamp cannot meet its intended beam pattern
A sealed LED unit may not have a conventional bulb that can be changed. Replacing one internal component with an unapproved substitute could alter light output, thermal management, beam distribution, or electronic communication.
The repair plan should identify whether the proposed replacement is an OEM assembly, an approved service part, or another part that the manufacturer and repair facility have determined is appropriate for the vehicle. The owner should be able to ask what part is being installed and why.
Why cosmetic polishing is not a complete headlight repair
Polishing can improve the appearance of an exterior lens when the issue is surface oxidation or light abrasion. It does not repair a cracked housing, broken mount, failed LED driver, damaged actuator, water intrusion, or internal optical problem.
After a collision, appearance work should never replace functional testing. A polished lens may look clear while the beam remains misaligned or the internal electronics remain damaged.
Why moisture inside a Tesla headlight matters
Not every trace of fogging means the headlight has failed. Lamp assemblies can experience temporary condensation from temperature and humidity changes. The correct evaluation depends on the design and manufacturer guidance.
The concern increases when moisture:
- Forms large droplets
- Collects at the bottom of the housing
- Remains after the lamp has operated and conditions have changed
- Appears repeatedly after rain or washing
- Is accompanied by flickering or warning messages
- Produces visible corrosion
- Obscures the optical surface
- Reappears after a prior repair
Water and electronics do not make a good combination. Persistent moisture can corrode terminals, damage circuit boards, interfere with actuator operation, and create intermittent faults. It can also affect the optical path and change how light is distributed through the lens.
A professional inspection should look for the source rather than only the symptom. Possible sources include a cracked lens, damaged housing seam, displaced seal, broken vent, impact-related distortion, or a connector that was exposed during the collision.
The repair documentation should state what was found and what action was taken. If the assembly was replaced because its seal or internal electronics were compromised, that reason should be clear in the repair file.

Headlight aiming and leveling after replacement
Replacing a headlight without aiming it is incomplete. The physical position of the assembly, vehicle ride height, tire inflation, load condition, aiming equipment, and model-specific software procedure can all influence the final result.
Tesla’s published service information demonstrates that aiming may involve more than turning an adjustment screw. The Model Y global headlight adjustment procedure includes:
- Entering the vehicle’s headlight adjustment mode
- Calibrating the headlights when prompted
- Parking on a level surface
- Confirming tire inflation
- Loading the vehicle as specified
- Positioning a headlight tester at a controlled distance
- Aligning the tester with vehicle reference points
- Adjusting each side through the touchscreen
- Saving the measured results
- Exiting adjustment mode
Again, that procedure is not a universal instruction for every Tesla. It shows why the shop should use the procedure for the exact vehicle.
Aiming and leveling are related but different:
- Aiming establishes where the beam is directed.
- Leveling allows the system to maintain or adjust beam height as required by the vehicle design.
- Calibration may establish a system reference position or confirm that the actuator and sensors know their correct operating range.
- Diagnostic validation checks whether the vehicle reports faults after the work is complete.
If a collision changes suspension height, body geometry, headlight mounting, or a ride-height sensor, the leveling system may not operate correctly even after the lamp is installed. If the assembly is mounted too high, too low, too far inward, or too far outward, software cannot correct every physical error.
A headlight tester or approved aiming method provides a more reliable result than pointing the vehicle at a wall and making an informal visual adjustment. The proper equipment and procedure depend on the model and lamp type.

What about Autopilot camera calibration?
Headlight replacement and Autopilot camera calibration are separate questions, but both may belong in the same post-collision repair review.
A camera may need calibration after work that affects its mounting location, windshield, surrounding structure, or field of view. A front-end collision can also damage a camera bracket, wiring, bumper-mounted sensor, or other component that communicates with driver-assistance systems.
A scan can help identify communication faults and calibration-related messages. It cannot replace physical inspection. Similarly, completing a camera calibration does not prove that the headlight is aimed correctly.
Owners should ask the repair facility:
- Was the vehicle scanned before disassembly?
- Were lighting and driver-assistance modules checked?
- Did the vehicle show camera, sensor, or headlight faults?
- Was the headlight assembly replaced or repaired?
- Was headlight calibration completed?
- Was optical aiming performed using the applicable procedure?
- Were any camera or sensor calibrations required?
- Did those calibrations complete successfully?
- Were warnings cleared and rechecked after reassembly?
- Was a final road test performed when appropriate?
RVCCR’s explanation of Tesla-certified collision repair and EV structural safety covers the larger connection between physical repair accuracy, diagnostics, sensor alignment, and final validation.
What Tesla owners should demand in their repair documentation
A clear repair file helps an owner understand what happened and gives the shop a record of the work performed. Ask for documentation that addresses the following areas.
Vehicle identification
The repair order should identify the vehicle, model, model year, VIN, mileage, and relevant equipment configuration. Lighting requirements can change between model years and trims.
Initial photographs
Photos should document the collision area before disassembly, including the headlight, bumper, fender, hood gaps, lens condition, mounting areas, and visible wiring or sensor damage.
Pre-repair diagnostic scan
The initial scan should be performed before repairs change the vehicle’s condition when practical. Ask whether it identified lighting, camera, sensor, restraint, communication, or power-related faults.
Teardown findings
If additional damage appears after the bumper or headlight is removed, the repair file should explain the finding with photographs and a description. Broken tabs, distorted supports, connector damage, water intrusion, and harness damage should not be hidden inside a general line item.
Part identification
The documentation should identify the headlight part installed and whether it is an OEM assembly or an approved service component. The owner should receive an explanation when a complete assembly is replaced rather than repaired.
Moisture evaluation
If condensation or water was found, the file should state whether it was considered temporary condensation, active intrusion, pooling, corrosion, seal damage, or another condition requiring action.
Calibration and aiming results
Ask for confirmation that the headlight was calibrated and aimed according to the applicable Tesla procedure. If a dedicated tester or measured aiming process was used, the shop should be able to describe or document it.
ADAS and camera checks
If the collision involved nearby cameras, sensors, brackets, windshield work, or front-end structure, ask whether a diagnostic or calibration procedure was required and whether it completed successfully.
Post-repair scan
The final scan should be compared with the pre-repair scan. Remaining faults should be explained before delivery rather than discovered later by the owner.
Final quality-control inspection
The quality-control record should confirm lamp operation, turn signals, daytime-running lights, high and low beams, warning-message status, panel fit, hood and fender alignment, and any required road-test findings.
Documentation will not replace a correct repair, but it makes the repair process more transparent and gives the owner something concrete to review.
Insurance and estimate considerations
A Tesla headlight claim may change after disassembly. The original estimate may list a visible lamp, bumper, or fender, while teardown reveals broken supports, wiring damage, sensor concerns, or structural displacement.
That does not automatically mean the repair is excessive. It means the visible damage did not show the entire condition of the vehicle. A complete estimate should connect each operation to a documented finding and, when applicable, the manufacturer’s repair requirements.
Owners should ask:
- Is the headlight repairable under the applicable procedure?
- Is the lens or housing sealed?
- Are the mounting points intact?
- Is the connector and harness undamaged?
- Does the lamp contain serviceable components?
- Will the lamp need calibration and measured aiming?
- Are nearby cameras or sensors affected?
- Is a supplement likely after teardown?
- What documentation will be sent to the insurer?
A shop experienced in certified auto collision repair can help explain the technical reason for the repair plan and coordinate the claim process. RVCCR works with major insurance carriers and can help customers understand what the vehicle needs before authorizing the work.
Choosing a Tesla body shop in the Inland Empire
When you are comparing a Tesla body shop Inland Empire owners can depend on, look beyond a sign or a promise to “work on anything.” Ask whether the facility can manage the full repair chain:
- Tesla and EV-specific intake
- Pre-repair diagnostic scanning
- Headlight and exterior-lighting inspection
- Wiring and connector evaluation
- Collision teardown and hidden-damage documentation
- OEM procedure review
- Structural and mounting-point inspection
- Headlight installation or approved component repair
- Calibration and measured aiming
- Camera and sensor checks when applicable
- Post-repair diagnostics
- Final quality control and documentation
A facility that handles collision, paint, and mechanical repair under one roof can coordinate more of the process without sending the vehicle between unrelated providers. That can be useful when a front-end impact affects body panels, lighting, cooling components, suspension, wiring, and driver-assistance systems at the same time.
You can learn more about RVCCR’s Tesla and EV repair services, review the broader collision repair process, and request a free repair estimate.
Frequently asked questions
Can I replace a Tesla headlight bulb myself?
Many Tesla LED headlight systems are integrated assemblies rather than conventional bulb-and-housing designs. The exact serviceability depends on the model, year, and part configuration. Do not assume that a failed lighting function can be corrected with a universal bulb. A technician should identify the actual failed component and confirm the approved repair path.
Does a cracked Tesla headlight always need replacement?
Not every visible mark has the same significance. A surface scratch may be different from a housing crack, optical distortion, broken mount, or damaged seal. The shop should inspect the complete assembly and follow the applicable manufacturer information.
Is condensation inside the headlight always a failure?
No. Temporary condensation can occur in some lamp designs and weather conditions. Persistent fogging, large droplets, pooling, corrosion, or moisture associated with a collision should be investigated.
Does headlight replacement require calibration?
It may. The requirement depends on the vehicle, headlight type, actuator or leveling system, and applicable Tesla procedure. A replacement lamp should be aimed and validated rather than simply plugged in and released.
Is headlight aiming the same as Autopilot camera calibration?
No. Headlight aiming establishes the direction of the light beam. Camera calibration establishes or verifies the camera’s position and system reference. A collision may require one, both, or neither, depending on the damage and repair operations.
Can a broken headlight mounting tab be glued?
That depends on the specific part, location, structural function, and manufacturer-approved procedure. A glue repair that does not restore the original positioning and strength may allow vibration or misalignment. The repair facility should document the approved solution.
What should I do if the headlight works but I receive a warning message?
Have the vehicle scanned and inspected. A warning may relate to the lamp, connector, driver module, actuator, wiring, or another system. Continuing to drive without diagnosing the message can leave a lighting or safety-system fault unresolved.
How do I find an EV repair shop near me that can handle Tesla lighting?
Ask whether the shop is Tesla-certified, whether it performs pre- and post-repair diagnostics, whether it can complete headlight aiming and calibration, and whether it documents camera or sensor checks when needed. Certification, equipment, training, and a written process all matter.
Restore the light, the systems, and the journey
A damaged Tesla headlight is not just a cosmetic problem. It may involve the lens, housing, mount, harness, connector, LED driver, actuator, leveling system, optical aim, adaptive-lighting function, or nearby camera and sensor network. The right repair examines the complete system and verifies the result before the vehicle returns to everyday driving.
RVCCR gives Tesla and EV owners in Redlands and the Inland Empire a single place to coordinate collision, paint, mechanical, diagnostic, and calibration needs. Our certified team can inspect the damage, explain repair-versus-replacement options, coordinate with your insurer, document the work, and back the completed repair with a written lifetime warranty.
Request a free estimate from RVCCR today. Let our team restore the light, align the systems, clear the uncertainty, and get your Tesla ready for the road ahead: whether that means the morning commute, the family schedule, or your next long-distance adventure.
Sources and further reading
- Tesla Model Y service procedure: Headlights: Adjust: Global (Tool Method)
- NHTSA: Adaptive Driving Beam Headlights
- Federal Register: Adaptive Driving Beam Headlamps and FMVSS No. 108
- RVCCR: The Pre-Repair Diagnostic Scan for Tesla and EV Collision Repair
- RVCCR: Tesla-Certified Collision Repair and EV Structural Safety
Need a repair estimate?
Skip the wait — send us a few photos and our team will get back to you fast.
Start a Photo Estimate →