Water Damage Inspection After an RV Collision: Why Hidden Moisture Is the Most Expensive Surprise
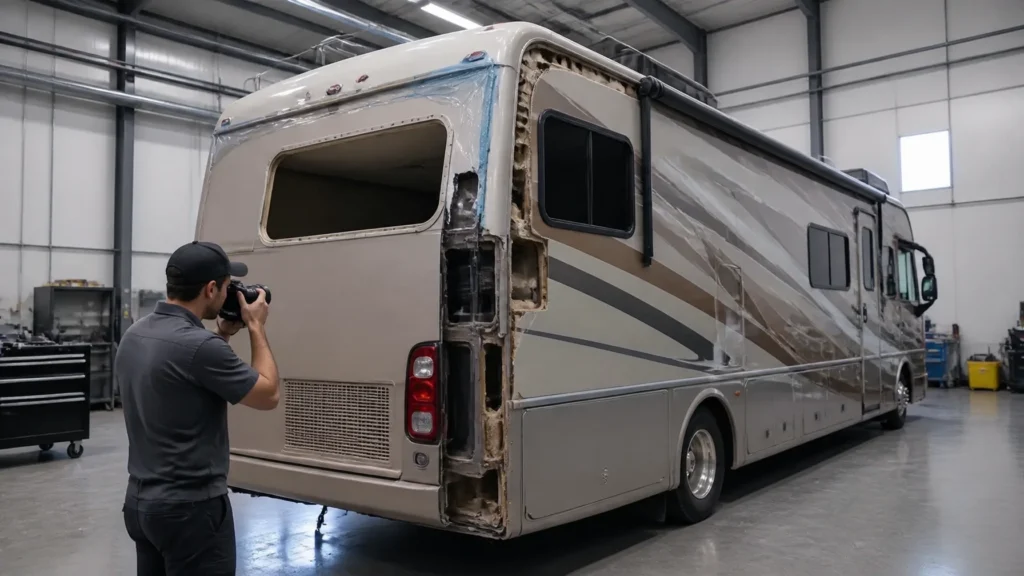
RVCCR is a family-owned, RVDA-certified collision, paint, and mechanical repair facility serving Redlands and the Inland Empire, with 21 years of experience evaluating recreational vehicles after accidents. Our team handles motorhomes, fifth wheels, travel trailers, toy haulers, popups, and other RVs under one roof, including collision damage that may not be visible from the outside.
Reviewed August 24, 2026
An RV collision can involve a large vehicle, multiple body materials, roof-mounted equipment, slide-out rooms, windows, wiring, insulation, and an enclosed underbelly. That combination makes water intrusion more complicated than a typical exterior body repair. A coach may look dry and roadworthy immediately after an impact while a cracked seam, shifted window frame, or distorted slide-out seal quietly allows moisture into the wall, roof, floor, or underbelly…
The most effective way to protect the RV is to inspect for hidden moisture before cosmetic repairs conceal the evidence.
Why a collision can create water damage without an obvious hole
RV water intrusion does not always begin with a large puncture. Recreational vehicles are built with connected assemblies: roof membranes and sealants meet sidewalls, sidewalls surround windows and slide-out openings, and those structures meet the floor and underbelly. A sudden impact can disturb one connection while leaving the surrounding exterior looking almost normal.
Collision force can affect the RV in several ways:
- A roof seam can flex or separate.
- A window frame can shift in its opening.
- A slide-out room can move out of square.
- A rubber wiper or bulb seal can tear, flatten, or lose contact.
- Exterior trim fasteners can loosen or shear.
- A lower sidewall or underbelly panel can open at an edge.
- Chassis movement can transfer stress into walls, flooring, and storage compartments.
The source of the leak may be several feet away from the first interior stain. Water can travel through a wall cavity, along framing, over insulation, or across the top of a floor before becoming visible. By the time an owner notices a soft spot, discoloration, odor, or bubbling wall surface, the moisture may have been present through several rain events.
That is why an RV collision inspection should evaluate the vehicle’s weather envelope, not just the bumper, fiberglass, paint, or trim.
The most vulnerable areas after an RV collision
1. Roof seams and roof-mounted components
The roof is one of the first areas to inspect after an impact involving a branch, low clearance structure, falling object, rollover, rear cap, front cap, or upper sidewall. Even if the roof membrane does not appear torn, the sealant around a seam or penetration may have cracked or lost adhesion.
Common roof inspection points include:
- Roof-to-sidewall transitions
- Front and rear cap seams
- Air-conditioning units
- Roof vents and skylights
- Plumbing vents
- Antennas and satellite equipment
- Solar-panel mounts and wire pass-throughs
- Ladder mounts
- Awning rails
- Fasteners and termination bars
The 2025 Winnebago Towables Owner’s Manual instructs owners to inspect the roof for damage, breaks in caulk or sealant, and problems around fasteners and accessories. It also directs owners to inspect exterior sealants for cracks, peeling, voids, breaks, or gaps and to contact an authorized dealer when a leak is found. Those manufacturer instructions illustrate why a post-collision inspection must include seams and penetrations: not only visible impact marks.
A roof seam can fail in a narrow area while the rest of the roof remains intact. A visual inspection from ground level may not reveal the problem. A technician may need to access the roof safely, inspect the sealant closely, compare the affected area with undamaged sections, and check the interior ceiling and wall surfaces below.
2. Window frames and seals
RV windows are installed into sidewall openings and rely on a combination of frame pressure, sealant, butyl or other approved sealing materials, fasteners, and exterior trim. Collision force can flex the sidewall or move the frame enough to create a leak path without breaking the glass.
Inspectors look for:
- Gaps at the upper corners
- Shifted or uneven window trim
- Cracked or separated sealant
- Loose fasteners
- Distortion in the frame
- Water staining below the window
- Soft wall material near the opening
- Damp insulation or trim
- Corrosion on nearby hardware
Water entering at a window often travels downward. It may appear first behind a valance, cabinet, wall covering, or interior trim rather than directly around the glass. The lower wall, floor edge, or storage compartment may show the consequences even though the window itself looks clean.
Owners should also be cautious about assuming that a dry interior means the window is unaffected. If the collision happened during dry weather, the seal may have been compromised but not yet exposed to rain. The inspection should document the condition before the next storm creates a new problem.
3. Slide-out roofs and perimeter seals
Slide-outs add another moving opening to the RV’s weather envelope. The room must remain aligned with the main wall, and its seals must maintain consistent contact around the perimeter.
A collision can affect the slide-out through:
- Direct impact to the slide room
- Sidewall distortion near the slide opening
- Chassis or floor movement
- Damage to the slide topper or awning
- Bent upper drip caps
- Distorted seal channels
- Torn wiper seals
- Flattened bulb seals
- Binding or uneven slide operation
When a slide-out is pushed out of alignment, one side may compress a seal while the opposite side develops a gap. The room may still extend and retract, but the seal may no longer shed water correctly. A damaged upper seal or drip cap can direct rain down the slide wall and toward the floor.
Winnebago’s owner documentation also warns that the RV should be level and stabilized before slide-out operation and that the perimeter seal must make proper contact. After a collision, owners should not repeatedly cycle a slide-out that binds, moves unevenly, or makes new noises. Operating a distorted room can enlarge damage and make the inspection more difficult.
For a closer look at the mechanical and sealing concerns involved, review RVCCR’s article on RV slide-out mechanism and seal repair after a collision.
4. The underbelly and lower floor structure
Many RVs have an enclosed underbelly that protects insulation, plumbing, wiring, tanks, and portions of the floor structure. That enclosure can also hide moisture.
An impact may tear or loosen the underbelly material, damage a fastener line, distort a lower sidewall edge, or open a pathway from the floor assembly. Water entering higher on the coach can migrate downward and collect near the floor or underbelly without leaving an obvious mark inside the living area.
A professional underbelly inspection may evaluate:
- Tears and openings in the underbelly fabric or panel
- Detached fasteners
- Water stains or sagging material
- Damp insulation
- Corrosion on metal components
- Wet or damaged wood
- Wiring routed near the affected area
- Tank supports and plumbing connections
- The wall-to-floor transition
- Evidence of water migration from above
The 2025 Winnebago Towables Owner’s Manual tells owners to check the underbelly for tears or openings and to have an authorized service provider handle maintenance requiring underbelly removal. That caution matters because an enclosed underbelly can involve electrical, plumbing, structural, and support components. It should not be opened or entered casually.

Collision-caused moisture intrusion versus pre-existing water damage
One of the most important questions in an RV insurance claim is whether the moisture-related damage resulted from the collision or existed beforehand. The answer cannot be established by one stain, one meter reading, or one photograph. It requires a documented comparison of timing, location, physical evidence, moisture patterns, maintenance history, and the collision forces involved.
Evidence that may support collision-related intrusion
The following findings may be consistent with a recent collision:
- A newly shifted window frame near the impact area
- Freshly fractured sealant at a stressed roof or sidewall transition
- A torn or displaced slide-out seal on the impacted side
- Broken trim fasteners or displaced molding
- An opening or tear in the underbelly near the collision path
- Moisture concentrated around newly damaged seams
- Interior dampness appearing after the accident or after the first rain following the accident
- Dry, intact areas elsewhere in the RV
- A delamination pattern that follows impact-related distortion rather than a known leak path
These findings do not automatically prove causation. They provide a physical basis for further analysis.
Evidence that may suggest pre-existing water damage
The following findings may be consistent with a longer-term leak:
- Older staining or discoloration around a roof penetration
- Widespread moisture across unrelated sections
- Soft or deteriorated substrate around a window, vent, marker light, or plumbing opening
- Musty odor, mold-like growth, or long-term dampness
- Corrosion that appears unrelated to the collision location
- Sealant that is aged, brittle, separated, or weathered over a broad area
- Delamination that follows gravity from an older leak source
- Maintenance records showing a prior leak or unrepaired seal failure
- Moisture in locations not connected to the collision path
Again, these are indicators, not a final insurance decision. An older leak and a new collision can also coexist. A careful inspection should document both conditions rather than force every defect into a single category.
Why delamination needs special care
Delamination occurs when layers of an RV wall or other composite assembly separate. It may be related to moisture, impact force, manufacturing conditions, or a combination of factors. Exterior bubbling or rippling can be a visible sign, but separation can also exist beneath a surface that looks relatively normal.
A professional evaluation may combine:
- Visual inspection
- Acoustic tapping
- Moisture readings
- Thermal imaging
- Interior trim removal
- Examination of the substrate
- Review of photographs and maintenance records
- Comparison with the collision impact pattern
Moisture readings in a separated area may be normal if the bond failed mechanically during the crash. Conversely, elevated moisture and deteriorated backing may point toward water intrusion. Neither conclusion should be made from a universal percentage threshold because readings vary with the material, meter, calibration, temperature, surface coatings, fasteners, and construction method.
RVCCR explains the causation questions in more detail in RV delamination repair after a collision.
What a professional RV water damage inspection includes
A thorough inspection is systematic. The technician begins with the collision history and visible damage, then follows likely water paths through the roof, sidewalls, openings, interior, floor, and underbelly.
1. Collision and maintenance history
Before testing, the repair team should document:
- Date and location of the collision
- Direction and type of impact
- Whether the RV struck a branch, overhang, vehicle, barrier, or object
- Weather conditions at the time
- Whether the RV was exposed to rain afterward
- When the owner first noticed dampness or staining
- Prior roof or seal repairs
- Recent maintenance records
- Previous insurance claims
- Photographs from before and after the accident
This timeline helps technicians identify which findings deserve immediate attention and gives the insurance carrier useful context.
2. Exterior visual and tactile inspection
The exterior review includes the roof, sidewalls, caps, windows, doors, compartments, awnings, slide-outs, vents, lights, trim, and underbody edges.
Technicians look for:
- Cracks
- Gaps
- Displaced parts
- Fresh scuffing
- Sealant separation
- Wrinkled membranes
- Loose trim
- Uneven panel alignment
- Scraped or fractured fiberglass
- Openings at corners and transitions
Sealant is evaluated for continuity and adhesion. A bead can look present while being detached from one of the surfaces it is supposed to protect.
3. Moisture meter mapping
Moisture meters are useful for comparing suspect areas with known dry areas. Depending on the tool and material, a technician may use pinless scanning, pin testing where appropriate, or both.
The objective is not simply to find the highest number. The technician should:
- Establish a baseline in an unaffected area
- Scan around the suspected entry point
- Follow the wall, ceiling, floor, or trim outward
- Record readings by location
- Note material differences
- Avoid interpreting readings through metal without accounting for interference
- Compare readings with visible evidence
- Photograph or map the test areas
A moisture meter is a diagnostic aid, not a stand-alone causation device. A reading may be affected by fasteners, wiring, foil insulation, surface coatings, salts, temperature, or the construction of the wall. The pattern is usually more useful than one isolated reading.
4. Thermal imaging
Thermal imaging can supplement moisture mapping by identifying temperature differences associated with wet materials, missing insulation, air pockets, or other changes in the assembly. It is most useful when interpreted alongside moisture readings and visible evidence.
A thermal image by itself does not prove that a specific area is wet or that a collision caused the condition. Ambient temperature, sunlight, airflow, insulation type, and the timing of the scan all affect the image. A qualified technician uses it to identify areas for closer examination, not to replace physical inspection.
5. Delamination tapping
A technician may use a controlled tapping method across fiberglass sidewalls, caps, and other composite surfaces. Changes in sound can help identify areas where the outer skin is no longer bonded consistently to the substrate.
The results should be mapped and compared with:
- Impact location
- Moisture readings
- Surface condition
- Interior findings
- Framing or panel distortion
A hollow sound may identify separation, but it does not independently identify when or why the separation occurred.
6. Interior trim inspection
Water can enter behind trim long before it reaches the open living area. Technicians may inspect or carefully remove:
- Window valances
- Cabinet backs
- Ceiling trim
- Wall panels
- Slide-out interior trim
- Flooring edges
- Closet interiors
- Exterior compartment liners
- Access covers
The inspection looks for staining, swelling, softened materials, odor, corrosion, wet insulation, and damaged fasteners. Trim should be removed methodically so that the inspection does not create new damage or destroy evidence.
7. Underbelly inspection
If the moisture pattern leads toward the lower floor or the collision affected a lower body area, the underbelly may need to be examined. The technician documents the condition before opening it, then uses appropriate support and safety procedures.
An underbelly can conceal moisture that has migrated from a roof, window, slide-out, sidewall joint, or plumbing area. It can also contain components that require careful handling. Owners should not crawl under an unsupported RV or attempt to remove structural or protective panels without the right equipment and training.

Why early detection matters
Hidden moisture becomes more difficult and expensive to address when it remains undiscovered. The longer water reaches absorbent materials, the more likely the inspection will involve more than a seal replacement.
Potential consequences include:
Mold and odor
Moisture can create conditions that support mold and mildew growth. The owner may notice a musty odor before seeing visible growth. Because an RV is a confined space, odors can develop in cabinets, wall cavities, insulation, flooring, and underbelly materials.
If mold is suspected, avoid disturbing contaminated materials unnecessarily. Ventilate the RV when practical, keep occupants away from affected areas, and ask a qualified repair or remediation professional for guidance.
Rot and weakened substrates
Wood-based materials can swell, soften, and lose their ability to hold fasteners or support bonded panels. Once the substrate is compromised, resealing the exterior alone may not restore the assembly.
Delamination
Moisture can weaken the bond between fiberglass and backing materials. Impact-related separation can also spread as the RV continues to flex during travel. A localized problem can become a larger structural and cosmetic repair if ignored.
Floor and underbelly damage
Water that reaches the floor assembly can affect insulation, wiring routes, tank supports, and lower wall connections. The problem may not be obvious until flooring moves, cabinets shift, or the underbelly sags.
More complicated insurance documentation
The longer an owner waits, the harder it can be to separate the original accident from later weather exposure, maintenance conditions, or progressive deterioration. Prompt inspection creates a clearer record.
Documentation that can help establish collision causation
An insurance carrier will evaluate the policy, the facts of the loss, the estimates, and the evidence. No repair shop can guarantee how a carrier will interpret coverage. However, organized documentation gives the claim a stronger factual foundation.
Keep the following:
-
Accident photographs
Photograph every exterior side, roof area that can be safely reached, window, slide-out, trim piece, compartment, and underbelly opening. Include wide shots that show the relationship between the damaged parts. -
A written timeline
Record the collision date, weather conditions, storage location, first rain after the crash, first odor or stain, and dates of any temporary protection. -
Maintenance records
Keep invoices and notes showing prior seal inspections, roof work, resealing, and repairs. These records may help distinguish a new failure from an older condition. -
Moisture maps
Ask the repair facility to identify test locations and compare suspect areas with unaffected areas. -
Thermal and tapping documentation
Images and mapped inspection notes can show where additional examination was needed. -
Photos of removed components
Preserve images of cracked sealant, shifted frames, torn seals, broken fasteners, damaged trim, wet insulation, and deteriorated substrate. -
A detailed repair estimate
The estimate should separate visible repairs from hidden damage found during disassembly or testing. If additional damage is discovered, the shop can document a supplement for the insurer to review. -
Manufacturer information
The owner’s manual for the specific RV can identify sealant locations, slide-out requirements, underbelly construction, and maintenance procedures. Winnebago provides owner manuals, diagrams, sealant callout sheets, and service resources through its official Manuals & Diagrams page. -
Insurance communications
Save claim numbers, adjuster messages, inspection dates, approvals, denials, and requests for additional information.
Government guidance also supports prompt documentation when a vehicle may have damage that is not immediately visible. The National Highway Traffic Safety Administration advises owners to conduct a thorough assessment before operating a flood-damaged vehicle and notes that water damage can affect vehicle systems without obvious early symptoms. Although that guidance addresses flood exposure rather than collision-created RV leaks, the same documentation principle applies: identify and record hidden damage before use or cleanup changes the evidence.
What to do if you suspect water intrusion after a crash
If you notice dampness, a stain, a musty odor, a soft wall, a bubbling panel, or a slide-out seal that no longer contacts evenly, take these steps:
Stop using affected components
Do not continue cycling a slide-out that binds or moves unevenly. Do not climb onto a roof unless the RV and roof are designed for it and you have the proper safety equipment. Do not drive the RV if the collision may have affected structural integrity, visibility, braking, steering, tires, or other safety systems.
Protect the interior temporarily
If rain is expected, use temporary protection only if it can be applied without causing additional damage. Do not permanently reseal, paint, drill, or remove components before photographing the condition and notifying the insurer, unless immediate action is necessary to prevent further damage.
Photograph before cleaning
Take photos of stains, dampness, seal separation, damaged trim, and any water path. Include a measuring reference when practical, but do not press aggressively on soft materials or spread moisture.
Notify your insurance carrier promptly
Provide the date of loss, location, visible damage, suspected water intrusion, and the steps taken to prevent further damage. Ask whether the carrier wants an inspection before disassembly.
Schedule a professional RV inspection
Choose a facility experienced in RV collision repair, motorhome collision repair, body work, paint, structural evaluation, and mechanical systems. A general car-only inspection may not address slide-out openings, roof membranes, composite sidewalls, enclosed underbellies, or RV-specific seal systems.
Request a written report
Ask for photos, findings, test locations, suspected entry paths, condition of the substrate, and a clear separation between confirmed damage and areas requiring further disassembly.

Why RVCCR evaluates water intrusion before cosmetic restoration
A professional RV paint and body shop should not simply repair the visible fiberglass, apply paint, and send the coach back onto the road. If the underlying seal, wall, floor, slide-out, or underbelly has been affected, the restoration plan must address weather resistance as well as appearance.
At RVCCR, the inspection process can include:
- Review of the collision history
- Documentation of visible damage
- Evaluation of roof seams and penetrations
- Inspection of window and door seals
- Slide-out alignment and seal review
- Moisture testing where indicated
- Delamination evaluation
- Interior trim inspection
- Underbelly assessment
- Collision, paint, and mechanical repair planning
- Insurance estimate coordination
The appropriate repair may be a seal or trim replacement, slide-out realignment, localized substrate repair, fiberglass restoration, delamination repair, structural reconstruction, or a combination of services. The correct choice depends on the RV’s construction, the location and extent of damage, manufacturer requirements, and the condition discovered during inspection.
Owners can begin with RVCCR’s RV repair and collision services or submit photos and vehicle information through the RVCCR photo estimate page. A photo estimate is useful for starting the conversation, but hidden moisture and structural conditions may require an in-person inspection.
Protect the next trip by finding the damage now
An RV collision can interrupt a family trip, create an insurance claim, and leave owners wondering whether the visible damage tells the whole story. It often does not. Roof seams, window frames, slide-out seals, wall assemblies, and enclosed underbellies can conceal the most important evidence.
Inspect the RV promptly. Document the condition before repairs or cleanup. Compare moisture patterns with impact evidence and maintenance history. Use manufacturer information for the specific RV whenever possible. Then let an experienced RV collision repair team determine whether the coach needs sealing, realignment, structural repair, water-damage restoration, or a broader mechanical and body repair plan.
RVCCR combines collision, paint, and mechanical work in one facility and helps coordinate the repair process with major insurance carriers. Our goal is not simply to make the exterior look finished. We restore the RV’s weather protection, structure, finish, and function so you can move beyond the accident and return to the camping, travel, and open-road adventures that brought you to RV ownership in the first place.
Sources and manufacturer guidance
- Winnebago 2025 Towables Owner’s Manual : manufacturer guidance on roof, sealant, windows, slide-outs, underbelly inspection, and maintenance.
- Winnebago Manuals & Diagrams : official owner manuals, sealant resources, diagrams, and service information.
- National Highway Traffic Safety Administration: Hurricane- and Flood-Damaged Vehicles : federal guidance on documenting and evaluating water-damaged vehicles, including damage that may not be immediately visible.
- California Bureau of Automotive Repair: Safety Systems Inspections : California information about inspections of revived salvage vehicles and OEM repair specifications.
Manufacturer recommendations vary by RV make, model, year, roof material, sealant, and construction. Follow the owner’s manual for your specific RV and consult a qualified repair professional when collision or water intrusion is suspected.
Need a repair estimate?
Skip the wait — send us a few photos and our team will get back to you fast.
Start a Photo Estimate →