RV Brake and Axle Inspection After a Collision: Why Undercarriage Damage Is Easy to Miss
Updated August 28, 2026 | RVCCR RVDA Certified | Redlands and Inland Empire
RVCCR is an RVDA-certified collision and repair facility with 21 years of experience serving Redlands and the Inland Empire. Our team handles RV collision repair, motorhome collision repair, travel trailers, fifth wheels, toy haulers, popups, and other recreational vehicles, combining structural, paint, body, and mechanical services under one roof.
After an RV collision, the visible damage may be limited to a fender, bumper, sidewall, wheel, or exterior panel. The undercarriage can tell a different story. Impact forces may travel through the wheel, hub, spindle, axle tube, brake assembly, spring hanger, frame, wiring, and suspension before the damage becomes obvious. Some parts may look normal while already being bent, cracked, shifted, contaminated, or unsafe to reuse…
A proper inspection must therefore go beyond looking at the tire and checking whether the wheel still turns. It should establish what was damaged by the collision, what represents normal wear, what requires replacement, and whether the RV can be safely towed again. The details matter because a small undercarriage problem can affect braking, tire wear, tracking, stability, and the way the RV responds behind the tow vehicle.
Why undercarriage damage is easy to miss
RV undercarriages are difficult to inspect for several practical reasons.
First, many components are hidden behind wheels, brake drums, protective panels, underbelly materials, dirt, grease, and suspension hardware. A technician may not be able to see the axle tube, brake shoes, magnet, spindle, or bearing condition until the wheel and hub are removed.
Second, the body can hide the direction and severity of the impact. A side collision may damage the wheel and fender while transferring force into the spindle or axle. A curb strike may leave only a scrape on the tire but bend a suspension component. A rear or front impact may move the frame, tongue, coupler, spring hanger, or axle attachment point.
Third, some problems do not appear while the RV is parked. A damaged trailer may sit level in the driveway but track incorrectly on the road. A bearing may rotate quietly by hand but heat up under load. A brake wire may remain connected while its insulation is cut and exposed to movement or moisture. A wheel may appear centered until the suspension cycles.
The undercarriage also contains parts that naturally show wear over time. Brake linings become thinner. Magnets develop contact wear. Bearings accumulate normal service marks. Bushings loosen. Tires may already have uneven tread wear. A collision inspection must separate those gradual conditions from fresh damage caused by the impact.
That distinction is important for safe repairs and for insurance documentation.
Which RVs need this type of inspection?
The inspection process differs according to the RV’s construction.
Towable RVs
Travel trailers, fifth wheels, toy haulers, and popups commonly use one or more of the following:
- Straight or cambered axle beams
- Leaf-spring suspension
- Equalizers and shackles
- Torsion axles
- Electric drum brakes
- Hydraulic or electric-over-hydraulic brakes
- Hubs, bearings, seals, and drums
- Brake wiring and breakaway systems
- A-frame tongues, couplers, and safety-chain attachments
For these RVs, an impact near a wheel, curb, hitch, tongue, underbelly, or frame deserves a complete running-gear inspection. A travel trailer may still be towable after a collision, but that cannot be determined only by whether the trailer connects to the ball.
Motorhomes
Motorhomes use a powered chassis rather than a separate trailer axle system. Depending on the coach and chassis, the inspection may include:
- Steering linkage
- Front and rear suspension
- Wheel hubs and bearings
- Brake calipers, rotors, drums, or hydraulic components
- Air-brake components on equipped diesel chassis
- Axle housings and shafts
- Frame rails and crossmembers
- Alignment geometry
- Tires and wheels
- Chassis wiring
- Body-to-chassis mounts
A motorhome collision may require both RV structural knowledge and chassis-specific mechanical expertise. Manufacturer procedures for the motorhome chassis control the inspection and repair. The inspection should not apply a generic travel-trailer axle procedure to a motorhome.
For towable RV owners, RVCCR’s article on RV underbelly repair after a collision explains how hidden damage can extend from the wheel and frame area into plumbing, wiring, tanks, insulation, and support components.
Do not tow before the wheel area is evaluated
If the collision involved a wheel, tire, curb, pothole, trailer tongue, hitch, axle, underbelly, or suspension component, avoid towing until the affected area is inspected.
Do not assume the RV is safe because:
- The tire is still inflated
- The wheel is not visibly cracked
- The trailer appears to sit level
- The brake controller shows a signal
- The motorhome starts and moves
- The vehicle can be pulled slowly around a parking lot
- There is no fluid on the ground
- The damage looks cosmetic
A collision can leave a part weakened without creating a dramatic visual failure. Continuing to tow can turn a limited repair into damage involving the tire, wheel, body, frame, brake system, or other axle components.
If movement is necessary, a qualified tow provider and repair facility should determine the safest transport method. The RV may require a flatbed, specialized trailer transport, wheel dollies, or other equipment based on its condition and type.
The professional RV brake and axle inspection process
A complete inspection should be organized and documented. The exact sequence varies by RV design and manufacturer, but owners should expect the following major steps.
1. Record the condition before disassembly
Before removing parts, the repair facility should photograph the RV and the affected area. Useful photographs include:
- The complete RV
- The damaged corner or side
- The wheel and tire
- The fender or wheel opening
- The axle and suspension area
- The brake wiring
- The underbelly and frame
- The hitch, coupler, or tongue if involved
- Scrapes, dents, fresh paint loss, or impact marks
- Tire contact marks
- The VIN and component identification labels
The shop should also record the collision direction when known, the owner’s description of the event, the location of the impact, and any changes noticed afterward.
This baseline helps distinguish collision-related findings from normal wear or pre-existing conditions.
2. Secure the RV correctly
Wheel and hub inspection requires the RV to be raised and supported according to the RV and component manufacturer’s instructions. Dexter’s official service manual warns against supporting a trailer under the axle or suspension and states that the frame should be properly supported with appropriately rated jack stands.
Owners should not crawl beneath a trailer supported only by a jack. A large RV contains substantial weight, and incorrect lifting can create a serious injury hazard or damage the axle and frame.
A qualified technician will also account for:
- Axle configuration
- Loaded and unloaded conditions
- Manufacturer lifting points
- Frame strength and access
- Multiple-axle support requirements
- Wheel chocking
- Brake and electrical safety
- Whether the RV must remain connected to the tow vehicle
3. Remove the wheel for a real inspection
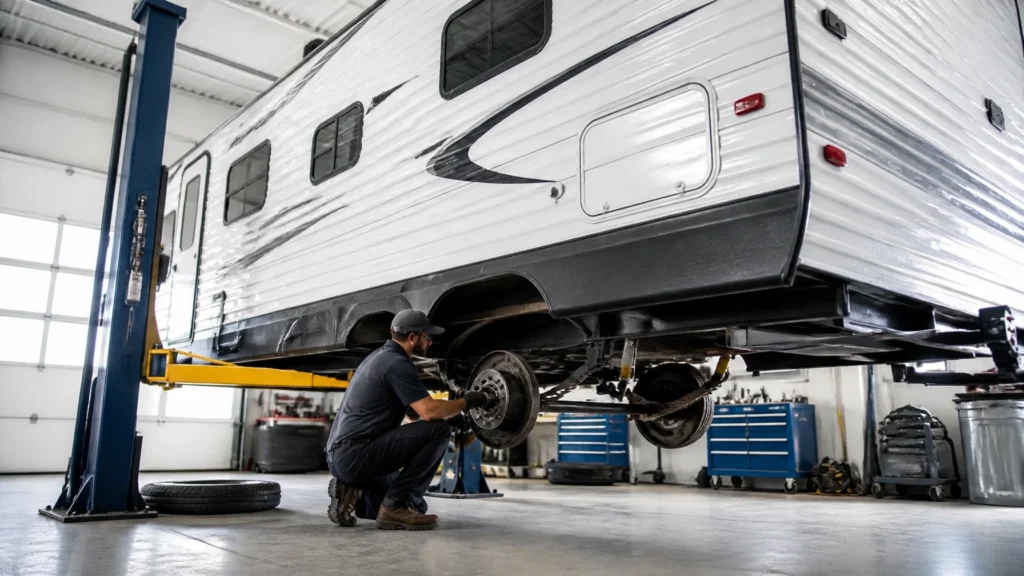
A visual check through the wheel openings is not enough when collision damage is suspected. The wheel may need to be removed so the technician can inspect:
- Wheel damage
- Lug nuts and studs
- Hub or drum condition
- Brake backing plate
- Brake wiring
- Spindle area
- Axle flange
- Suspension attachment points
- Tire clearance
- Contact marks behind the wheel
The shop should record the wheel position and component identification so parts can be returned to their correct locations when appropriate.
The wheel itself must also be checked for cracks, dents, distortion, incorrect offset, and damage around the mounting holes. A wheel that appears usable from the outside may have been deformed by an impact.

Inspecting the hub, spindle, and bearings
The hub and spindle transfer wheel loads into the axle and suspension. They also support the brake drum or rotor. An impact at the tire or wheel can place concentrated force into these parts.
Hub inspection
The technician should check the hub for:
- Cracks
- Distortion
- Damaged wheel studs
- Damaged bearing bores
- Scoring
- Abnormal wear
- Damage around the grease cap or oil cap
- Brake-drum damage where the drum is integrated with the hub
- Evidence of grease or fluid leakage
On an electric drum-brake system, the hub or drum includes the armature surface contacted by the brake magnet. Uneven scoring or damage can affect brake operation even when the brake shoes appear usable.
Spindle inspection
The spindle should be examined for:
- Bending
- Gouges
- Deep scoring
- Discoloration from heat
- Damage to the bearing journals
- Damage to the seal journal
- Damaged threads
- Burrs or deformation at the nut and washer area
A bent spindle can prevent the hub from rotating concentrically. It can also interfere with correct bearing adjustment and seal operation.
Dexter’s service manual identifies a bent spindle as a condition requiring axle replacement. That is different from replacing a small, serviceable wear component. The spindle is part of the axle assembly, and attempting to straighten it without an approved manufacturer procedure can compromise geometry, strength, bearing alignment, or load capacity.
Bearing inspection
For standard tapered roller bearings, the hub is removed and the bearings are cleaned with a suitable solvent before inspection. Dexter instructs technicians to inspect each roller and replace the bearing when pitting, spalling, or corrosion is present. The bearing cone and cup should be replaced as a matched set.
A collision-related bearing inspection should look for:
- Pitting
- Spalling
- Corrosion
- Heat discoloration
- Rough rollers
- Uneven wear
- Damaged races
- Contamination
- Abnormal end play
- A rough or “bumpy” rotation
- Evidence of grease or seal failure
A bearing that turns by hand is not automatically serviceable. The inspection must consider its actual surfaces, fit, lubrication, and condition under the applicable manufacturer’s specifications.
The seal also matters. When a hub is removed, the seal should be inspected and replaced when required by the component manufacturer. A damaged seal can allow lubricant to reach brake linings or magnets. Grease or oil contamination can reduce braking performance and may require replacement of affected brake components.
Nev-R-Lube and sealed bearing systems
Some RVs use sealed or cartridge-style bearing systems rather than conventional serviceable tapered bearings. These systems have different inspection, end-play, removal, and replacement procedures.
Do not apply a standard grease-bearing procedure to a sealed cartridge bearing. The axle manufacturer’s manual, RV manufacturer information, and component identification should determine the correct service method.
Inspecting the axle tube and determining whether it is bent
The axle tube is one of the most important components to evaluate after a wheel or side impact.
Normal camber versus abnormal bending
Many trailer axles are designed with a slight upward bow, or camber, in the axle tube when unloaded. That designed shape helps the axle carry the trailer load correctly.
A forward or rearward bend is not normal camber. Neither is a visible kink, dent, flattened section, cracked weld, displaced spring seat, or deformation near an attachment point.
The technician may inspect for:
- Scraped paint showing the impact path
- Dents or flattened tube sections
- A forward or rearward bend
- Loss of the designed camber
- Shifted spring seats
- Damaged torsion-axle mounting brackets
- Cracks near welds
- Distortion at the spindle or flange
- Unequal hub position from side to side
- Abnormal tire wear
- Trailer dog tracking
On tandem or triple-axle trailers, the relationship among the axles is especially important. Dexter’s towable-RV guidance discusses measuring hub-to-hub distances on both sides and identifies a one-quarter-inch comparison tolerance for that basic check. More detailed alignment measurements should follow the axle and RV manufacturer’s procedures.
Why a bent axle should not be straightened casually
A bent axle is not equivalent to a bent piece of non-structural sheet metal. The axle beam is engineered to carry a specified load and establish wheel alignment. Heating, pressing, bending, or welding the beam can alter:
- Camber
- Toe
- Spindle alignment
- Load distribution
- Metal properties
- Weld integrity
- Fatigue resistance
- Axle rating
- Tire clearance
Dexter’s service information treats damaged axle beams, loss of camber, misalignment, and bent spindles as conditions requiring replacement or a properly specified replacement solution. It does not provide a general “straighten every bent axle” procedure.
The safer rule is straightforward: do not authorize axle straightening unless the axle manufacturer and applicable RV manufacturer provide a specific, approved repair method for that exact axle. In many collision situations, replacement of the properly rated axle assembly is the appropriate path.
The replacement must match the RV’s required:
- Capacity
- Track width
- Spring-center dimension
- Hub face
- Brake type
- Spindle configuration
- Suspension style
- Camber
- Mounting arrangement
- Manufacturer specifications
An axle that physically fits is not necessarily the correct axle.
Inspecting suspension geometry and attachment points
An axle can be straight while the suspension around it has moved. The inspection should include the parts that hold the axle to the RV.
For leaf-spring trailers, the technician should examine:
- Front and rear hangers
- Center hangers
- Equalizers
- Shackles
- Spring eyes
- Bushings
- U-bolts
- Tie plates
- Spring seats
- Broken or stretched fasteners
- Elongated bolt holes
- Cracks and rust trails around welds
- Loss of spring arch
- Broken or separated spring leaves
For torsion axles, the inspection may focus on:
- Axle mounting brackets
- Frame attachment points
- Torsion arms
- Ride height
- Spindle position
- Uneven suspension movement
- Wheel and tire clearance
- Evidence of impact near the axle tube
Suspension geometry affects how the RV tracks behind the tow vehicle. It also affects tire wear, load distribution, braking behavior, and the ability of the wheels to remain aligned through turns and road movement.
Possible post-collision symptoms include:
- The trailer pulls to one side
- The trailer follows at an angle
- The tow vehicle feels pushed during braking
- One tire wears on an edge
- A tire rubs the fender or underbelly
- The RV leans
- A wheel sits farther forward or backward in the opening
- The suspension makes new clunking noises
- The trailer sways or behaves differently
- Tandem axles no longer appear parallel
These symptoms do not prove one specific failure. They indicate that the running gear needs measurement and inspection before the RV returns to service.
For a motorhome, the geometry review may include chassis alignment, steering components, control arms, leaf springs, airbags, shock absorbers, axle housings, wheel bearings, and frame attachments. The chassis manufacturer’s specifications control the process.
Distinguishing brake wear from collision damage
Brake components naturally wear as the RV is used. A collision inspection must identify whether a condition developed gradually or appeared because of the impact.
Conditions commonly associated with normal wear
Depending on the brake design and manufacturer limits, normal service wear may include:
- Gradual brake-lining thickness reduction
- Even contact marks on brake shoes
- Normal magnet face wear
- Light surface rust after storage
- Mild polishing on drum surfaces
- Bushing or spring wear over time
- Brake adjustment changes as linings wear
Dexter’s service manual identifies brake-lining replacement when the lining is worn to approximately 1/16 inch or less for the covered brake systems. It also states that linings contaminated with grease or oil, or abnormally scored or gouged, should be replaced. Exact limits for a particular RV must come from the applicable brake manufacturer.
Dexter also notes that slight hairline heat cracks in bonded linings can be acceptable. That does not mean every crack is harmless. A technician must distinguish minor heat checking from a broken, separated, contaminated, deeply scored, or structurally damaged lining.
Conditions more suggestive of collision damage
Collision-related brake findings may include:
- A bent backing plate
- Shifted brake hardware
- Crushed or torn brake wires
- A damaged magnet arm
- A cracked drum
- New impact scoring
- A drum that no longer runs true
- A brake assembly displaced on the axle flange
- Bent mounting hardware
- A wheel impact transferred into the brake assembly
- A brake line kinked or pulled from its fitting
- A caliper or rotor displaced on a motorhome
- Fresh grease contamination caused by impact-related seal damage
The location and pattern matter. Evenly worn brake shoes on both sides of an axle suggest a different issue from one wheel with fresh gouging, a bent backing plate, or a damaged wire at the impact location.

Inspecting brake linings, magnets, drums, and rotors
Electric drum brakes
Many towable RVs use electric drum brakes. The system sends current from the brake controller to an electromagnet inside each brake assembly. The magnet contacts the rotating armature surface and initiates the mechanical movement that applies the shoes.
The inspection should cover:
- Brake-shoe lining thickness
- Cracks, chips, scoring, and contamination
- Return springs
- Hold-down springs
- Adjuster assembly
- Magnet arm
- Magnet surface
- Backing plate
- Wiring connections
- Drum braking surface
- Drum armature surface
- Brake mounting hardware
Dexter’s manual instructs technicians to inspect magnets for uneven or abnormal wear. If the coil becomes visible through the magnet’s friction material, replacement is required. A magnet with uneven wear may indicate a drum, backing-plate, alignment, or mounting problem that also needs attention.
Brake drums
The drum should be checked for:
- Cracks
- Heavy scoring
- Heat checking
- Out-of-round condition
- Excessive wear
- Damage to the armature surface
- Impact distortion
- Metal contamination
Dexter’s service manual gives specific machining and replacement limits for the drum sizes covered by that manual. Those dimensions should not be generalized to every drum. The exact brake and axle identification must be confirmed before deciding whether a drum can be machined or must be replaced.
Hydraulic and electric-over-hydraulic systems
Some towable RVs use hydraulic brakes or electric-over-hydraulic actuation. These systems require additional checks, including:
- Brake fluid level
- Lines and hoses
- Wheel cylinders or calipers
- Actuator operation
- Leaks
- Kinks
- Air in the system
- Hydraulic pressure
- Electrical connections to the actuator
- Breakaway function
A hydraulic brake inspection should not be reduced to checking the electric brake wire. The actuation system and wheel-end components must be evaluated together.
Motorhome brakes
Motorhome brake systems vary by chassis and may include hydraulic disc brakes, hydraulic drum brakes, air brakes, or integrated electronic controls. The relevant chassis service information should determine:
- Rotor or drum limits
- Pad or lining limits
- Caliper or wheel-cylinder inspection
- Brake hose and line checks
- ABS-related diagnostics
- Parking-brake operation
- Hydraulic or air-system testing
- Required post-repair road testing
Checking brake wiring and electric function
A collision can damage electric brake wiring even when the brake assembly itself appears intact.
The technician should follow the wiring from the brake assembly along the axle and frame, checking for:
- Cut insulation
- Pinched wires
- Pulled connectors
- Loose terminals
- Chafing against the axle tube
- Contact with a tire or moving suspension part
- Crushed conduit
- Corrosion
- Poor grounds
- Damage at junctions
- Incorrect routing after reassembly
The two wires entering an electric brake assembly should be secure and properly insulated. The wiring must be secured away from sharp edges, heat, suspension movement, and tire contact.
Functional testing
A professional functional test may include:
- Brake-controller output testing
- Voltage measurement at the brake magnets
- Amperage testing for the complete brake circuit
- Individual magnet checks
- Breakaway-system testing
- Continuity and ground checks
- Inspection of connector pins
- Verification of brake response at each wheel
Dexter’s manual explains that voltage should increase as the controller is actuated and provides magnet resistance and amperage information for specific brake sizes. A value such as 3.2 ohms applies to certain listed magnet configurations, not automatically to every RV brake. The technician should identify the brake size and use the applicable manufacturer specification.
After repairs, brake synchronization and controlled road testing may be required. The trailer should not be tested on public roads until the repair facility has confirmed that the wheels, tires, axle, suspension, brakes, and hitch are safe for testing.
Why alignment and tire wear provide important clues
The tires often reveal undercarriage damage before the owner notices a handling change.
Inspect for:
- One-sided shoulder wear
- Cupping
- Feathering
- Flat spots
- Scuffing
- Rub marks
- Uneven wear across tandem axles
- Fresh sidewall damage
- A tire sitting at an unusual angle
Tire wear is not a collision diagnosis by itself. Improper inflation, overloading, unbalanced wheels, worn bearings, normal alignment issues, and suspension wear can all create patterns. But a new wear pattern after an impact is an important reason to inspect the axle and suspension.
A bent axle or shifted hanger can change the relationship between the wheel and the trailer body. That can make the trailer track at an angle, create uneven tire loading, and increase stress on the wheel-end components.
A final repair should include a documented review of wheel position, tire clearance, suspension geometry, and alignment as applicable.
Documenting undercarriage findings for an insurance claim
Insurance coverage and claim decisions depend on the policy, the facts, and the insurer’s procedures. A repair facility can document physical damage and explain the required repair operations, but it does not determine coverage.
Useful claim documentation may include:
Before-disassembly photographs
Photograph the RV before the wheel, underbelly, hub, or suspension components are removed. Show the full vehicle and close-ups of the impact area.
Teardown photographs
Photograph hidden damage as it becomes visible, including:
- Bent axle tubes
- Damaged spindles
- Cracked hubs or drums
- Broken brake hardware
- Torn brake wiring
- Shifted hangers
- Cracked welds
- Damaged U-bolts or shackles
- Bearing and seal condition
- Tire contact marks
- Underbelly damage
- Fluid or grease contamination
Measurements
Record measurements used to evaluate:
- Axle position
- Hub spacing
- Frame or suspension alignment
- Ride height
- Tire clearance
- Drum or rotor condition
- Bearing end play where applicable
- Remaining lining thickness
- Component dimensions
- Frame or hanger displacement
The measurement method and component identification should be included where relevant.
Parts and serial-number information
If the axle or brake assembly is replaced, the repair file should identify the original component and replacement component when possible. Dexter advises owners to have the axle serial or lot number available when seeking service assistance.
Separate collision damage from normal wear
A clear report should distinguish:
- Collision-related damage
- Normal wear
- Pre-existing deterioration
- Damage discovered because of teardown
- Damage caused by continued use after the collision
- Components that remain serviceable
- Components requiring replacement
For example, “brake lining worn below manufacturer limit” is different from “right brake backing plate bent at the reported impact location.” Both may require repair, but the descriptions answer different questions.
Supplement documentation
If hidden damage changes the original estimate, the shop may prepare a supplement with photographs, measurements, parts information, labor operations, and manufacturer procedures. This gives the insurer a basis to review the additional work.
RVCCR’s article on when insurers total an RV after a collision explains why accurate RV identification, repair documentation, and evidence of hidden damage can matter when a claim involves repair-versus-total-loss questions.
What owners should expect after undercarriage damage is found
A thorough RV collision repair may take longer after the wheel and axle area is opened. That is not necessarily a sign that the process is stalled. It may mean the shop has found damage that could not be safely evaluated during the initial visual estimate.
Possible repair outcomes include:
- Replacing a tire or wheel
- Replacing a bearing, race, and seal
- Replacing a brake magnet or complete brake assembly
- Repairing damaged brake wiring
- Replacing a hub or drum
- Replacing a spindle or axle assembly
- Repairing or replacing a spring hanger
- Replacing shackles, bushings, or U-bolts
- Correcting frame or suspension alignment
- Replacing damaged underbelly material
- Repairing nearby plumbing or wiring
- Performing final brake and alignment tests
- Replacing multiple components on the same axle for balanced operation
The correct repair depends on the inspection findings, RV design, manufacturer procedures, component availability, and insurance authorization.
Owners should ask:
- Which undercarriage components were inspected?
- Was the wheel and hub removed?
- Was the spindle checked for damage?
- Were the bearings and seal inspected?
- Was the axle tube measured for straightness and camber?
- Were the spring hangers, equalizers, shackles, and U-bolts checked?
- Were the brake linings and magnets measured?
- Was the drum or rotor checked for cracks and excessive wear?
- Was the brake wiring tested under load?
- Was the breakaway system checked if the RV is a towable?
- Were tire clearance and alignment evaluated?
- Which parts show collision damage versus normal wear?
- What manufacturer information supports the repair decision?
- What testing will be completed before release?
- What documentation will be provided to the insurer and owner?
How long can the inspection and repair take?
The inspection itself may be completed relatively quickly when the wheel area is accessible and parts are available. The overall repair timeline can be longer if the collision involves:
- A damaged axle assembly
- A specialized torsion axle
- A rare hub or brake configuration
- A bent frame or hanger
- A motorhome chassis component
- Hidden underbelly damage
- A supplement requiring insurer review
- Multiple wheel-end components
- Backordered parts
- Additional paint or body repairs
- A final road test or alignment appointment
For larger coaches, the mechanical repair may need to be coordinated with structural and body work. The motorhome may also need additional teardown before the shop can confirm the complete repair scope.
RVCCR’s guide to motorhome collision repair timelines in 2026 explains why RV repairs are often affected by teardown findings, parts availability, insurance supplements, booth scheduling, and final mechanical checks.
Choosing an RV collision repair facility
When searching for travel trailer repair near me, choose a facility that can evaluate the complete RV rather than only the visible exterior damage.
Look for a repair partner with:
- RV-specific experience
- RVDA certification or relevant technician training
- Collision inspection capability
- Mechanical repair capability
- Brake and suspension knowledge
- Access to manufacturer repair information
- Proper lifting and support equipment
- Insurance documentation experience
- Parts identification and sourcing procedures
- A written warranty
- A clear final inspection process
For a motorhome, confirm that the facility understands both the coach body and the underlying chassis. For a travel trailer, confirm that the shop can inspect the axle, hubs, brakes, suspension, hitch, frame, underbelly, and body structure together.
The lowest initial estimate is not always the most complete estimate. A repair plan that identifies hidden damage early can prevent additional problems after the RV returns to the road.
Official technical references
The following primary sources were used for the general inspection principles discussed in this article:
- Dexter: How to Inspect Your Towable RV Axles, Brakes & Suspension
- Dexter Light Duty 600–8K Operation Maintenance Service Manual
- Dexter Trailer Service Checklist
These sources provide general information for the component systems they cover. The RV manufacturer’s instructions, axle manufacturer’s specifications, brake manufacturer’s limits, and motorhome chassis documentation control the repair of a specific RV.
The goal is a safe return to your next adventure
An RV collision can leave you focused on the visible damage: a crushed fender, a scraped sidewall, a damaged bumper, or a broken light. But the parts underneath determine whether the RV can brake, track, carry its load, and travel safely.
Inspect the wheel. Remove the hub when necessary. Check the spindle, bearings, brake assembly, wiring, axle tube, suspension, and alignment. Replace damaged components according to the manufacturer’s repair information. Document what the collision caused and what represents normal wear. Then test the completed repair before the RV returns to the highway.
RVCCR combines RV collision repair, motorhome collision repair, structural work, paint, and mechanical service in Redlands. Our team can inspect the undercarriage, coordinate with major insurance carriers, document hidden damage, provide a free estimate, and back completed repairs with a written lifetime warranty subject to its terms.
Bring us the collision damage. We will inspect beneath the surface, identify the real problem, repair the systems that keep your RV moving, and help put your motorhome or travel trailer back on the road ready for the next campsite, family trip, and open-road adventure.
Need a repair estimate?
Skip the wait — send us a few photos and our team will get back to you fast.
Start a Photo Estimate →