RV Frame Rust and Corrosion After a Collision: How to Tell Collision Damage From Pre-Existing Decay
Updated August 26, 2026
RVCCR is an RVDA-certified repair facility with 21 years of RV-specific experience in Redlands, serving motorhomes, fifth wheels, travel trailers, toy haulers, popups, and other recreational vehicles. Our collision, paint, body, and mechanical teams inspect the complete repair area rather than stopping at the first visible scrape.
That matters when rust appears after an RV collision. A damaged frame may show fresh scratches, chipped paint, cracked undercoating, shifted brackets, or broken welds. At the same time, the same area may contain corrosion that developed months or years before the accident. Separating those conditions requires a documented inspection, access to the affected steel, careful measurements, and the applicable RV or chassis manufacturer’s repair information…
Why frame rust after a collision requires a closer look
Many RV owners first notice corrosion after a collision because the accident removes the coverings that previously hid it. A bent bracket may expose the side of a frame rail. A scraped underbelly may reveal a section of steel that was already heavily scaled. A technician may also discover rust after removing undercoating, insulation, body panels, or other materials needed to reach the impact area.
That discovery does not automatically mean the collision caused all of the rust.
Steel corrosion generally develops over time when moisture, oxygen, road chemicals, dirt, or salt remain in contact with unprotected metal. An impact can expose bare steel or damage a protective coating, allowing moisture to reach the metal more easily. It can also create a pocket where water and debris remain trapped. In those circumstances, the collision may expose pre-existing corrosion or create conditions that allow corrosion to continue.
The repair question is therefore more precise than “Was there rust after the crash?” The important questions are:
- Where is the corrosion located?
- What condition was the metal in before the impact?
- Is the rust only on the surface, or has it caused measurable section loss?
- Did the collision create a new crack, bend, tear, or coating failure?
- Does the corrosion affect a frame rail, crossmember, suspension mount, hitch area, or welded structural joint?
- Can the damaged portion be safely repaired under the manufacturer’s instructions?
- What evidence supports the distinction between collision damage and pre-existing deterioration?
A proper RV collision repair inspection answers those questions before structural work begins.
First identify the RV’s construction
Not every RV uses the same type of frame or structural system. A motorhome may have a steel chassis with a body structure mounted above it. A travel trailer or fifth wheel may use a dedicated steel trailer frame supporting a lightweight living structure. Some RV body components may use aluminum, wood, composite, or laminated construction even when the main chassis is steel.
The inspection should identify:
- RV type: Class A, Class B, Class C, fifth wheel, travel trailer, toy hauler, or popup
- Chassis or frame manufacturer
- RV manufacturer and model year
- Frame rail design and material
- Crossmember locations
- Suspension and axle attachment points
- Hitch, coupler, or pin-box structure
- Previous repairs or modifications
- Areas protected by paint, powder coating, sealant, or undercoating
The RV manufacturer’s repair information and the chassis manufacturer’s service information take priority over a generic rust-treatment recipe. They may specify whether a frame member can be straightened, welded, sectioned, or replaced. They may also identify areas where drilling, heating, welding, or adding reinforcement is prohibited.
RVCCR’s motorhome frame straightening service guidance explains why a motorhome chassis requires different equipment and procedures than an ordinary passenger vehicle. The same principle applies to corrosion: the repair plan must match the structure.
Signs that corrosion may be pre-existing
Pre-existing corrosion often has characteristics that distinguish it from a fresh collision scrape or fracture. No single visual clue proves when rust began, but the overall pattern can help a technician form a defensible opinion.
Broad, uneven scale
Rust that covers a large area of a frame rail, crossmember, spring hanger, or bracket may indicate long-term environmental exposure. A collision may have revealed that corrosion, but the size and distribution of the affected area can show that it did not begin at the moment of impact.
Multiple layers of flaking metal
Surface oxidation can develop into layered scale. As the corrosion progresses, portions of the metal and old coating may lift or separate. Flaking that extends well beyond the direct impact path may be evidence of earlier deterioration.
Rust beneath intact or aged coatings
Rust streaks, bubbling, or lifted paint beneath older coatings may indicate that corrosion was present before the crash. Technicians still need to remove enough coating to inspect the steel accurately, because undercoating can hide both old corrosion and new impact damage.
Corrosion at moisture traps
Rust commonly deserves extra attention around:
- Frame seams
- Boxed rail openings
- Crossmember intersections
- Suspension hangers
- Brackets mounted against the frame
- Wheel wells
- Areas behind tires
- Battery trays
- Propane-cylinder mounts
- Hitch and coupler structures
- Underbelly openings
- Locations where dirt and water collect
A collision may disturb one of these areas without creating the original corrosion. The inspection should record the location and pattern instead of assigning causation based solely on when the rust was discovered.
Previous repairs
Old patches, added plates, replacement brackets, non-factory welds, or repaired coating can complicate the analysis. A prior repair may have covered corrosion, changed the original load path, or created a crevice where moisture collected. Photographs, repair invoices, vehicle-history records, and earlier inspection reports can help establish what existed before the current collision.
Signs that the collision exposed or caused new damage
Collision-related damage is often more localized and follows the force path from the point of impact. Again, the condition must be documented rather than assumed.
Potential indicators include:
- Freshly scraped or polished metal at the impact point
- New chips in paint or undercoating
- A sharp tear or crack near a deformed bracket
- Weld separation at a location loaded during the collision
- A bent frame rail or crossmember
- Elongated mounting holes
- Fresh distortion around a hitch, coupler, or pin box
- A newly shifted suspension hanger
- Cracked seam sealer or broken fasteners
- Abrasion showing contact with another object
- Rust beginning around newly exposed bright metal
Fresh bare metal does not necessarily mean the underlying steel was healthy before the accident. A new scrape may sit over older pitting or section loss. Conversely, older surface rust may surround a new collision crack. That is why the inspection should describe each condition separately.
A useful report may identify:
- Pre-existing corrosion: oxidation, pitting, scale, perforation, or previous repair observed away from the impact path or beneath older coatings.
- Collision damage: deformation, cracking, tearing, coating removal, or displaced components consistent with the reported event.
- Collision-exposed condition: older corrosion uncovered because the collision or teardown removed a covering.
- Related repair condition: moisture intrusion or coating failure caused by the collision damage and requiring correction to complete the repair properly.
That language is more accurate than assigning every defect to one category.

The professional RV frame corrosion inspection process
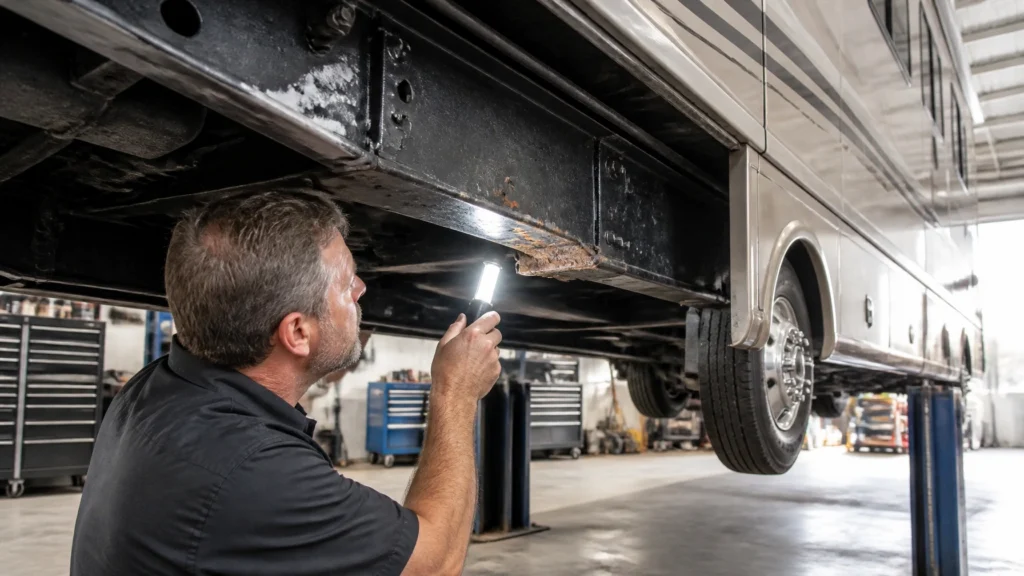
A meaningful inspection often requires more than looking underneath the RV with a flashlight. The exact procedure depends on the RV design, damage, accessibility, and manufacturer information.
1. Photograph the RV before disassembly
The condition should be recorded before the frame is cleaned or components are removed. Photographs should show:
- The complete RV
- All four corners
- The primary point of impact
- The underside near the collision
- Frame rails and crossmembers
- Suspension and axle attachments
- Hitch, coupler, or pin-box areas
- Existing rust, scale, or coating failure
- Visible cracks or deformation
- The VIN and manufacturer labels
The State Farm photo documentation guide is an insurer-specific example that calls for overall photos, damage photos, prior-damage photos, VIN documentation, and: when applicable: RV model information. Its requirements are not universal law, but they illustrate why a clear baseline matters in a claim file.
2. Clean the accessible frame area
Dirt, mud, road salt, grease, loose paint, and failed undercoating can conceal the actual steel condition. A technician may clean the area using methods appropriate for the RV and the components nearby.
Cleaning should be controlled. High-pressure water can force moisture into electrical connectors, bearings, insulation, or openings in the RV body. The area must be dried before measurements are taken.
The purpose is not to make the frame look better. The purpose is to reveal:
- The actual edges of cracks
- The difference between coating failure and metal loss
- The location of welds
- The boundaries of pitting
- Evidence of impact contact
- Holes or perforation
- Areas where the metal has separated
3. Remove loose coating and scale
Wire brushing, scraping, or other mechanical cleaning may be appropriate for exposing steel. A technician should remove loose rust and failed coating without grinding away sound metal or changing the shape of the frame.
For a small accessible area, a wire brush may reveal whether the metal underneath is solid. For heavier scale, additional controlled methods may be necessary. The technique depends on the material, the location, and the manufacturer’s instructions.
A frame should not be judged by its appearance before loose corrosion is removed. Thick scale can make a rail appear substantial while hiding reduced thickness underneath.
4. Inspect the frame rails and crossmembers
The inspection should follow the complete affected structure rather than stopping at the visible impact point. Important areas include:
- Main frame rails
- Crossmembers
- Outriggers
- Suspension hangers
- Spring seats
- Axle brackets
- Steering or suspension mounts on motorhomes
- Hitch receivers
- Trailer tongues
- Pin-box mounting structures
- Body and frame attachment points
The technician should compare the damaged side with the opposite side where the design is symmetrical. That comparison can help identify bends, shifted brackets, or unusual corrosion patterns. It is not a substitute for manufacturer measurements, but it can provide useful context.
5. Inspect welds and fastener locations
Welded joints deserve special attention because they connect brackets, crossmembers, suspension mounts, and frame sections. Inspect for:
- Cracks through the weld bead
- Cracks in the surrounding heat-affected area
- Rust lines radiating from a joint
- Separation between the weld and base metal
- Undercut or missing weld material
- Previous weld repairs
- Deformed brackets
- Loose or missing fasteners
- Elongated holes
- Corrosion between overlapping plates
A small crack at a non-structural trim bracket is different from a crack at a spring hanger, suspension mount, hitch attachment, or primary crossmember. The report should identify the component and its function.
“Spot weld repair” also requires careful terminology. Spot welds may be appropriate for certain sheet-metal or body components when the original construction and repair procedure call for them. They are not a universal solution for a corroded primary frame rail. A shop should not replace a structural repair plan with a series of convenient welds that merely cover weak metal.
6. Measure remaining material where necessary
Visual inspection cannot determine the remaining thickness of every corroded section. When corrosion appears deep, irregular, or close to a structural attachment, the repair facility may use a thickness-measurement method appropriate to the material and access.
Potential approaches can include:
- Direct measurement after exposing a clean edge
- Ultrasonic thickness measurement when suitable
- Comparing an affected section with an undamaged area of the same member
- Measuring a removed section during teardown
- Engineering review where the condition is complex
There is no single nationwide “safe rust percentage” that applies to every RV frame. Rail shape, steel grade, thickness, load, location, design, corrosion pattern, and manufacturer requirements all matter. An insurer’s preferred estimate or a generic internet threshold should not replace the OEM repair procedure or qualified structural assessment.
7. Assess moisture and water intrusion
Corrosion inspection should include a moisture assessment because the source of the moisture may still be active. Check for:
- Torn underbelly material
- Open seams
- Damaged wheel-well liners
- Missing sealant
- Water trails
- Damp insulation
- Wet wood or luan
- Moisture around floor penetrations
- Leaks from plumbing or tanks
- Water entering through a damaged wall, roof, cap, or compartment
A steel frame may rust from road spray underneath the RV, but moisture can also enter from the living-area structure and remain against the frame or floor. The Heartland 2021 owner’s manual, for example, instructs owners to wash and rinse the undercarriage after exposure to corrosive materials, inspect the frame, refinish damaged frame coatings, and maintain exterior seals. The manual also warns that undercoating can dry and peel and therefore requires inspection and renewal.
8. Remove portions of the underbelly when needed
The underbelly protects plumbing, wiring, insulation, tanks, and frame components. It can also hide damage. If the collision area cannot be evaluated with the underbelly in place, partial or complete removal may be necessary.
Underbelly removal can reveal:
- A bent rail
- A shifted crossmember
- A cracked weld
- Torn insulation
- Damaged wiring
- Crushed plumbing
- Water staining
- Rust on the top or inside of a frame member
- Previous patch plates
- Missing or displaced fasteners
The removed material should be photographed and preserved when it supports the insurance estimate. If the underbelly is damaged by the collision, the repair may require replacement rather than simply reattaching the old material.
Understanding the severity of RV frame corrosion
Rust descriptions should be specific. Broad labels such as “bad rust” do not give an owner, insurer, engineer, or future repairer enough information.
Surface rust
Surface rust is oxidation on the exterior of otherwise solid steel. After loose corrosion and coating are removed, the metal may remain sound without perforation or significant pitting.
A typical repair path may include:
- Cleaning
- Removing loose oxidation
- Treating or preparing the metal according to the product and OEM requirements
- Applying the correct primer or corrosion-resistant coating
- Restoring underbody protection where permitted
- Documenting the completed condition
The product and coating system should be compatible with the frame, nearby components, heat sources, moving parts, and manufacturer requirements.
Pitting and scaling
Pitting means corrosion has removed some metal from the surface. Scaling indicates more advanced layered corrosion. These conditions require closer evaluation, especially on a rail flange, crossmember, suspension mount, hitch structure, or weld.
A technician may need to clean a larger area, measure remaining thickness, compare the affected area with an undamaged section, and consult the OEM procedure. Light pitting on a non-critical bracket is not automatically equivalent to section loss on a primary frame member.
Perforation and structural section loss
A rust hole or perforated frame member is a serious condition. Structural metal that has become soft, cracked, holed, or significantly reduced in section may no longer carry its intended load.
The vehicle may require:
- Removal from service until evaluated
- Section replacement
- Replacement of a bracket or crossmember
- Replacement of the frame assembly
- Engineering review
- A total-loss evaluation if safe restoration is not practical
The correct decision depends on the RV’s design and the manufacturer’s repair information. A patch placed over perforated steel does not automatically restore original strength. Welding onto weak metal can also transfer forces into surrounding areas that are already compromised.
Repair options for a rusted RV frame
Surface-rust removal and refinishing
When the steel remains structurally sound, the repair may involve mechanical rust removal, preparation, corrosion protection, and refinishing. The final coating should restore protection without hiding unresolved cracks, moisture, or section loss.
Coating should never be used to conceal active corrosion. It is also important to avoid spraying undercoating over exhaust components, brakes, moving suspension parts, drains, or areas where the applicable manufacturer prohibits it.
Bracket or crossmember repair
A damaged bracket or crossmember may be repairable or replaceable depending on its design and condition. The repair should restore the component’s position, attachment method, and load path. If the original part was bolted, welded, or mechanically fastened in a specific way, the replacement should follow the applicable instructions.
Section replacement
Section replacement may be considered when damage is limited to a defined portion of the frame and the manufacturer allows that repair. The technician must remove all weakened metal, preserve alignment, use suitable materials, and complete the approved joining procedure.
The replacement section should extend into sound material. A short plate over the visible rust boundary is not sufficient if corrosion continues underneath or beyond the repair area.
Full frame or chassis replacement
Full frame replacement is more extensive and may be necessary when corrosion or collision damage affects multiple structural areas, the central rails, suspension attachment points, or a large portion of the chassis.
For a motorhome, the body, plumbing, electrical systems, drivetrain, and interior components may have to be separated from the chassis. For a towable RV, the living structure may require extensive support while the frame is removed. The cost and timeline can be significant, and parts availability may determine whether repair is feasible.
When corrosion is beyond a safe repair
There is no honest way to promise that every rusted frame can be saved. Corrosion may be beyond a safe repair when:
- Critical load-bearing members are perforated
- Metal thickness is materially reduced
- Cracks extend beyond the repairable area
- Corrosion affects multiple suspension or axle mounts
- The frame has lost its original geometry
- Previous repairs have weakened or altered the structure
- The manufacturer provides no approved repair method
- Sound metal is unavailable for a reliable weld
- The cost of safe restoration approaches or exceeds the RV’s value
That determination should be documented by the inspecting repair facility and discussed with the insurer and, when necessary, the RV or chassis manufacturer.

Safety implications of rust combined with collision damage
A rusted frame is not only a cosmetic concern. Frame rails and crossmembers may support the body, suspension, axles, hitch, tanks, steps, and other equipment. In a motorhome, chassis condition also affects steering, braking, suspension geometry, and the way the body remains supported.
A collision can add loads to already weakened steel. Potential consequences include:
- Frame movement
- Suspension misalignment
- Uneven tire wear
- Poor tracking
- Hitch or coupler misalignment
- Stress on the floor and sidewalls
- Cracked body seams
- Slide-out binding
- Water leaks
- Loss of support at an attachment point
- Unpredictable handling
For commercial motor vehicles, 49 CFR § 393.201 states that the frame or chassis must not be cracked, loose, sagging, or broken. It also requires welded frame repairs to follow the vehicle manufacturer’s recommendations. That regulation applies to commercial motor vehicles within its scope, not automatically to every privately operated RV, but it illustrates the safety principle: structural repairs must restore a sound frame and follow the applicable manufacturer’s instructions.
The Federal Motor Carrier Safety Administration’s inspection, repair, and maintenance guidance also identifies frame and frame assemblies, suspension systems, axles, attaching parts, wheels, rims, and steering systems as safety-related components that require systematic inspection and maintenance for covered commercial vehicles.
Do not tow a trailer or drive a motorhome if the inspection identifies a cracked, perforated, badly distorted, or structurally questionable frame. Arrange appropriate transport and have the coupling, suspension, frame, and related systems evaluated together.
Documenting pre-existing corrosion for an insurance claim
Insurance claims are easier to review when the documentation separates facts from conclusions. A repair estimate should not simply state “rust damage” without identifying what was observed and where.
A strong documentation package may include:
Intake photographs
Take wide and close-up photographs before repairs begin. Include the entire RV, all four corners, the impact area, frame access points, and visible pre-existing damage.
Location-specific photographs
Photograph each corrosion area with enough surrounding context to identify its position. A close-up of orange scale without showing whether it is on the main rail, a bracket, or a trim support is not very useful.
Before-cleaning and after-cleaning photos
When practical, photograph the area before loose coating is removed and again after cleaning exposes the steel. This helps show whether the apparent “rust” was coating failure, surface oxidation, pitting, perforation, or a collision crack.
Measurements
Record frame dimensions, alignment measurements, remaining thickness where applicable, and the location of each measurement. Identify the tool or method used and distinguish measured facts from technician observations.
Teardown records
Document the removal of:
- Underbelly panels
- Insulation
- Wheel-well liners
- Brackets
- Body panels
- Interior access panels
- Damaged frame attachments
- Previous repair plates
Photograph removed components before disposal whenever they support the claim.
Prior-condition evidence
Useful sources may include:
- Earlier repair invoices
- Maintenance records
- RV inspection reports
- Photos from before the collision
- Registration or sales photos
- Storage records
- Prior claim documentation
- Customer statements describing known damage
Previous photographs may not show the underside, but they can still establish the condition of the body, ride height, slide-outs, doors, or hitch alignment before the crash.
Written causation notes
A report should use careful language, such as:
- “Corrosion was observed before cleaning in the left rear frame rail.”
- “Fresh coating loss and impact deformation were observed at the right rear crossmember.”
- “Perforation extends beyond the direct impact area.”
- “The corrosion pattern is present on both sides of the frame and is not limited to the reported impact path.”
- “Additional inspection is required after removal of the underbelly.”
- “Repairability cannot be determined until remaining metal thickness is measured.”
This approach helps the adjuster evaluate covered collision damage separately from maintenance-related corrosion or unrelated pre-existing deterioration.

Questions RV owners should ask the repair facility
Before authorizing structural work, ask:
- Which exact frame member is damaged?
- Is the corrosion surface-level, pitted, scaled, or perforated?
- Was the area cleaned before the condition was classified?
- What evidence indicates the corrosion was pre-existing or collision-exposed?
- Were the welds and nearby brackets inspected?
- Was the underbelly removed or is hidden damage still possible?
- Was remaining material thickness measured where necessary?
- Which RV or chassis manufacturer repair procedure applies?
- Will the repair involve treatment, a bracket replacement, section replacement, or frame replacement?
- How will alignment be verified after structural work?
- How will the repaired area be protected from future moisture?
- What photos and measurements will be provided to the insurer?
Be cautious if a proposed repair consists only of sanding visible rust and spraying undercoating over the area without checking for section loss, weld damage, moisture, or frame distortion.
How RVCCR handles frame rust discovered during collision repair
At RVCCR, our motorhome collision repair and towable-RV services combine structural inspection with paint, body, and mechanical evaluation. We do not treat a frame concern as an isolated cosmetic item.
Depending on the RV and the collision, our inspection may include:
- Frame rails and crossmembers
- Hitch or coupler structures
- Fifth-wheel pin boxes
- Suspension and axle mounts
- Underbelly and insulation
- Plumbing and wiring
- Body-to-frame attachments
- Floor and wall movement
- Slide-out alignment
- Water intrusion
- Welds, brackets, and fasteners
- Paint and undercoating damage
Our RV repair and collision service supports motorhomes, fifth wheels, travel trailers, toy haulers, popups, and other RV types. We coordinate with major insurance carriers and provide written estimates that identify visible damage, teardown findings, structural concerns, parts, labor, and required follow-up inspections.
For towable RV owners, our article on travel trailer collision repair explains why the frame, axle, hitch, sidewall, underbelly, and body must be considered together. Owners with front-end or coupling damage can also review our guidance on RV hitch and coupler repair after a collision.
Costs and timelines vary by the condition of the frame
Surface-rust treatment and refinishing may be relatively limited when the metal remains solid and the collision damage is minor. Structural corrosion, section replacement, underbelly removal, chassis alignment, suspension work, and full frame replacement require substantially more labor and may involve specialized parts.
Timeline variables include:
- RV size and construction
- Accessibility of the frame
- Amount of teardown
- Corrosion severity
- Manufacturer repair information
- Parts availability
- Structural alignment requirements
- Insurance supplements
- Paint and refinishing needs
- Mechanical and electrical testing
A repair facility should explain what is known, what remains to be inspected, and what may change after teardown. RVCCR provides a free estimate request option for owners who want to submit photos and begin the evaluation process.
The goal is a safe return to the road
Rust discovered after an RV collision does not automatically prove that the accident caused the corrosion. It also should not be dismissed as ordinary surface rust without inspection. The correct answer comes from exposing the steel, following the corrosion pattern, checking welds and attachments, measuring the affected material when necessary, assessing moisture, reviewing manufacturer procedures, and documenting the condition before and during teardown.
A careful rv paint and body shop should restore more than the visible finish. It should address the frame’s structural condition, the protection around the repaired area, the body systems affected by frame movement, and the documentation needed to explain the repair.
If your RV has been involved in a collision and rust is now visible, avoid towing or driving it until the frame and related safety systems have been evaluated. Bring the RV to a facility with RV-specific experience, structural inspection capability, collision repair knowledge, and insurance documentation practices.
RVCCR can inspect the damage, explain what appears collision-related versus pre-existing, coordinate the repair process, and help restore your motorhome or towable RV for the miles ahead. Clean the structure. Correct the damage. Protect the frame. Then get back to the trips, campsites, and family adventures that made the RV worth repairing in the first place.
Need a repair estimate?
Skip the wait — send us a few photos and our team will get back to you fast.
Start a Photo Estimate →