Tesla Paint and Refinishing After Collision Repair: What a Factory-Quality Color Match Actually Requires
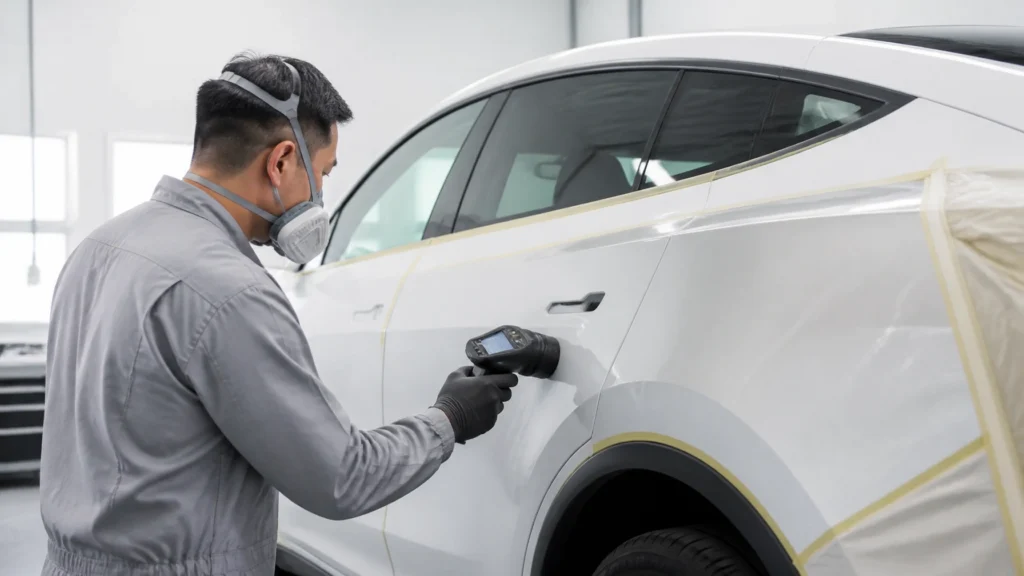
RVCCR is a Tesla Approved Body Shop serving Redlands and the Inland Empire, with manufacturer certifications that include Tesla, Rivian, Ford/Lincoln, Honda/Acura, Mazda, and Subaru. Our family-owned collision facility has served local vehicle owners for 21 years, combining structural repair, paint and refinishing, diagnostics, and mechanical work under one roof.
That background matters after a Tesla collision because a quality paint repair is more than selecting a color from a label and spraying a replacement panel. Tesla finishes such as Pearl White Multi-Coat, Midnight Silver Metallic, Deep Blue Metallic, Red Multi-Coat, Ultra Red, and Quicksilver can respond differently to lighting, spray technique, film build, and viewing angle. The exact finish may also vary by model, production year, market, and vehicle configuration. A repair that appears acceptable inside a shop can show a noticeable mismatch outdoors, beside an adjacent panel, or from a different angle…
The difference comes from the process that happens before the final clear coat is applied. Accurate color identification, camera-based measurement, formula selection, spray-out testing, controlled flake orientation, proper blending, correct booth conditions, curing, and final inspection all work together to restore a Tesla’s appearance as closely as the approved repair system allows.
Why Tesla Paint Matching Is More Complicated Than It Looks
A vehicle’s visible color is the result of multiple layers working together. Depending on the finish and repair system, those layers can include substrate preparation, corrosion protection, primer or sealer, basecoat, pearl or metallic effect layers, and clear coat.
A replacement panel may be new, while the original surrounding panels have spent years exposed to:
- Sunlight
- Washing and polishing
- Road debris
- Environmental contaminants
- Temperature changes
- Minor scratches and surface wear
- Previous refinishing or repair work
Even when the paint code is correct, the original finish may not look exactly like a newly sprayed panel. The repairer must match the vehicle as it exists today, not simply reproduce a color name from a database.
A solid color is generally more straightforward because the appearance is less affected by viewing angle. Metallic and pearl finishes add another variable: the orientation of reflective particles inside the coating. Two panels can use the same formula and still appear different if one was sprayed wetter, drier, closer, farther away, or with different air pressure.
The result is called flop: a change in the apparent value, hue, or chroma of a finish when viewed from different angles. Axalta’s Color Improvement Guide explains why metallic and pearl finishes require particular attention to viewing angle and application technique.
This is why a search for an ev repair shop near me should not stop at whether the facility owns a paint booth. Ask how the shop identifies Tesla color variants, verifies formulas, controls metallic and pearl orientation, and documents the finished repair.
Tesla Paint Names Do Not Tell the Whole Story
Tesla owners commonly recognize finishes such as:
- Pearl White Multi-Coat
- Midnight Silver Metallic
- Deep Blue Metallic
- Red Multi-Coat
- Ultra Red
- Quicksilver
These names describe the vehicle’s finish family, but they do not replace the vehicle’s specific paint identification information or the repairer’s color verification process. Availability and formulation can vary by model and production period. A technician should confirm the correct information using the vehicle identification number, manufacturer repair information, paint-system data, and an inspection of the actual finish.
Pearl White Multi-Coat
Pearl White Multi-Coat is not simply a white basecoat followed by clear. A pearl finish uses a layered appearance in which translucent or reflective materials influence how light moves through and reflects from the coating.
The repairer must control:
- Undercoat or ground-coat color
- Basecoat coverage
- Pearl layer application
- Number of passes
- Flash time between layers
- Spray distance and overlap
- Blend-out into the adjacent panel
- Clear-coat application
A small change in the pearl layer can make the repaired area appear too bright, too gray, too warm, or too dark from certain angles. A proper spray-out panel helps the technician determine whether the selected formula and application technique reproduce the original finish.
Midnight Silver and Deep Blue
Metallic finishes depend on the size, concentration, and orientation of reflective particles. A metallic panel can look correct when viewed straight on but shift when viewed from the front, rear, or side.
Midnight Silver Metallic can reveal differences in brightness and flake distribution very quickly. Deep Blue Metallic can also show changes in flop and saturation, especially when the repaired panel is viewed under sunlight or strong directional lighting.
The repairer must match both color and effect. This requires more than a digital formula. It requires a controlled test application and comparison against the vehicle.
Red Multi-Coat and Ultra Red
Multi-coat reds can be particularly sensitive to the color of the undercoat, the thickness of the translucent color layer, and the number of applications. If the ground coat is incorrect, the topcoat may not achieve the same depth or saturation as the original.
Ultra Red is also a finish that should be assessed at multiple angles and under multiple lighting conditions. The technician is not simply trying to create a red panel. The objective is to reproduce the way the complete finish reflects and absorbs light beside the undamaged panels.
Quicksilver
Quicksilver is a modern metallic finish that may reveal differences in flake orientation, spray pattern, and clear-coat appearance. The formula is only one part of the result. The way the metallic layer is applied can affect whether the repaired panel appears to match the vehicle’s face color and side tone.
For any of these finishes, the correct approach is to confirm the color, produce a test panel, evaluate it against the vehicle, and establish a repeatable spray technique before refinishing the repair.
Step One: Identify the Actual Finish on the Vehicle
A professional color match begins with inspection.
The technician should examine the damaged panel and adjacent panels for:
- Paint-code information
- Existing color variation
- Fading or weathering
- Previous repair work
- Clear-coat damage
- Sand-throughs
- Contamination
- Differences between horizontal and vertical panels
- Changes in appearance from different viewing angles
The inspection should occur in natural light and controlled color-corrected lighting. Natural sunlight is useful because it exposes differences that may be hidden under shop lighting. Color-corrected lamps help the technician evaluate the finish consistently while working indoors.
If the damaged area is too contaminated, heavily scratched, or heavily weathered, the technician may need to clean, polish, or inspect another representative area before taking a reading. A camera cannot correct for poor preparation or an unrepresentative measurement location.
Step Two: Use Camera-Based Color Measurement as a Starting Point
Modern refinish systems may use a spectrophotometer or camera-based color-matching device. These tools measure the vehicle’s finish and compare the reading with a database of formulas and variants.
Axalta describes digital color tools such as Irus Scan as systems designed to measure vehicle color and effect characteristics, including metallic and pearl finishes. The tool helps the technician find a strong starting formula, but it does not eliminate the need for professional judgment.
Camera-based measurement is valuable because it can help identify:
- The closest formula variant
- Differences between color families
- Metallic or pearl effect characteristics
- Possible color drift from the original formula
- A starting point for mixing and testing
However, the camera reading is not the finished repair. The technician still needs to mix the selected formula accurately, prepare the substrate correctly, apply the material according to its technical data sheet, and verify the result on a spray-out panel.
The vehicle’s existing finish remains the final reference.

Step Three: Mix the Formula Precisely
A color formula is a measured recipe. Small errors in mixing can affect the final appearance, especially in transparent, pearl, metallic, or multi-coat finishes.
The mixing process should include:
- Confirming the formula and variant.
- Verifying that paint components are properly agitated.
- Using a calibrated scale.
- Measuring components by weight according to the paint system.
- Selecting the appropriate reducer, activator, or hardener for the shop conditions.
- Thoroughly mixing the material.
- Straining the coating when required by the paint system.
- Recording the formula and any approved adjustment.
Axalta’s technical guidance emphasizes accurate mixing, proper scale use, thorough agitation, and the importance of matching in natural or color-corrected light. If tinting becomes necessary, the technician should make controlled adjustments rather than altering the entire batch without documentation.
A trustworthy repair file should identify the formula used, the paint-system manufacturer, the variant selected, and any documented adjustment made after spray-out evaluation.
Step Four: Produce Spray-Out Panels
A spray-out panel is a test panel used to verify how the mixed material behaves when applied. It allows the technician to assess the color before applying it to the vehicle.
For complex metallic and pearl finishes, a spray-out can reveal differences in:
- Face color
- Side tone
- Brightness
- Darkness
- Flake size and distribution
- Pearl effect
- Coverage
- Mottling
- Transparency
- Flop
- Blendability
The test panel should be prepared and sprayed in a manner that represents the vehicle repair. That includes the same general gun setup, application distance, overlap, pressure, coat sequence, flash time, and orientation that will be used on the vehicle.
Axalta’s Color Spray-Out SOP describes a structured approach using multiple spray-out panels and different application pressures to evaluate effect orientation. Its purpose is not to create an arbitrary test. It is to determine which formula-and-application combination most closely reproduces the existing finish.
The panel should be compared with the vehicle:
- Straight on
- At approximately 45 degrees
- From both sides
- Under color-corrected lighting
- In natural daylight when possible
- After the finish has flashed or cured as directed
- With clear coat applied where the system requires it for evaluation
A panel that matches only from one angle is not a satisfactory result for an effect finish.
Step Five: Control Metallic and Pearl Flake Orientation
Metallic and pearl particles behave differently depending on how the coating is applied. Variables include:
- Gun distance
- Gun speed
- Air pressure
- Fan pattern
- Fluid delivery
- Overlap
- Number of coats
- Wetness of the application
- Flash time
- Panel position
- Temperature and humidity
If the gun is held too close, the coating may be applied too wet or with excessive film build. If it is held too far away, the material may dry before it reaches the panel, changing the appearance and texture. Incorrect pressure or an uneven spray pattern can also alter the way particles settle.
This is one reason a generic body shop’s “same color” approach can produce an unsatisfactory result. The technician may have the correct formula but apply it with a technique that produces a different metallic or pearl orientation.
The Axalta Paint Defects Manual identifies incorrect spray-gun setup, pressure, application technique, insufficient flash time, and poor mixing as potential causes of color mismatch, mottling, and other finish defects.
Step Six: Decide Between Blending and Full-Panel Refinishing
The repair plan should explain whether the basecoat will be blended into an adjacent panel or whether the entire panel will be refinished.
When blending may be appropriate
Blending can help transition a color gradually into an adjacent panel so that a small difference in formula or effect is not concentrated at a hard edge.
For a metallic or pearl finish, a blend may involve:
- Applying the repaired panel’s color to the prepared repair area
- Extending the color gradually into the adjacent panel
- Controlling the fade-out of the basecoat
- Applying clear coat over the full panel or to a defined break point
- Following the paint-system technical data sheet
A blend is not a way to hide poor workmanship. It is a recognized refinishing technique used to manage color and effect transitions.
When a full-panel repaint may be necessary
A full-panel refinish may be more appropriate when:
- The panel has extensive damage
- The existing clear coat is compromised across the panel
- The panel has prior repair work
- The color cannot be transitioned cleanly
- The panel’s shape makes a controlled blend impractical
- The manufacturer or paint system specifies a particular procedure
- The adjacent surface has defects that would prevent a durable repair
The decision should consider both appearance and durability. A repairer should explain which panels will be blended, where clear coat will be applied, and how the repaired area will be inspected.
Why Clear-Coat Quality Matters
Clear coat provides gloss, protection, and the final visual surface of the finish. Its quality affects more than shine.
Proper clear-coat application helps support:
- Consistent gloss
- UV resistance
- Surface protection
- Chemical resistance
- Adhesion
- Durability
- Correct texture
- Long-term appearance
- The ability to polish and finish the surface without exposing lower layers
Clear coat must be mixed correctly and applied at the recommended film thickness, with the correct activator and flash times. Too little material may reduce protection and gloss. Excessive film build or inadequate flash time can contribute to defects such as solvent pop, cracking, adhesion loss, or dieback.
A high-quality finish should be checked for:
- Runs or sags
- Dry spray
- Orange peel
- Mottling
- Dirt inclusion
- Solvent pop
- Fish eyes
- Edge mapping
- Color mismatch
- Uneven gloss
- Improper blend transition
- Poor panel fit surrounding the repair
The clear coat must also be cured according to the approved paint system and vehicle-specific requirements. A finish that looks good immediately after spraying may change as it cures if the materials were mixed, applied, or dried incorrectly.
Booth Conditions and Tesla-Specific Curing Requirements
A professional paint booth provides a controlled environment for application and curing. The facility should manage:
- Temperature
- Humidity
- Airflow
- Filtration
- Booth cleanliness
- Lighting
- Compressed-air quality
- Flash and bake cycles
- Vehicle and battery thermal conditions
Tesla collision procedures must be followed when the vehicle enters a booth or is exposed to forced drying. Tesla model-specific repair documentation should control the process because acceptable temperatures, time limits, and preparation requirements can vary by vehicle and operation.
Tesla’s published collision documentation includes specific limitations for force-drying operations when the high-voltage battery remains installed. The repair facility should confirm the applicable procedure for the exact Tesla model and repair. The shop should not automatically apply a conventional gasoline-vehicle bake cycle to an EV.
A Tesla Approved Body Shop is expected to work from Tesla repair information and approved paint-system guidance. Tesla states that approved body shops are factory trained and equipped to rebuild vehicles to original specifications for structural integrity and quality of finish. Owners can review Tesla’s Collision Support information and verify approved repair resources through Tesla’s official channels.

Tesla-Approved Refinishing Versus a Generic Body Shop Attempt
A general body shop may have experienced painters and still not be a Tesla Approved Body Shop. These are separate questions.
The important distinction is whether the facility has the current manufacturer relationship, training, equipment, technical documentation, and process controls required for Tesla collision work.
A Tesla-approved refinishing process should include:
- Confirmation of the vehicle’s exact finish
- Access to Tesla collision repair information
- Use of a paint system recognized by Tesla’s repair documentation
- Proper color-measurement equipment or an equivalent documented matching method
- Spray-out verification
- Controlled metallic and pearl application
- Manufacturer-approved blending practices
- A suitable booth and curing process
- Tesla-specific thermal precautions
- Documentation of the repair
- Final inspection under multiple lighting conditions
A generic attempt may involve ordering a replacement panel, selecting a paint code, spraying the color, and checking it under one shop light. That approach can work on some conventional solid colors, but it does not provide the same level of process control for a multi-coat Tesla finish.
The difference is not simply a logo or marketing phrase. It is whether the repairer can explain and document how the finish was identified, tested, applied, cured, and inspected.
For additional context, see RVCCR’s article on what to look for in a Tesla certified collision center. Owners can also review our Tesla and EV certified repair services before choosing a facility.
What Owners Should Request in the Repair Documentation
You do not need to become a refinish technician to request useful records. Ask the shop to provide a clear summary of the paint and refinishing process.
1. Vehicle paint identification
Request the paint code or vehicle-specific color identification used to begin the match. The documentation should identify the Tesla model and the applicable repair area.
2. Paint-system manufacturer
Ask which approved refinish system was used. Tesla’s model-specific collision documentation identifies paint-system manufacturers recognized as meeting Tesla warranty repair standards. The applicable Tesla manual and current technical data sheet should control the exact product selection.
3. Mixing formula
Request the formula, variant, and any documented tinting or adjustment. The formula should show the materials used and the mixing method required by the paint system.
4. Spray-out proof
Ask whether spray-out panels were made and retained or photographed. The record should identify the selected panel or application method and show that the match was evaluated before the vehicle was painted.
5. Blend and clear-coat plan
The repair order should identify which panel was repaired, which adjacent panels were blended, and how the clear coat was applied. If the shop chose a full-panel repaint instead, the file should state why.
6. Film-thickness readings
Ask for finish-thickness readings where the shop’s process supports them. These readings are useful for comparing repaired areas with adjacent panels and identifying unusually high or low build.
There is no single universal film-thickness number that applies to every Tesla panel, every original finish, and every refinish system. The meaningful information is the recorded comparison, the products used, and whether the application followed the paint manufacturer’s technical data sheet and the vehicle maker’s repair requirements.
7. Curing information
Ask how the finish was cured and whether the shop followed the applicable Tesla thermal limits and paint-system instructions. The record may include booth cycle information, product data, or technician notes.
8. Final inspection
Request confirmation that the vehicle was inspected in controlled lighting and, when practical, natural daylight. The inspection should cover color, flop, gloss, texture, blend edges, panel alignment, and visible defects.
9. Warranty information
A collision repair warranty and Tesla’s factory warranty are not necessarily the same thing. Ask for the shop’s written warranty and confirm what it covers, including paint adhesion, peeling, fading, defects, and workmanship. RVCCR backs completed repairs with a written lifetime warranty, subject to its terms and conditions.
For broader warranty considerations after a collision, review Tesla warranty and collision repair guidance for Inland Empire owners.
Questions to Ask Before Authorizing Paint Work
A reputable repair facility should be comfortable answering direct questions such as:
- What is the exact paint code or finish variant for my Tesla?
- Will you measure the existing finish before mixing paint?
- Do you use a camera-based color-matching system?
- Will you create a spray-out panel before refinishing the vehicle?
- How will you compare the test panel to my Tesla?
- Does this finish require blending into an adjacent panel?
- Will the clear coat cover the full panel or stop at a defined break point?
- Which paint-system manufacturer will you use?
- How will you control booth temperature, humidity, airflow, and cleanliness?
- What Tesla-specific curing limits apply to my vehicle?
- Will you record the mixing formula and any color adjustment?
- Can I receive finish-thickness readings or final inspection records?
- What written warranty covers the refinishing work?
The quality of the answers matters. A qualified technician should be able to explain the process in plain language without promising that every finish can be matched by formula alone.
How RVCCR Approaches Tesla Paint and Refinishing
RVCCR’s Tesla repair process is designed around the full vehicle, not only the visible dent.
Our Tesla and EV collision work can include:
- Damage inspection and repair planning
- Manufacturer-specific repair procedures
- Aluminum and mixed-material repair
- OEM-aligned parts planning
- Paint and refinishing
- Camera-based color matching where appropriate
- Metallic and pearl spray-out verification
- Panel blending
- Clear-coat application
- Booth-controlled curing
- Diagnostic scans
- ADAS-related verification when required
- Mechanical inspection
- Insurance coordination
- Final quality review
Because collision, paint, and mechanical services are available under one roof, the repair plan can address visible damage and related systems together. That is important when a collision affects body panels, sensors, glass, suspension, wheels, wiring, or other components near the repair area.
Our goal is not to make a Tesla look “good enough” from one angle. It is to restore the vehicle’s appearance and function through a documented, manufacturer-informed repair process.
A Factory-Quality Match Is a Sequence, Not a Single Product
A successful Tesla color match depends on the sequence:
- Inspect the original finish.
- Confirm the vehicle-specific color information.
- Measure the panel when appropriate.
- Select the best formula variant.
- Mix the material precisely.
- Prepare a spray-out panel.
- Evaluate color, flop, and effect.
- Establish the correct application technique.
- Blend or refinish the panel according to the repair plan.
- Apply clear coat at the correct film build.
- Cure the finish under controlled conditions.
- Inspect the repair from multiple angles and lighting conditions.
- Document the work and warranty.
Skipping one of these steps may not produce an obvious problem immediately. But the risk of mismatch, gloss variation, poor adhesion, premature finish failure, or resale concerns increases when the process is treated as a quick cosmetic operation.
A Tesla owner should expect more from a certified auto collision repair facility than a color name and a delivery date. The shop should be able to explain how it will match the finish, protect the vehicle during curing, and verify the result before handing back the keys.
Get Your Tesla Ready for the Road Ahead
A collision can interrupt commuting, family plans, and the road trips that made you choose an EV in the first place. The repair should move you toward getting that routine and freedom back: not leave you wondering whether the color will change, the clear coat will fail, or the repaired panel will stand out every time the sun hits it.
When you need a Tesla repair facility near Redlands or the Inland Empire, choose a team with verified manufacturer credentials, proper refinishing controls, and a written commitment to workmanship. RVCCR offers free estimates, coordinates with major insurance carriers, and handles Tesla collision, paint, diagnostic, and mechanical needs under one roof.
Bring us the damage. We will measure the finish, plan the repair, control the process, verify the result, and help put your Tesla back on the road looking right and ready for the next drive.
Request a free Tesla collision repair estimate from RVCCR and start the path back to your daily commute, weekend plans, and next adventure.
Need a repair estimate?
Skip the wait — send us a few photos and our team will get back to you fast.
Start a Photo Estimate →