Tesla Underbody Aero Shield and Battery Tray Repair: What Hides Beneath a Torn Shield
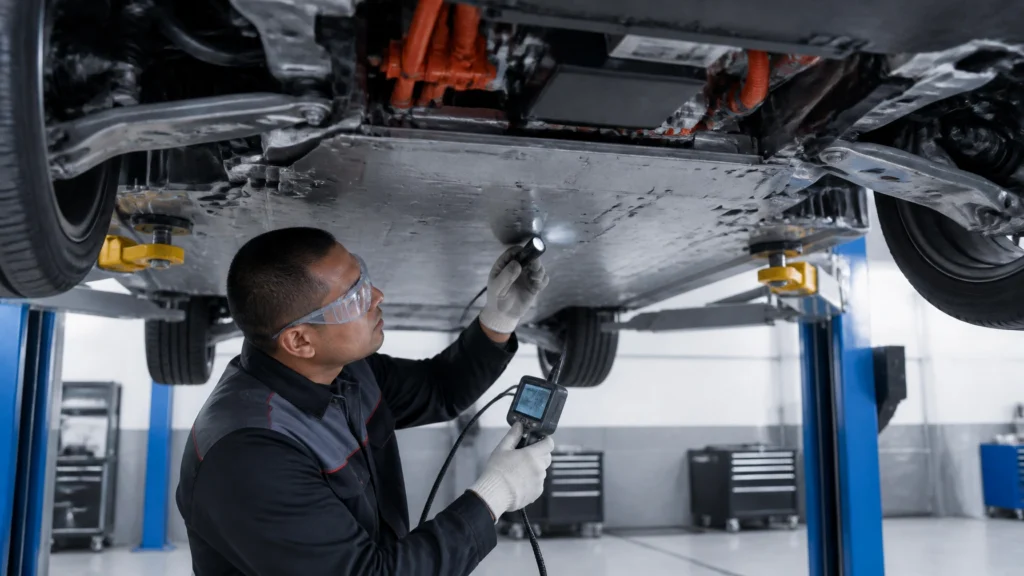
RVCCR is a Tesla Approved Body Shop and certified collision, paint, and mechanical repair facility serving Redlands and the Inland Empire. Our technicians work with Tesla-specific repair information, OEM parts, high-voltage safety procedures, and manufacturer-directed collision methods. That experience matters when damage is underneath the vehicle, where a torn aero shield may be the first visible sign of a much larger inspection question…
A Tesla underbody aero shield is easy to overlook because it sits below the vehicle and is often made from molded composite or formed protective material rather than painted body metal. After a curb strike, road-debris impact, collision, or contact with a damaged roadway, the shield may tear, sag, scrape, lose fasteners, or separate from the vehicle. The visible damage can look cosmetic. It may not be.
The shield helps manage airflow beneath the vehicle and protects areas around the battery assembly from road debris, water spray, and other underbody exposure. Depending on the Tesla model, battery configuration, and damage location, the panels beneath the vehicle may also provide access protection for battery skid plates, enclosure surfaces, high-voltage cables, coolant hoses, passthroughs, brackets, and related fasteners.
A torn shield does not automatically mean the high-voltage battery is damaged. It does mean the vehicle should be raised and inspected correctly before anyone assumes the repair is limited to replacing plastic or composite trim.
Why a Tesla Aero Shield Is More Than an Appearance Panel
The underbody of a Tesla is designed as a system. The aero shield contributes to the smooth surface beneath the car, while separate skid plates, skis, brackets, and battery enclosure components provide different forms of protection and support.
The shield may help:
- Smooth airflow under the vehicle
- Reduce exposure of protected components to road debris
- Limit direct water and dirt spray around underbody components
- Cover openings and transitions between underbody panels
- Protect or conceal fasteners, brackets, and access areas
- Maintain the intended underside surface after repair
The shield itself is not the same thing as the high-voltage battery enclosure. That distinction is important. Replacing a damaged aero shield does not repair damage to the battery enclosure, baseplate, cable, coolant system, or structural underbody. Conversely, a damaged shield does not prove that the battery pack has been compromised.
The repair question is therefore not simply, “Can the panel be replaced?” It is, “What did the impact reach, and what does Tesla’s applicable procedure require next?”
A missing or poorly secured shield can also affect the vehicle’s aerodynamic behavior. The exact effect depends on the model, panel location, severity of the separation, and driving conditions. A damaged panel may create additional turbulence or drag, which can affect efficiency and potentially reduce the vehicle’s expected range. That does not create a universal range-loss number, and no responsible shop should promise one without examining the vehicle.
The more immediate concern is physical protection. A shield that is torn or hanging can catch debris, contact the road, expose adjacent components, or allow continued water and contamination exposure in an area that was designed to be covered.
What May Be Beneath the Torn Panel
Tesla technical documentation identifies several underbody areas that may need inspection after damage. The exact arrangement depends on the model, year, battery design, and vehicle configuration, but the inspection may involve more than the outer shield.
Potentially affected areas include:
Battery skid plates and skis
Tesla battery assemblies may include front and rear skid plates, side ski zones, longitudinal skis, and a center ski. These pieces can take direct contact from road debris or an underbody impact.
A skid plate may be torn, dented, breached, detached, or displaced. Even if the battery enclosure itself appears intact, a damaged protective part may no longer cover the intended area.
Battery enclosure and baseplate
The battery enclosure contains the high-voltage battery system and may include a lower baseplate or other protective surfaces. A dent, gouge, crack, hole, or tear can have a different meaning depending on its location and depth.
The enclosure is not a component a general collision shop should patch, reshape, or weld based on preference. Tesla’s technical documentation establishes specific inspection and escalation paths for high-voltage battery damage.
High-voltage cables and connectors
High-voltage cables may run near protective plates and underbody components. A torn shield or damaged skid plate can expose them to contact, abrasion, or impact. The cables and connection points require manufacturer-directed handling and appropriate high-voltage safety procedures.
Coolant hoses and passthroughs
Tesla battery systems use thermal-management components that may include coolant hoses and passthroughs. A collision or underbody strike can damage a hose, connection, or passthrough even when the outer panel appears to be the primary problem.
A shop should not pressurize a cooling system when Tesla’s applicable procedure warns against doing so for a battery with a suspected coolant leak. The inspection path has to match the vehicle and the condition found.
Fasteners, clips, brackets, and mounting points
A shield can appear to fit while important clips, bolts, nuts, or brackets are bent, stripped, sheared, missing, or unable to hold the panel securely. Tesla documentation describes inspection and replacement considerations for damaged fasteners and mounting points.
A replacement shield installed with damaged attachment hardware is not a finished repair.
Why the Vehicle Must Be Raised Before the Damage Can Be Judged
A standing walk-around inspection is useful for documenting visible damage, but it cannot confirm the condition of the underbody. The inspection should begin with safe lifting and support using equipment and procedures appropriate for the Tesla model.
Once raised, the technician can examine:
- The full length and width of the shield
- Leading and trailing edges
- Panel overlap and coverage
- Fasteners, clips, and mounting holes
- Scrape marks, impact transfer, and deformation
- Exposed skid plates or battery surfaces
- HV cable routing and visible connectors
- Coolant hoses and related components
- Signs of leakage, corrosion, residue, or moisture
- Any contact between the shield, tires, suspension, or road surface
The panel should generally be removed when the visible damage or impact history indicates that hidden components may have been affected. Looking only at the shield while it remains installed can hide damage above, behind, or beneath it.
Tesla’s service documentation provides model- and configuration-specific aero shield removal and installation procedures. A structural-pack Model Y does not necessarily use the same procedure as a non-structural-pack vehicle. The number and type of fasteners, installation sequence, threadlocker requirements, and torque specifications must come from the applicable Tesla service information.
The Difference Between Non-Structural and Structural Model Y Battery Procedures
One of the most important technical distinctions is battery-pack type.
Tesla Technical Note TN-18-16-001 R6 is titled “Inspect the Model 3 and Model Y (Non-Structural) HV Battery for Underside Damage.” The note specifically states that it applies to Model 3 vehicles and Model Y vehicles without the structural high-voltage battery. It directs technicians to a different technical note for Model Y vehicles equipped with the structural battery.
For structural-pack Model Y vehicles, the applicable inspection path is TN-22-16-001, together with the relevant Model Y Structural Pack body-repair procedures and Tesla Service Manual procedures.
That means a shop should not take a measurement or repair threshold from TN-18-16-001 and apply it automatically to every Model Y. The vehicle’s build configuration must be identified first.
This is one reason a Tesla-certified collision repair process is different from a generic body repair estimate. The repair decision depends on the Tesla model, the battery configuration, the impact zone, the component affected, and the procedure that governs that component.
What Tesla TN-18-16-001 Says About Non-Structural Pack Damage
For non-structural Model 3 and Model Y battery assemblies, TN-18-16-001 provides a zone-based inspection process. It identifies components such as the front skid plate, side ski zones, longitudinal skis, center ski, baseplate, rear skid plate bracket, and rear skid plate.
The note directs technicians to document noticeable underside damage, identify the affected zone, photograph the damage, and follow the applicable repair recommendations. Where appropriate, the technician may need to remove aero shields or skid plates to inspect what lies above or below them.
Several examples illustrate why a visual shield replacement is not enough:
- A front skid plate may need replacement if it does not cover the front baseplate or if its leading edge is dented, torn, or breached.
- A damaged fastener may need replacement if it is bent, sheared, stripped, or unable to withstand the required torque.
- HV cables should be replaced if they are damaged.
- A damaged passthrough can lead to a recommendation for high-voltage battery replacement.
- A battery enclosure that fails a leak test because of impact may require replacement.
- Low isolation caused by impact may require battery replacement.
- A baseplate dent or deepest gouge measuring 8 millimeters or more is identified in the technical note as a condition requiring a battery replacement recommendation.
That 8-millimeter criterion is not a universal “battery tray rule” for every Tesla. It belongs to the baseplate guidance in the specified non-structural battery inspection procedure. It should not be copied into a structural-pack repair estimate or treated as a substitute for Tesla’s current instructions.
The same note also warns that if the HV battery enclosure has a visible open hole, crack, or tear, the battery should be recommended for replacement to meet Tesla’s standards of quality and safety. The body shop should not attempt to repair the damaged HV battery itself; the technical note directs damaged-battery repair to Tesla Service Center procedures.
Structural-Pack Model Y Inspection Requires a Different Path
For a structural-pack Model Y, the inspection is governed by the applicable Tesla structural-battery technical note and body-repair documentation.
The front-zone inspection may require removal of the front aero shield using the structural-pack Service Manual procedure. The technician then inspects the front skid plate and the area above it, including relevant high-voltage cables, coolant hoses, baseplate surfaces, passthroughs, and enclosure areas.
The rear or mid-area inspection may require removal of the mid or rear aero shield. The technician may inspect rear battery components, harnesses, passthroughs, brackets, fasteners, and related enclosure areas.
The repair decision is location-specific. A damaged aero shield or bracket may be replaceable, while damage to a structural battery enclosure, passthrough, thermal vent, or other protected component may require escalation, component replacement, or a Tesla-directed battery decision.
Structural battery-pack damage can also overlap with body-repair procedures for cast front, center, or rear underbody components. If the collision reaches structural castings or the underbody that supports the battery system, the repair plan must follow the relevant Tesla Model Y Structural Pack Body Repair Procedure. A shop should not use conventional heat-straightening, arbitrary pulling, or an improvised weld simply because the damaged area is made of aluminum.
For more context, see RVCCR’s explanation of Tesla Giga-Casting collision repair.
Repair or Replace the Aero Shield?
An aero shield is generally a replacement item when it is torn, breached, detached, distorted beyond proper fit, or unable to cover the intended area.
A repair may be considered only when the applicable Tesla procedure permits it and the repaired panel can be secured, positioned, and protected correctly. A shop should not use a universal plastic repair method, oversized washer, random fastener, or adhesive patch as a substitute for the Tesla installation procedure.
The shield may require replacement when:
- Its leading edge is torn or breached
- It no longer covers the intended battery or baseplate area
- Mounting holes are pulled out or distorted
- A section is missing
- It is detached from the vehicle
- It contacts the road, tire, suspension, or another moving component
- It cannot be secured with the specified hardware
- It has damage that could allow additional debris or water exposure
- It was deformed by an impact that may also have affected components behind it
The replacement decision should also account for what caused the damage. A shield torn by a road object may be a relatively contained repair. A shield torn after a collision, curb impact, jack-point strike, or underbody contact may be evidence that the battery protection system absorbed a load.
When Battery Tray or Enclosure Components Cannot Simply Be Straightened
Vehicle owners often use the phrase “battery tray” to describe the metal structure beneath the battery. Tesla documentation may use more specific names, including enclosure, baseplate, skid plate, ski, bracket, passthrough, or structural underbody component.
Those distinctions matter because each component can have a different repair path.
A removable skid plate may be replaced. A damaged fastener may be replaced or, where Tesla permits, the damaged hole may be serviced. A bracket may be replaceable if it is bent or detached within the limits of the applicable procedure.
The battery enclosure is different. A visible breach, crack, tear, failed leak test, or impact-related low-isolation condition can lead to a battery replacement recommendation under Tesla’s applicable guidance. A shop should not promise that an enclosure can be straightened, welded, sealed, or patched without a procedure that specifically authorizes that work.
Structural underbody castings require another separate decision. If an impact reaches a cast front, center, or rear underbody section, the applicable Structural Pack body-repair procedure controls whether a repair, section replacement, or larger replacement is permitted. The repair cannot be based solely on the technician’s ability to make the metal look straight.
Why a Generic Shop May Miss Underbody Battery Damage
Underbody damage is easy to miss for practical reasons:
- The vehicle may not be raised during the initial estimate.
- The shield may remain installed.
- The damaged area may be covered by dirt or road residue.
- A torn panel may hide a bent bracket or damaged fastener.
- The battery enclosure may not show damage until the protective part is removed.
- A generic scan may not provide the Tesla-specific information needed.
- The estimator may not know which technical note applies.
- The shop may not distinguish a structural battery pack from a non-structural pack.
- A panel that looks like trim may actually protect a critical inspection area.
- The repair plan may stop after visible parts are replaced.
This is not necessarily a matter of bad intent. It is often a matter of procedure, training, equipment, and access to manufacturer repair information. A shop that performs conventional bumper and fender repairs may not have the process required to evaluate a Tesla battery underside after an impact.
When searching for an ev repair shop near me, ask whether the facility can identify the vehicle’s battery configuration, perform a documented underbody inspection, access Tesla technical information, and coordinate the correct escalation path when battery damage is found.
What Owners Should Ask to See After Underbody Repair
A clear repair file helps you understand what happened beneath the vehicle and supports future service, insurance, resale, or warranty conversations.
Ask the repair facility for documentation appropriate to the work performed, including:
Vehicle and procedure identification
The file should identify the vehicle by VIN, model, year, and relevant configuration. For a Model Y, ask whether the inspection was handled as a structural or non-structural battery-pack vehicle.
The repair file should also identify the Tesla procedure or technical note used for the inspection and repair decision.
Before-and-after photographs
Request photographs showing:
- The damaged shield before removal
- The underside after the shield was removed
- Damaged or replaced fasteners and brackets
- The battery protection area
- Any visible cables or coolant components inspected
- The replacement shield installed
- Final fastener and panel coverage
Photos should be clear enough to show the area, not merely close-ups of an unidentifiable part.
Damage measurements and zone information
Where Tesla’s procedure calls for measurements, photographs, grid-zone identification, damage depth, or other documentation, ask whether those records were completed and retained.
If a threshold is discussed, ask which Tesla document contains it and whether it applies to your exact vehicle configuration.
High-voltage and battery findings
Ask what was inspected and what was not. Depending on the damage, the documentation may include scan results, isolation information, leak-test results, battery-related fault information, or Tesla escalation records.
Do not assume that every test applies to every vehicle or every shield replacement. The important point is that the shop should be able to explain which checks were necessary and why.
Parts and hardware
Ask whether the replacement aero shield, skid plate, bracket, clips, bolts, nuts, and related hardware were new OEM parts or otherwise approved under the repair plan.
A shield that is correctly shaped but installed with damaged or incorrect hardware is not a complete restoration.
Final inspection
The final file should show that the shield is secured, properly aligned, clear of moving components, and covering the intended area. If the collision affected other systems, ask about the applicable post-repair scans, calibrations, road testing, and warning-message verification.
For broader battery-related questions, review RVCCR’s article on EV battery safety inspection after a collision.
How Insurance Estimates Change After Teardown
An initial insurance estimate may include visible bumper, fascia, paint, or underbody-panel damage. The scope can change after the Tesla is raised, scanned, disassembled, and inspected.
A supplement may become necessary when teardown reveals:
- A damaged battery skid plate
- Broken shield fasteners
- A bent battery bracket
- Damaged high-voltage cables
- Coolant-line or passthrough damage
- Battery enclosure deformation
- A failed leak or isolation check
- Structural underbody damage
- Required Tesla-specific diagnostics
- Additional OEM parts or procedures
A supplement is not automatically evidence that a shop is adding unnecessary work. It may reflect information that could not be confirmed before disassembly. The responsible approach is to document the condition, identify the applicable Tesla procedure, and explain why the additional operation is required.
If you are dealing with a collision claim, RVCCR can coordinate with major insurance carriers and provide a written estimate. You can also start with the RVCCR photo estimate form.
Choosing a Tesla Certified Collision Center
A Tesla repair facility should be able to explain more than its paint color and turnaround estimate. Ask about:
- Tesla Approved Body Shop status
- High-voltage safety training
- Access to Tesla repair procedures
- OEM parts sourcing
- Underbody battery inspection capability
- Structural-pack and non-structural-pack distinctions
- Aluminum and mixed-material repair equipment
- Tesla-specific scanning and calibration
- Photo documentation and supplement support
- Written warranty coverage
At RVCCR, Tesla and EV work is part of our certified collision, paint, and mechanical repair operation. We serve Redlands and the Inland Empire, use OEM-directed processes, coordinate insurance claims, and back completed repairs with a written lifetime warranty.
Our Tesla and EV repair page explains the services and manufacturer certifications available at our facility.
The Goal Is More Than Replacing a Torn Panel
A torn aero shield may be the only part a driver can see. Beneath it may be an intact battery protection system, or there may be damage to a skid plate, bracket, baseplate, cable, coolant component, enclosure, or structural underbody section.
The correct response is not panic, and it is not guesswork. Raise the Tesla. Identify the battery configuration. Remove the applicable shield or protective panel. Inspect the components beneath it. Follow the correct Tesla technical note and Service Manual procedure. Replace what the procedure identifies as replaceable, and escalate battery or structural damage through the correct manufacturer pathway.
That process protects more than the vehicle’s appearance. It helps preserve battery safety, underbody protection, aerodynamic performance, repair documentation, and long-term confidence behind the wheel.
When you need a certified auto collision repair facility for a Tesla underbody impact, bring the vehicle to a team that knows what to inspect beneath the shield. RVCCR will document the damage, explain the repair path, work with your insurance carrier, and restore your Tesla for the miles and plans ahead.
Get the underside inspected correctly, replace what is compromised, verify what was repaired, and get back to the drive that matters.
Primary Tesla References
Need a repair estimate?
Skip the wait — send us a few photos and our team will get back to you fast.
Start a Photo Estimate →