Toy Hauler and Fifth Wheel Collision Repair: Frame, Pin Box, and Living-Quarter Damage
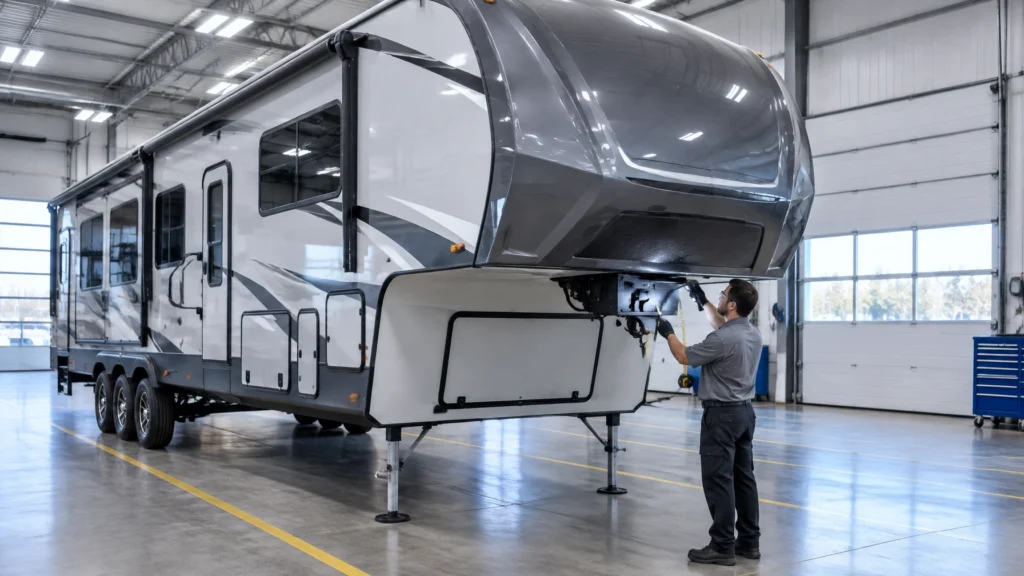
RVCCR is a family-owned collision and repair center serving Redlands and the Inland Empire, with RVDA-certified RV service and collision capabilities, Fix Auto Network affiliation, certified technicians, OEM-focused repair practices, and a written lifetime warranty. Those credentials matter when a fifth wheel or toy hauler has damage that extends beyond fiberglass and paint.
A fifth-wheel collision can affect the pin box, kingpin plate, hitch-mounting structure, frame rails, crossmembers, garage floor, ramp door, sidewall, and living-quarter transition at the same time. A toy hauler adds another layer because its rear structure must support a ramp door, garage loads, tie-down locations, and the transition into the main living area. The visible damage may be limited to one corner while the underlying load paths have shifted…
Why fifth-wheel and toy hauler damage is different
A standard automotive collision usually involves a vehicle designed around a unified body and chassis system. A fifth wheel or toy hauler combines a trailer frame, suspension, hitching system, exterior shell, interior cabinetry, electrical wiring, plumbing, appliances, and sometimes a garage structure designed for concentrated cargo loads.
That combination makes a post-collision inspection more involved than a conventional body estimate.
The impact may come from:
- A jackknife while backing or turning
- A truck and trailer collision
- Contact with a pole, wall, tree, or another vehicle
- A damaged road shoulder or obstacle
- A ramp-door impact
- A sway event followed by contact with another object
- A failed or distorted hitching component
Even if the trailer still appears towable, the coupling and frame should be treated cautiously until inspected. California DMV pre-trip guidance identifies bent kingpins, cracked or broken fifth-wheel platforms, loose mounting bolts, damaged locking components, and gaps between the trailer and skid plate as safety concerns. Owners can review the California DMV fifth-wheel pre-trip inspection guidance for the basic equipment checks that apply before travel.
Frame rails and crossmembers: the damage you may not see
The frame supports the trailer’s weight and transfers loads between the pin box, suspension, body, garage, and rear structure. A collision can bend or twist the main rails without producing an obvious crack in the exterior wall.
On a fifth wheel, that hidden structural relationship matters more than many owners expect. The front upper deck carries concentrated coupling loads through the pin box structure, then hands those forces into the main frame rails, crossmembers, gussets, and outriggers that support the body. If a side hit, jackknife, underride event, curb strike, or rear impact shifts one part of that system, the trailer may still look usable from twenty feet away while the geometry underneath has changed enough to affect towing behavior, room openings, floor transitions, and long-term durability.
A professional RV collision inspection should look for:
- Bent, buckled, or twisted frame rails
- Shifted or separated crossmembers
- Cracked welds
- Torn or elongated mounting holes
- Damaged suspension brackets
- Distorted outriggers
- Changes in axle alignment
- Stress marks in flooring or interior walls
- New gaps around doors, slides, cabinets, or trim

The frame should be measured rather than judged by appearance alone. A trailer can look straight from the side while having a twist, sag, or diagonal shift that affects tracking, suspension loading, and hitch alignment.
A proper frame measurement or geometry check is more than a quick visual walkaround. The inspection may include reference-point checks from side to side, diagonal measurements between known structural points, confirmation of suspension pick-up locations, review of pin-box mounting relationship to the main rails, and inspection of axle position relative to the chassis centerline. Technicians also look for witness marks that show movement, such as rubbed underbelly material, displaced fastener heads, fresh rust lines at weld toes, cracked seam sealers, torn attachment flanges, or floor coverings that now telegraph a ridge over a shifted member.
This is why a trailer can “look straight” and still be out of square. Exterior sidewalls and trim can visually mask a diagonal shift. Front and rear caps can remain intact enough to hide distortion underneath. Interior furniture may keep a wall from visibly leaning even when the supporting structure has moved. By the time an owner notices unusual tire wear, a slide-out rubbing one side of the opening, a baggage door needing to be lifted to latch, or a bathroom door swinging open by itself, the underlying frame geometry issue may already be affecting multiple systems.
Outriggers and crossmember movement often telegraph into the coach in subtle but predictable ways. A shifted outrigger can change sidewall support at the perimeter floor edge. A moved crossmember can alter the squareness of a room opening or the continuity of the subfloor under cabinets and partitions. On a toy hauler, that can show up as a slide room with uneven reveal lines, a main entry door that no longer closes without extra pressure, interior trim that splits at the garage transition, or a floor that feels solid in the center but soft or stressed near the wall line.
That is why structural diagnosis should extend beyond the visible hit area. A rear corner impact can affect the mid-body. A hit near the front upper deck can change load distribution all the way back to the suspension. A sidewall strike can damage frame outriggers without leaving an obvious rail buckle. Cosmetic repair without geometry confirmation can leave the coach difficult to tow, difficult to seal against water, and difficult to keep in adjustment.
Our related article on RV frame crack and weld inspection after a collision explains why frame and weld inspection should be coordinated with examination of the hitch, suspension, brakes, tires, and underbody.
Pin box, kingpin plate, and fifth-wheel hitch mounting
The pin box transfers trailer weight and towing forces to the truck’s fifth-wheel hitch through the kingpin and kingpin plate. After a collision, the inspection must include the pin box itself and the structure to which it is attached.
On a fifth wheel, the kingpin plate and pin box are not isolated parts. They are the front-end load path. Vertical pin weight, braking force, acceleration force, fore-aft chucking, and torsional inputs from turning are transmitted through the kingpin plate and pin box housing into the mounting wings, brackets, gussets, and upper-deck frame structure. If the geometry in that path changes, the trailer may still couple to the truck, but the load can be transferred unevenly into the frame.
Important inspection points include:
- Kingpin alignment and visible wear
- Kingpin plate condition
- Pin box housing
- Pin box mounting wings
- Frame brackets and welds
- Bolt holes for elongation or distortion
- Missing, loose, or damaged hardware
- Cracks around the upper deck
- Gaps between the pin box and frame mounting surfaces
The kingpin plate geometry matters because the hitch head is designed to mate to a defined surface relationship. If the skid plate surface is distorted, if the kingpin is no longer square to the plate, or if the pin box has been pushed rearward, downward, or to one side, the hitch may still close its jaws while the contact pattern is no longer correct. That can increase localized stress, produce abnormal wear, create poor coupling feel, or change how braking and turning forces enter the trailer frame.
A pin box that still connects to the truck is not automatically safe. A bent component may latch while transferring loads incorrectly. Damage may also be hidden behind the front cap or interior wall.
Inspection in this area often requires more than looking at the exposed pin box. Depending on construction, technicians may need to evaluate the upper deck from beneath and from inside the front compartment or adjacent interior spaces. Signs of trouble can include wrinkled sheet material, cracked sealant lines, popped fasteners, distorted compartment openings, stress marks at the front cap attachment points, or movement around the interior transition where the raised front deck meets the living space. On some units, cabinetry and finish panels can hide the very structure that needs to be checked.
Lippert’s fifth-wheel pin box replacement information emphasizes supporting the trailer, inspecting the frame and kingpin area, using the correct hardware, and following the applicable torque specifications. Those procedures are especially important after collision damage. A replacement pin box should not be installed over a distorted or cracked mounting structure.
That point is worth slowing down for. Replacing a visibly damaged pin box without confirming the mounting structure, bolt-hole condition, weld integrity, and surrounding frame geometry can leave the new part installed on a compromised foundation. Correct hardware, torque procedure, and structural condition are part of the same repair decision, not separate issues.
The truck-side fifth-wheel hitch also requires inspection. The hitch head, mounting rails, brackets, fasteners, skid plate, locking jaws, and truck frame attachments should be evaluated together with the trailer. If the event involved a hard stop, jackknife, or visible trailer-to-truck contact, the tow vehicle mounting system may have absorbed force even when the trailer damage looks more dramatic. For more background, review our article about RV hitch and coupler repair after a collision.
Toy hauler ramp door and rear-frame damage
A toy hauler’s ramp door is both an exterior closure and a loading surface. Its hinges, cables, springs, latches, seals, rear wall, and surrounding frame can all be affected by an impact.
That dual purpose is what makes rear-end and rear-corner damage on a toy hauler different from damage on many conventional travel trailers. The rear structure is expected to carry the weight and motion of the ramp system, support loading activity, and protect the opening against water intrusion while the trailer is traveling. In many units, the garage floor and tie-down zones also see concentrated point loads from motorcycles, UTVs, golf carts, tool storage, or cargo rolling in and out over the threshold.
Common signs of ramp-door or rear-frame damage include:
- A door that binds or will not close evenly
- Uneven gaps around the perimeter
- Cracked hinge mounts
- Bent hinge sections
- Frayed or displaced cables
- Loose latches
- Water-damaged or separated flooring
- A rear wall that appears bowed
- Cracks near the garage corners
- A ramp that no longer rests evenly on the ground
The garage-to-living-quarter transition is another critical area. Structural movement can show up as a separation at the wall, floor, cabinets, trim, or interior partition. Wiring and plumbing may also pass through this zone, so a body-only repair may leave secondary damage unresolved.
Garage floor condition deserves its own check after a collision, especially on toy haulers used for heavier cargo. Technicians should inspect for crushed, fractured, softened, or moisture-damaged floor sections; displaced threshold components; fastener pull-through; and movement around tie-down anchor points. Tie-down hardware may look intact from above while the backing structure beneath has shifted or weakened. If an anchor area has been overloaded during a collision event or secondary cargo shift, the concern is not just appearance. It is whether that part of the floor can still retain cargo loads as designed.
Ramp-door operating systems also need to be treated as assemblies, not just panels. Depending on the manufacturer and model, the ramp may use spring-assist components, cables, hinge systems, latch hardware, and seals that work together to control movement and support operation. If the opening goes out of square or the ramp structure changes shape, the cables may no longer share load evenly, the latches may no longer seat correctly, and the hinge line may carry stress it was not intended to carry. After structural repair or component replacement, these systems need to be returned to the manufacturer’s procedure rather than “adjusted until it feels okay.”
That is especially important with spring, cable, and latch systems. Re-tensioning or adjustment must follow the applicable manufacturer procedure because the stored energy in these components and the geometry of the door opening affect how the ramp opens, closes, seals, and rests under load. An improperly tensioned or misadjusted system can create hard operation, poor sealing, latch wear, or an unsafe loading surface.
Before using or loading the ramp, the trailer should be stabilized according to the manufacturer’s instructions. The exact ramp capacity, cable procedure, cargo limits, and loading arrangement depend on the model. Keystone owners can consult the official Keystone owner’s manual portal, while Forest River owners should use the manual for the specific brand and model.

Because toy haulers are designed around cargo use, rear-impact diagnosis should also include the threshold, flooring at the entry edge, surrounding wall framing, weather sealing, and the path that cargo takes into the coach. If the rear opening is no longer square, owners may first notice it as a ramp that is heavy to operate, daylight at one seal edge, scuffing at the threshold, or tie-down locations that no longer align with floor markings. Those are practical warning signs that the rear structure needs more than cosmetic attention.
Sidewall damage and fiberglass delamination
Fifth wheels and toy haulers often use fiberglass exterior panels or laminated wall assemblies. Unlike a steel fender, fiberglass may crack, separate, or delaminate after impact instead of forming a simple dent.
Collision damage in a laminated RV wall can be deceptive because the visible crack, scrape, or ripple may be smaller than the affected bond area underneath. The outer skin, adhesive layers, substrate, insulation, framing, openings, and trim all influence whether the wall can be repaired locally or whether a larger section must be opened and rebuilt.
A collision-related sidewall inspection should consider:
- Cracks radiating from windows or door corners
- Bulging or soft sections
- Separation around trim and moldings
- Distorted slide-out openings
- Water entry at newly opened seams
- Front-cap cracks
- Rear-wall movement near the ramp
- Changes in compartment-door alignment
- Moisture behind affected panels
Delamination does not always appear immediately. If the wall substrate has separated, refinishing the outer surface without addressing the underlying condition can leave the panel vulnerable to continued movement and water intrusion.
Diagnosis should focus on the condition beneath the finish, not just the finish itself. Depending on access and construction, that may include moisture-meter readings around the impact area and nearby seams, substrate probing where softness is suspected, straightedge checks across the panel, and inspection behind removed trim or components. The reason for that extra work is straightforward: a sidewall that has lost bond between layers may still accept filler, primer, and paint, but those cosmetic materials do not restore a separated substrate. If the underlying layers continue to move, the repaired surface can print through, crack again, or fail to seal properly.
This is one reason refinishing over a separated substrate fails. Paint systems need a stable base. If the laminated wall has lost adhesion, if luan or other backing material has fractured or softened, or if moisture has entered the assembly, the surface may move under temperature change, road flex, or normal trailer loading. The result can be recurring cracks, waviness, bubbling, or loss of edge seal even when the color match initially looks good.
The repair approach also differs between wall types. Aluminum-sided construction and fiberglass laminated sidewalls do not respond to the same repair process. Aluminum-sided assemblies may involve panel replacement, trim removal, and attention to how overlapping sections and fastener lines are restored. Fiberglass laminated walls may require evaluation of bond condition, substrate replacement, localized rebuild, or broader section repair depending on the size and location of the failure. Slide openings, baggage doors, windows, and front or rear transitions make the plan more involved because those cutouts interrupt the panel and create concentrated stress points.
The repair plan may involve removing trim, opening the affected section, drying and evaluating the substrate, replacing damaged materials, restoring fiberglass layers, sealing the exterior, and blending paint across the repaired area. The correct method depends on the construction of the specific RV and the extent of the damage.

Sidewall movement can also telegraph into nearby systems. A shifted wall opening may affect a slide room seal path, window fit, baggage-door compression, or interior cabinet alignment. That is why wall repair decisions should be tied back to frame condition, outrigger position, and opening geometry instead of being treated as isolated panel work.
How insurance typically handles a fifth-wheel claim
Insurance treatment depends on the policy, the loss circumstances, deductibles, prior damage, coverage limits, and the adjuster’s evaluation. A shop cannot promise coverage before the carrier reviews the claim.
To help document the loss:
- Photograph the entire trailer before moving or disassembling it.
- Take close-ups of the impact area, pin box, kingpin plate, hitch structure, frame, suspension, ramp door, and sidewalls.
- Photograph interior gaps, cracked cabinets, damaged flooring, and misaligned doors.
- Record the date, location, weather, and description of the incident.
- Save towing invoices, police or incident reports, and any communication with the insurer.
- Avoid making structural repairs before the damage is documented unless immediate action is necessary for safety.
The initial estimate may not include hidden frame, underbelly, plumbing, wiring, or delamination damage. Once components are removed and previously concealed damage is confirmed, the shop may prepare a supplement for insurer review. This is one reason a qualified RV collision center should inspect the unit before repairs are finalized.
In practice, supplements often turn on documentation quality. Adjusters commonly need clear photos of exposed damage after teardown, identification of the affected component or assembly, explanation of why the condition was not visible at the initial inspection, and documentation connecting the hidden damage to the collision event. On RVs, that can include pictures of distorted mounting points, cracked weld areas, damaged underbelly sections, displaced wiring or plumbing, moisture or substrate failure revealed after trim removal, and measurements showing geometry concerns.
That workflow is one reason RV collision repairs sometimes evolve after disassembly. The first estimate addresses what can be seen. The supplement addresses what is verified once access improves. For owners, the important point is not that something unusual is happening. It is that complex RV repairs often require staged documentation because the structure, wall assemblies, underbody, and appliance-adjacent systems are concealed by design.
A strong supplement package may also include parts identification, manufacturer-related repair information where applicable, notes about non-reusable components, and photographs that show why an adjustment-only approach is insufficient. For example, an adjuster may need to see not just that a ramp door is misaligned, but that the surrounding opening has moved, the hinge line has deformed, or the latch side no longer lands evenly because of structural shift. The same principle applies to pin-box or frame claims. Photos of the exposed condition, measurement findings, and damaged attachment areas help support why cosmetic repair alone is not enough.
RVCCR works with major insurance carriers and can help coordinate the estimate and repair process. Owners can begin with a free RV collision repair estimate in Redlands. For broader context on regional heavy-RV damage assessment and repair planning, see our article on RV collision repair in the Inland Empire. If you want a clearer picture of how line items and hidden-damage approvals are built, our collision repair estimate line-item decoder is also a useful companion piece.
Towing after the collision and after repairs
Do not tow a fifth wheel or toy hauler with suspected damage to the pin box, kingpin, frame, suspension, ramp structure, or brakes until it has been inspected.
That caution is not just about preventing additional body damage. It is about avoiding loss of control, coupling failure, brake imbalance, tire overload, or secondary structural damage during transport. A unit that rolls does not necessarily tow safely. If the frame is out of square, if an axle has shifted, if a wheel end has been overloaded, or if a brake wire or breakaway component has been damaged, a short trip can turn a repairable claim into a larger one.
Depending on the condition and location, safe transport may require:
- A heavy-duty recovery vehicle
- A flatbed or specialized trailer
- Controlled movement by a qualified towing provider
- Removal of loose exterior or interior components
- Temporary protection against weather exposure
The right choice depends on the safety reason, not just convenience. If the pin box or kingpin area is in question, conventional towing behind a pickup may not be appropriate because the very coupling structure under load is what may be damaged. If the suspension or axle relationship is compromised, rolling the trailer on its own running gear may increase tire, hub, spindle, spring, equalizer, or hanger damage. If the rear of a toy hauler is open or the ramp system will not secure properly, transport planning also has to account for road debris, water exposure, and loose interior cargo.
Brake, axle, wheel-end, and breakaway equipment checks are especially important after a rear or side impact. A strike near the suspension can shift axle position or damage spring hangers, equalizers, U-bolts, shock mounts, or related brackets. A wheel or tire impact can load the hub, bearings, brake backing plate, or drum/disc components in ways that are not obvious from outside. Damage near the sidewall or underbody can also affect brake wiring, junction points, and breakaway switch routing. If the trailer separates from the tow vehicle, the breakaway system is a last-line safety device, so any impact near the tongue, front structure, side routing, or wiring path deserves careful attention.
After repairs, the trailer should not return to the road simply because the body looks complete. The final inspection should include frame geometry, pin-box mounting, hitch engagement, axle and suspension alignment, tires, wheels, brakes, breakaway equipment, lights, doors, seals, and ramp operation.
The owner should also confirm that the repaired trailer is loaded and coupled according to the manufacturer’s instructions. Weight distribution, cargo placement, pin weight, and ramp capacity remain important after a collision because repaired components must operate within their intended loads.
Closing inspection and delivery checklist
Before a repaired fifth wheel or toy hauler goes back into regular service, the last step should be a disciplined final inspection rather than a quick appearance check. This matters because RV collision work often touches multiple systems at once: structure, openings, running gear, electrical circuits, lighting, seals, body panels, and cargo areas.
A practical closing checklist should include confirmation of:
- Frame measurement or geometry verification after structural repair
- Pin box, kingpin plate, and related mounting condition
- Hitch engagement surfaces and visible coupling hardware condition
- Axle, suspension, and wheel position consistency
- Brake system function and visible wiring condition
- Breakaway switch, cable, battery connection, and activation readiness
- Wheel-end and tire condition after any impact involving the side, suspension, or curb area
- Ramp-door operation, latch engagement, cable condition, and seal contact
- Garage floor condition and tie-down anchor area integrity where applicable
- Door, baggage-compartment, and slide-out alignment
- Sidewall, trim, sealant, and roof-edge transitions in the repaired area
- Lighting, marker lamps, turn signals, and clearance lights
- Underbody closure, splash protection, and weather sealing where disturbed during repair
- Interior function checks in any area affected by structural movement or panel removal
Owners should also use delivery as a time to ask practical questions. Was the repair primarily cosmetic, structural, or both? Were any hidden issues found after teardown? Were any owner follow-up checks recommended after initial use? If the trailer had rear-garage damage, ask specifically about loading guidance and whether any operating steps for the ramp system need to be followed exactly as described in the manufacturer’s manual.
A better starting point for RV collision repair
A fifth-wheel or toy hauler is more than an exterior shell. Its frame, pin box, hitching structure, garage, living quarters, sidewalls, and safety systems work together. A trustworthy repair plan identifies that relationship before cosmetic work begins.
For owners in Redlands, San Bernardino, Riverside, and the broader Inland Empire, RVCCR combines RV collision repair, frame evaluation, body and paint work, mechanical inspection, insurance coordination, and a written lifetime warranty under one roof. Whether the damage involves a bent pin box, cracked ramp-door frame, shifted crossmember, damaged sidewall, or a combination of several areas, the goal is to restore a safe, functional RV for the trips, events, and outdoor time that made you choose it in the first place.
Stop towing questionable damage. Document the loss. Get the structure measured. Check the coupling, running gear, ramp system, and openings the right way. Then let qualified RV collision professionals rebuild the path back to your next adventure.
Sources and additional reading
- Lippert: Replace Your 5th Wheel Pin Box
- Keystone RV Owner's Manuals
- Forest River Owner Manuals
- RVIA
- California DMV Recreational Vehicles and Trailers Handbook: Pre-Trip Inspection for Noncommercial Class A License
- Federal Motor Carrier Safety Administration Regulations
- Electronic Code of Federal Regulations, Title 49
Need a repair estimate?
Skip the wait — send us a few photos and our team will get back to you fast.
Start a Photo Estimate →